


M
Mary WilliamsJul 26, 2025
What to do if the air filter of my Rinnai Heater is blocked?
- KKathy HillJul 26, 2025
If the air filter is blocked, clean the filter.
What to do if the air filter of my Rinnai Heater is blocked?
If the air filter is blocked, clean the filter.
What to do if the gas is turned off at the meter, tank, or valve of my Rinnai Heater?
If the gas is turned off at the meter, tank, or valve, turn the gas on.
What to do if my Rinnai Heater has a power failure?
If you experience a power failure with your Rinnai Heater, push the On/Off button to attempt a restart after the power is restored. If this is an initial installation issue, the cause may be air in the gas pipe, which an installer needs to purge.
What to do if the flue terminal of my Rinnai Heater is obstructed?
If the flue terminal is obstructed, clear the obstruction.
What to do if the louver of my Rinnai Heater is obstructed?
If the louver is obstructed, clear the obstruction.
Why is there no ON indicator on my Rinnai Heater?
If there is no ON indicator, make sure the heater is plugged in.
Explains safety alert symbols and hazard indicators like DANGER, WARNING, and CAUTION.
Outlines essential behaviors and practices for safe operation and installation of the appliance.
Details the built-in safety mechanisms designed to protect the appliance and users.
Lists technical details including application, gas connection, and electrical requirements.
Highlights the main functionalities and design aspects of the heating appliance.
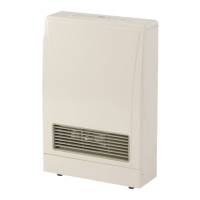
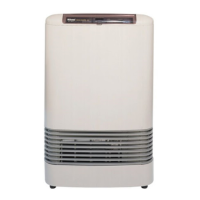
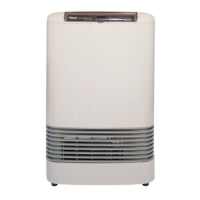
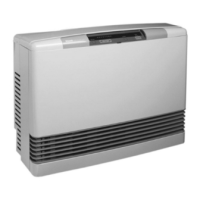
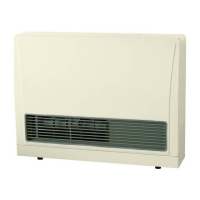
Identifies the main external components and their basic functions.
Explains the buttons and their functions for navigating and controlling the appliance.
Decodes the meaning of various indicators and symbols shown on the LED display.
Describes the feature that automatically adjusts heating for comfortable room temperatures.
Step-by-step guide for setting the current time and day on the control panel.
Instructions for turning the heater ON/OFF and setting desired room temperature manually.
Introduces the concept of the weekly timer and provides example programs.
Details the procedure for setting custom daily heating schedules and temperatures.
Provides a practical walkthrough for programming weekday and weekend schedules.
Explains how to review programmed timer settings without making changes.
Covers writing custom programs and using the factory pre-set schedule.
Instructions on how to activate and use the programmed timer settings.
How to disable timer operation and revert to manual control.
Allows temporary adjustment of timer settings until the next scheduled period.
Setting a minimum room temperature to prevent freezing during inactive periods.
Activates a mode to reduce energy consumption by slightly lowering temperature.
Prevents accidental operation or tampering with settings by locking controls.
Instructions for adding water to the humidifier and adjusting air louvers.
Details routine cleaning and servicing steps for the appliance.
Instructions for cleaning air filters to maintain optimal performance.
Guidance on visually inspecting burner flames for normal operation.
Cleaning the unit's exterior and ensuring flue terminals are clear of obstructions.
Checks to perform before contacting a service technician for issues.
Lists fault codes, their causes, and recommended remedies.
Procedures for restarting the appliance and resolving common problems.
Provides essential warnings and general requirements for appliance installation.
Details on connecting the gas supply and maintaining safe clearances to combustibles.
Specifies minimum clearances for flue termination based on location and obstructions.
Provides the physical measurements of the appliance for installation planning.
Lists the components included with the appliance and available kits.
Instructions for drilling the correct size hole in the wall for the flue.
Step-by-step guide for assembling and installing the flue manifold.
Guidance on using extension kits for vent and air intake lines.
Procedures for connecting the appliance to the flue manifold and wall bracket.
Visual diagrams and lists to identify specific parts for ordering and replacement.
Details on how to register the product and information to keep for records.
Explains what is covered, coverage duration, and Rinnai's responsibilities.