AF SCANNING SECTION (RN20/21 Series)
[ 14 - 8 ]
A
B
CDE F
G
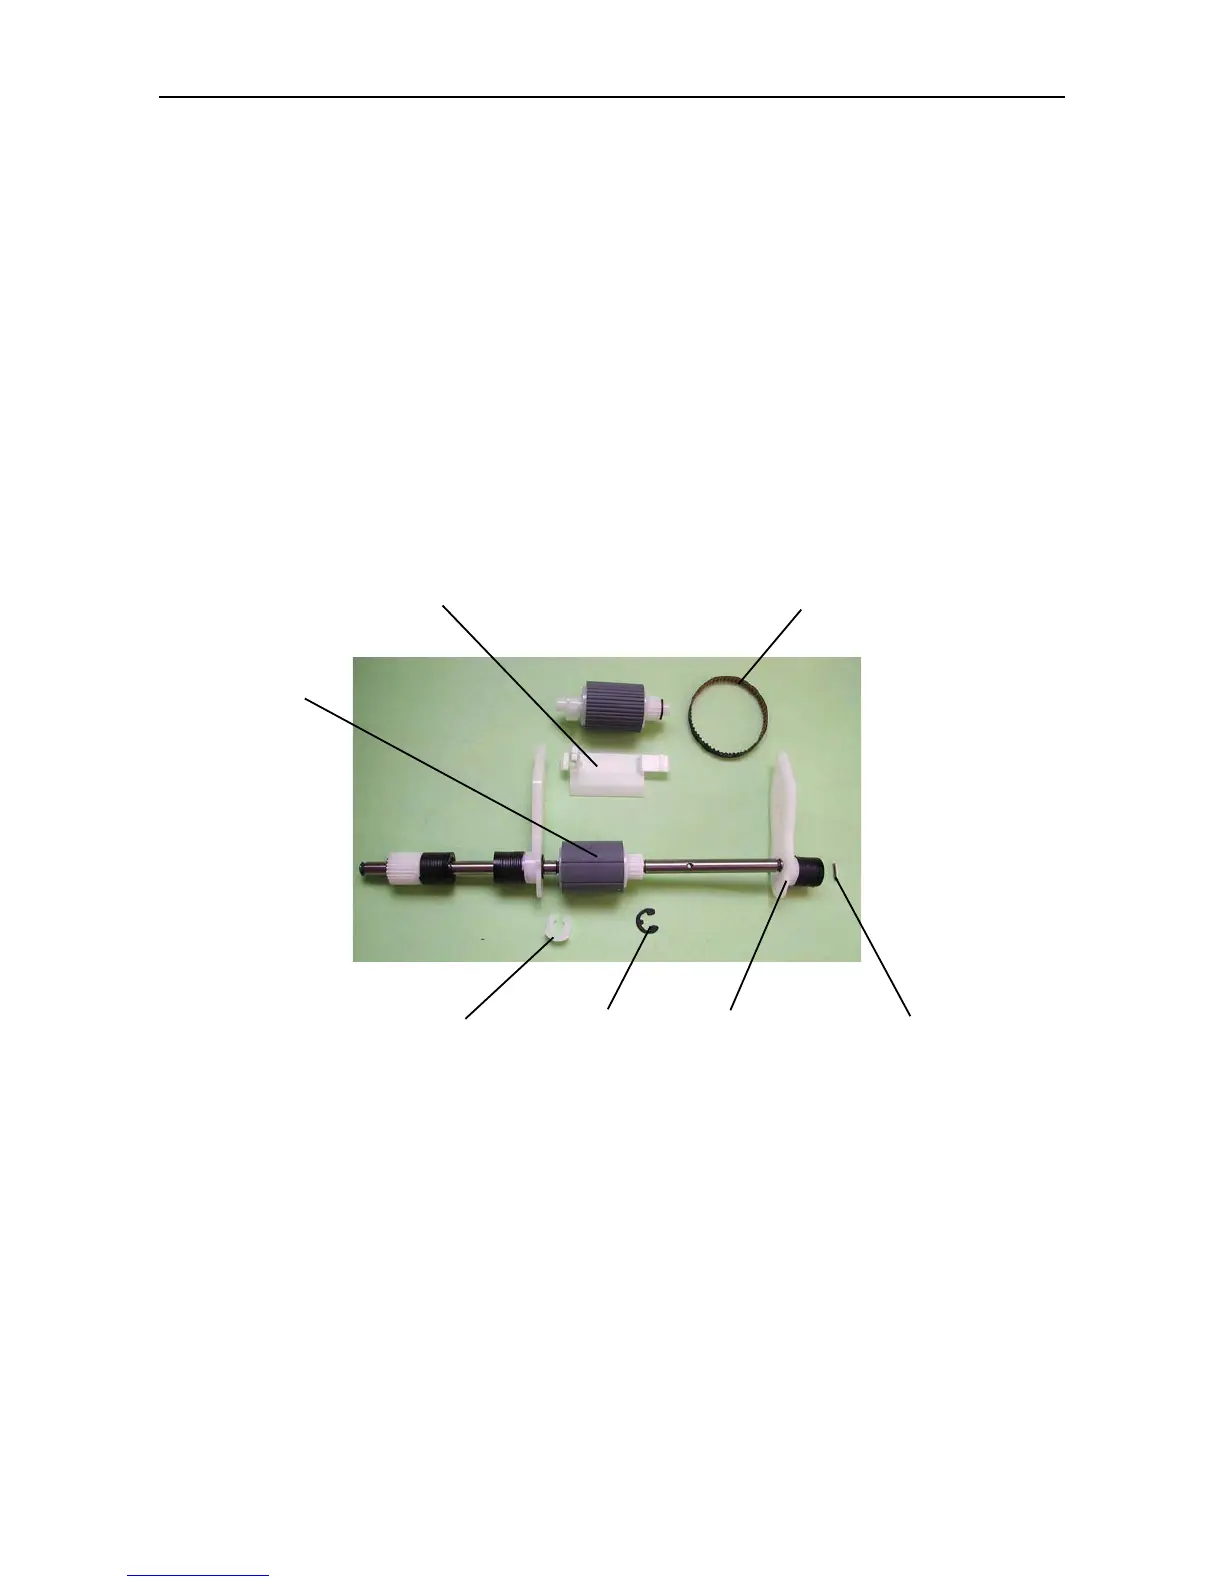
3. Removing the Original Stripper Roller
(1) Switch off the power and open the AF unit. Now remove the two screws (P tight, M3 x 10), and
remove the AF cover. Finally, close the AF unit.
(2) Remove the original scraper ass’y.
(3) Remove the pickup roller.
(4) Remove the intermediate guide [A].
(5) Remove the plastic lock ring [C] on the left-hand side of the original stripper roller [B], move the
original stripper roller [B] to the left, and then remove the right-hand E-ring [D]. Move the pickup
roller frame ass’y (right) [E] to the left, pull out the Pin [F] and then remove it to the right.
* Take care not to drop the washer fitted to the gear side of the original stripper roller.
[Precautions on Reassembly]
• Fit the gear on the right-hand side as shown in the photograph, as the original scraper roller contains a
one-way clutch. Also, do not forget to insert the washer on the gear side.
• When engaging the pin into the pickup roller frame ass’y (right), insert it into the shallower slot.
A: Intermediate guide
B: Original stripper roller
C: Lock ring
D: E-ring
E: Pickup roller frame ass’y (right)
F: Pin
G: Timing belt
1408