Rite‑Hite
®
Installation/Service/Owner's Manual Eclipse
®
Dock Shelter (620G, 620NH)
Publication: AMEN00141 2019-11-22 7
INSTALLATION
Side Frames
Continued
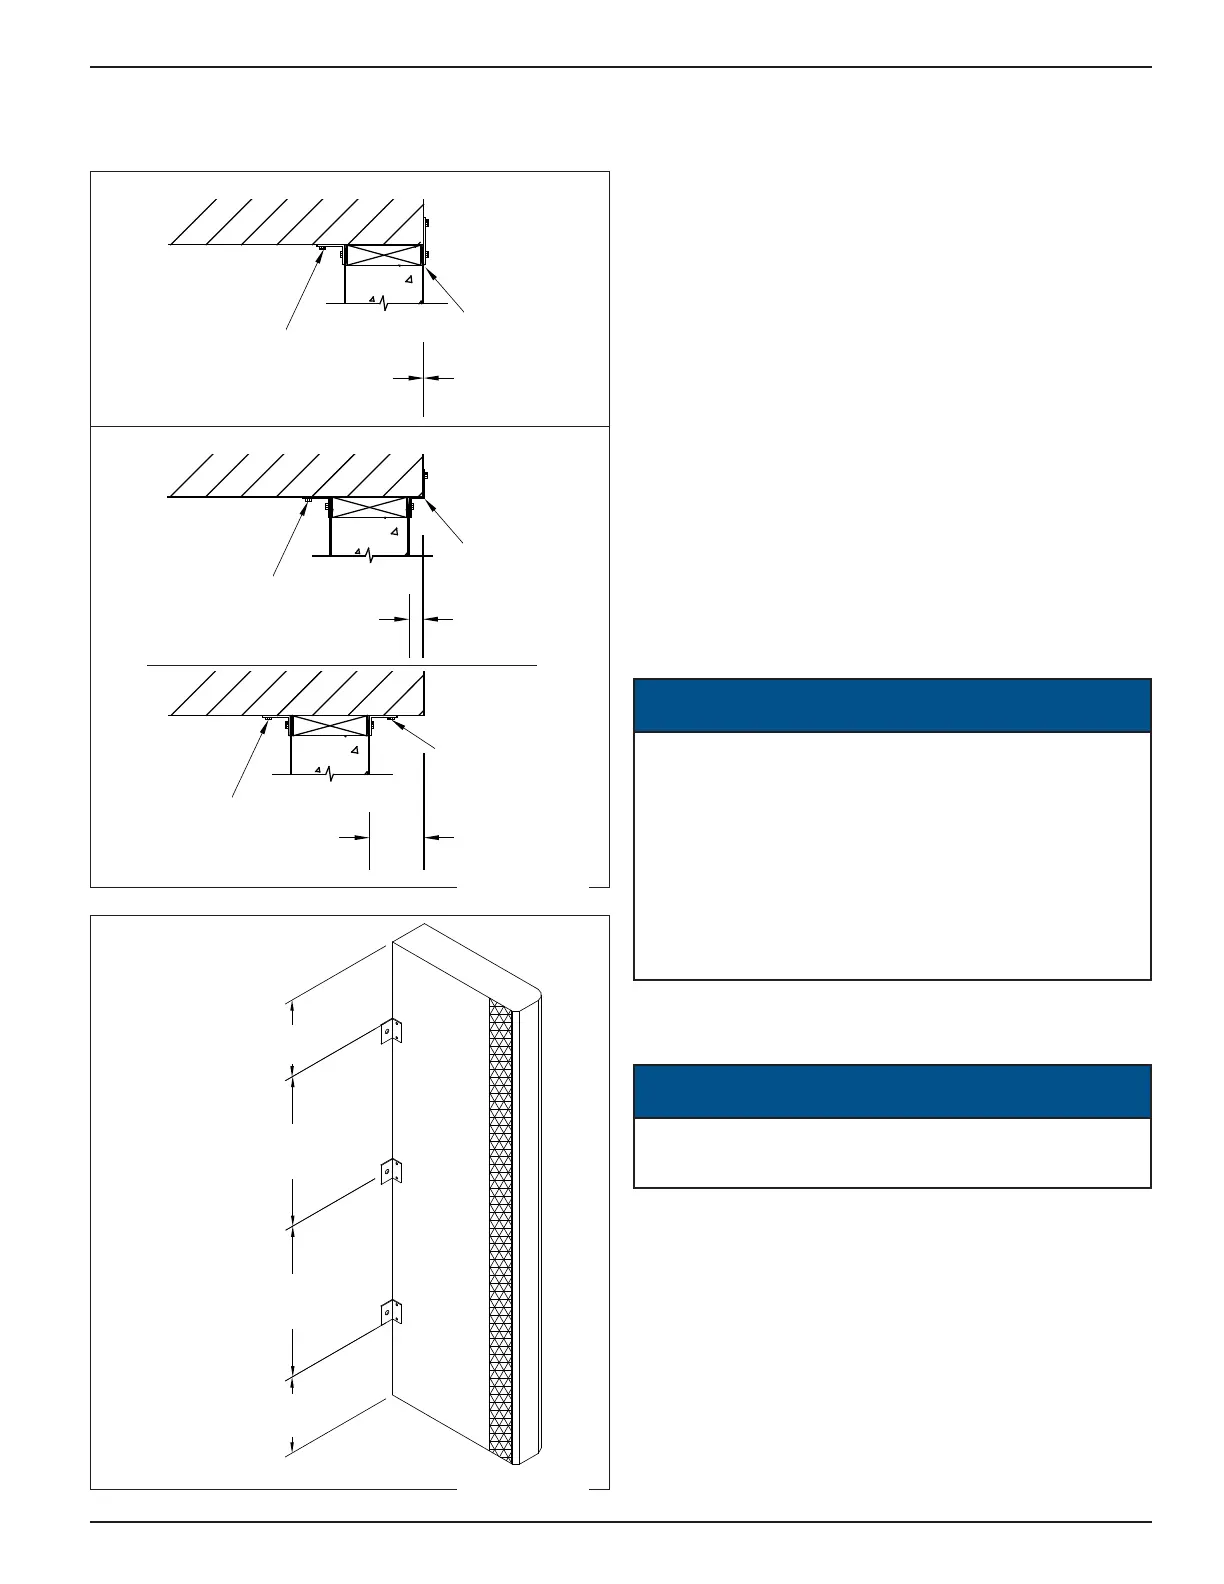
Flush Mounting
Flush Mount
Bracket
Oset =
‑1/4in [‑6mm] to
1/4in [6mm]
‘L’ Bracket
Oset Mounting
‘L’ Bracket
Bent
‘L’ Bracket
Oset =
1/2in to 3 1/2in
[13mm ‑ 89mm]
‘L’ Bracket
‘L’ Bracket
Oset =
4in [102mm] or
Greater
9in
[225mm] max.
Equal
9in
[225mm] max.
Equal
4. Install brackets:
NOTE:
– Side frames are supplied with brackets that
match the application
(Figure 4).
– If blockouts were supplied with the unit,
reference the blockout installation manual
(Document 1321‑0008) and this manual to
ensure proper installation of the blockouts and
the side frames.
• Position the side frames on their marks.
• Mark the side frame for bracket installation (3 on
each side of each side pad)
(Figure 5).
Example: Line up the mounting hole on the
bracket with a mortar joint on the wall and attach
the mounting bracket to the side frame backer
board.
• Attach the brackets to the side frame backer. Use
(supplied) 1/4in x 1 1/4in wood screws for wood
backers.
NOTICE
4in [102mm] width side frames require protective
bumpers to be installed below the side pads.
Reference "Bumpers" on page 17.
If the 4in [102mm] side frame (including blockout) has
an overall projection greater than 40in [1016mm], the
bottom, front of the blockout must be secured to either
the bumpers, the building foundation, or any other
solid rigid structure underneath the blockout. This is
required to stabilize the side frames.
5. Attach the side frames to the building wall, ensuring
they are aligned with the marks made in step 1.
NOTICE
It is critical to mount the side frames plumb and per
the building style (Mounting Methods, page 5).
Figure 4
Figure 5