FasTrax
®
XL Installation/Service/Owner's Manual Rite‑Hite
®
8 Publication: AMEN00316 2020-07-06
INSTALLATION
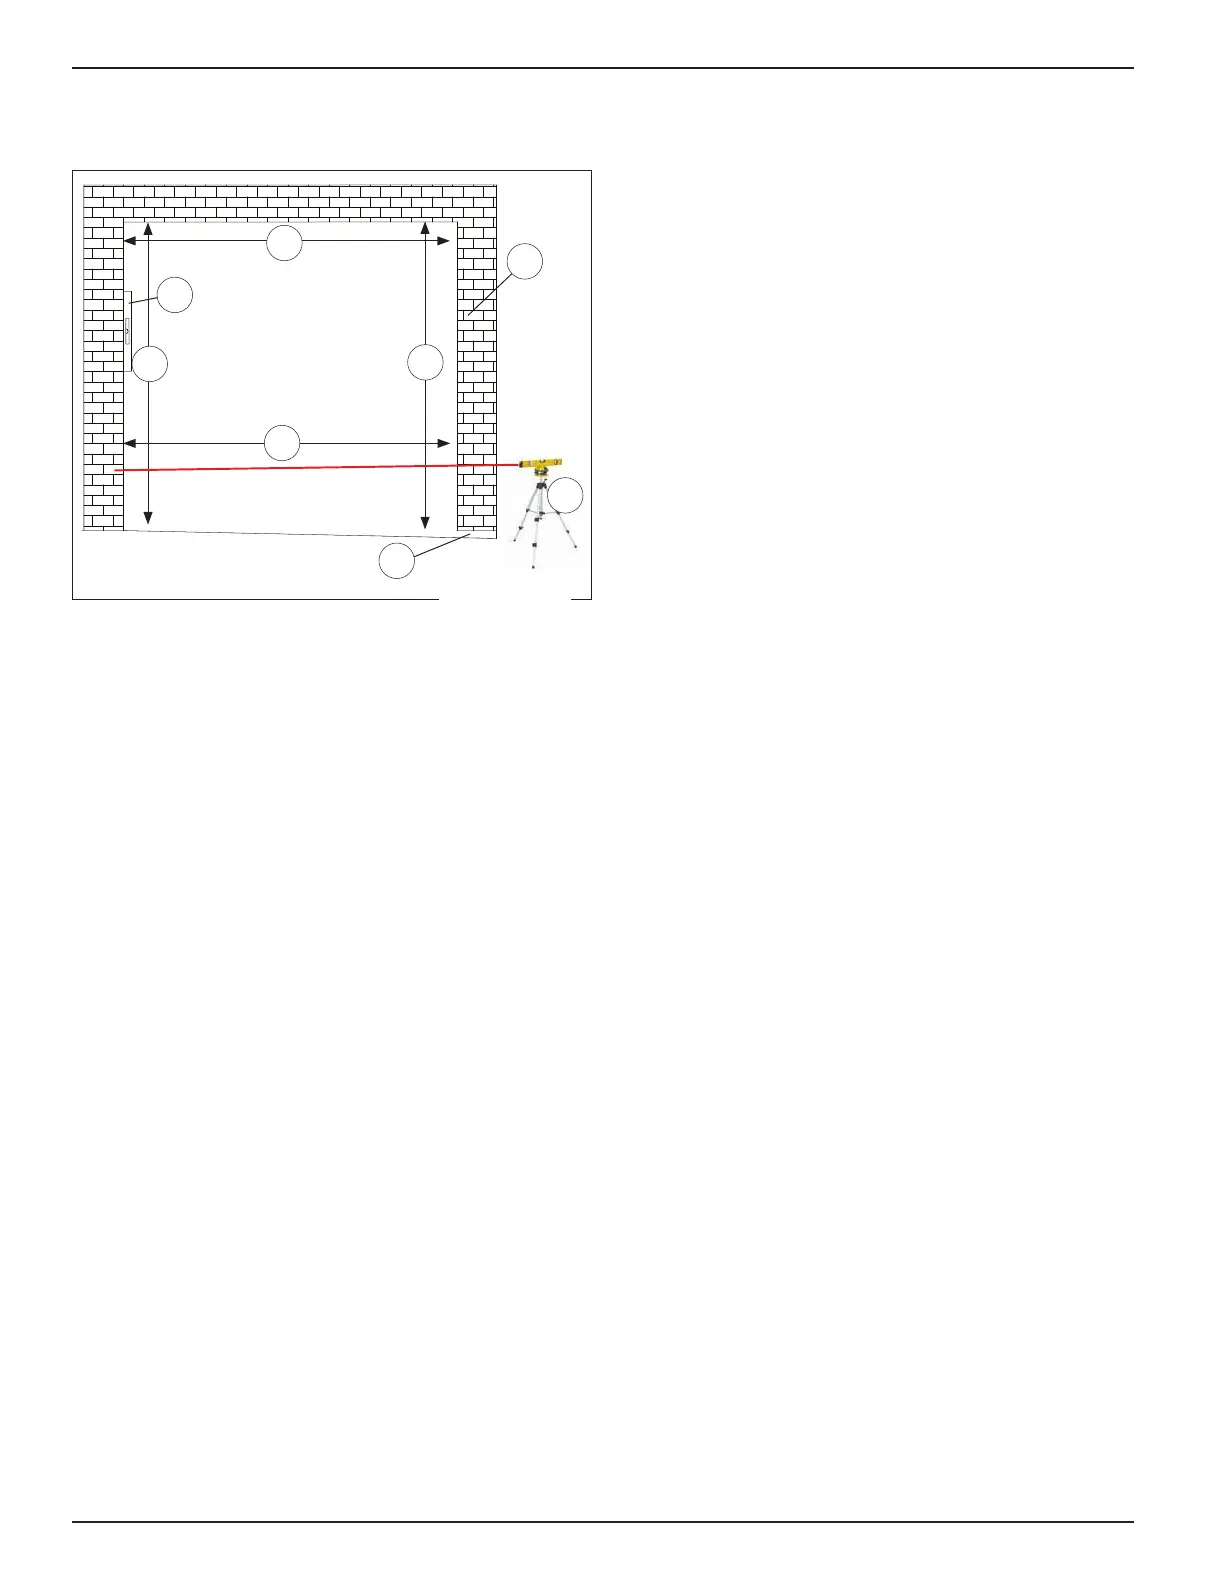
Door Jamb
A
B
C
F
E
D
H
G
NOTE: For space clearance requirements, refer to
architectural drawings (sent with unit) or call your Rite-Hite
Representative.
1. Measure Door Opening Width (D.O.W.) at the top (A)
and floor (B).
2. Measure Door Opening Height (D.O.H.) at left
side (C) and right side (D).
3. Dimensions from Steps 1-2 should be ± 1/2in [13mm]
of the dimensions listed on the serial number label. If
the measurements do not agree, STOP! Contact your
Rite-Hite representative.
4. Surface MUST be flat, smooth and collinear with
opposite side (E).
5. Using a 6ft [2m] carpenter's level (F), verify that the
door jambs and header are plumb and perpendicular.
6. Using a laser level (G), place a mark where the laser
is sighted on each side of the jamb to determine if
the floor is level. Measure both sides from floor to
the mark and if the floor is not level to ± 1/8in [3mm],
shim under the lower track that will be located on
the low side (H) (greatest measurement) of the
door opening.
Caulk
Seal gap between the lower tracks, header and walls
using:
• Exterior low temperature, clear silicone caulk.
Figure 2
 Loading...