2
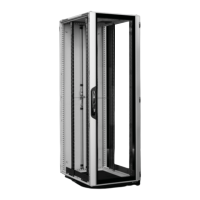
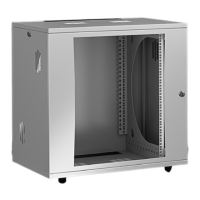
Kabelrangiergehäuse VX IT / Cable management rack VX IT / Armoire de rangement des câbles VX IT
Inhaltsverzeichnis
Contents
Sommaire
Seite
1. Hinweise zur Dokumentation 4
1.1 Aufbewahrung der Unterlagen 4
1.2 Verwendete Symbole 4
1.3 Mitgeltende Unterlagen 4
2.
Sicherheitshinweise 5 – 24
2.1 Bestimmungsgemäße
Verwendung 5 – 16
2.2 Benutzergruppen
nach IEC 62 368 5 – 16
2.3 Sicherheitshinweise 5 – 16
– Erklärung der
Sicherheitssymbole 17 – 24
3.
Gerätebeschreibung 25 – 27
3.1 Funktionsbeschreibung
und Bestandteile 25
3.2 Kennzeichnung 26
3.3 Lieferumfang 27
4.
Montage und Aufstellung 27 – 31
4.1 Anforderungen an den Aufstellort 27
4.2 Benötigte Werkzeuge 27
4.3 Verpackungsbänder lösen,
auspacken 28
4.4 Anleitung lesen 28
4.5 Türen demontieren 29
4.6 Optionale Montage des Sockels 30
4.7 Montage von Nivellierfüße 30
4.8 Rack anreihen 31
5. Transport 32
6. Installation 33 – 41
6.1 Installation 33 – 36
6.2 Installation der Power- und
Netzwerkverkabelung 37
6.3 Türen montieren 38
6.4 Türanschlagwechsel 39 – 41
– Aluminium-Fronttür 39 – 40
– Rücktür 41
7.
Inbetriebnahme 42
8.
Bedienung 42
9. Störung und Abhilfe 42
10.
Inspektion und Wartung 43
11.
Lagerung und Entsorgung 43
12.
Technische Daten 44
13.
Ersatzteile 45
14.
Garantie 45
15.
Kundendienstadressen 45
Page
1. Notes on documentation 4
1.1 Storing the documents 4
1.2 Symbols used 4
1.3 Other applicable documents 4
2.
Safety instructions 5 – 24
2.1 Intended use 5 – 16
2.2 User groups to IEC 62 368 5 – 16
2.3 Safety instructions 5 – 16
– Explanation of
safety symbols 17 – 24
3.
Device description 25 – 27
3.1 Function description
and components 25
3.2 Labelling 26
3.3 Scope of delivery 27
4.
Assembly and siting 27 – 31
4.1 Site requirements 27
4.2 Required tools 27
4.3 Releasing the packing bands
and unpacking 28
4.4 Reading the instructions 28
4.5 Dismantling the doors 29
4.6 Optional installation of
the base/plinth 30
4.7 Installing levelling feet 30
4.8 Baying the rack 31
5. Transport 32
6. Installation 33 – 41
6.1 Installation 33 – 36
6.2 Installing the power and
network cables 37
6.3 Fitting the doors 38
6.4 Swapping hinge
to opposite side 39 – 41
– Aluminium front door 39 – 40
– Rear door 41
7.
Commissioning 42
8.
Operation 42
9. Troubleshooting 42
10.
Inspection and maintenance 43
11.
Storage and disposal 43
12.
Technical specifications 44
13.
Spare parts 45
14.
Warranty 45
15.
Customer services addresses 45
Page
1. Remarques relatives
à la documentation 4
1.1 Conservation des documents 4
1.2 Symboles utilisés 4
1.3 Autres documents applicables 4
2.
Consignes de sécurité 5 – 24
2.1 Utilisation correcte 5 – 16
2.2 Groupes d’utilisateurs
selon la norme CEI 62 368 5 – 16
2.3 Consignes de sécurité 5 – 16
– Explication des symboles
de sécurité 17 – 24
3.
Description de la baie 25 – 27
3.1 Description fonctionelle et
éléments 25
3.2 Traçabilité 26
3.3 Composition
de la livraison 27
4.
Montage et implantation 27 – 31
4.1 Exigences concernant le lieu
d’implantation 27
4.2 Outils requis 27
4.3 Ôter les liens d’emballage,
déballer 28
4.4 Lire la notice 28
4.5 Démonter les portes 29
4.6 Montage du socle (en option) 30
4.7 Montage des pieds de nivellement 30
4.8 Juxtaposer les baies 31
5. Transport 32
6. Installation 33 – 41
6.1 Installation 33 – 36
6.2 Installation du câblage de
puissance et de réseau 37
6.3 Monter les portes 38
6.4 Changement du sens
d’ouverture de la porte 39 – 41
– Porte avant en aluminium 39 – 40
– Porte arrière 41
7.
Mise en service 42
8.
Utilisation 42
9. Incident et suppression 42
10.
Inspection et entretien 43
11.
Stockage et mise au rebut 43
12.
Caractéristiques
techniques 44
13.
Pièces de rechange 45
14.
Garantie 45
15.
Coordonnées des services
après-vente 45