Do you have a question about the Rittal VX25 SV and is the answer not in the manual?
Declaration of conformity available for download.
Safety notes are part of product; must be given to operator.
Safety and other notes to observe.
Other applicable documents and liability disclaimer.
Conforms to technical regulations for market suitability.
Intended use of Rittal products.
Safety instructions to observe.
Warning about closing movement of mechanical parts.
Warning about moving mechanical parts.
Warning about tipping due to center of gravity displacement.
Caution: Sharp object.
Caution: Obstructions on floor.
Caution: Heavy loads.
Caution: Obstructions in head area.
The instructions must be read.
Climbing on surfaces is prohibited.
Installation by specialist electricians.
Installation by specialist mechanics.
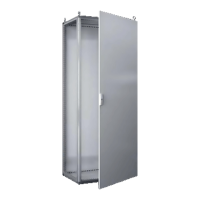
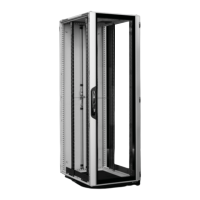
Describes function and components of the enclosure.
Labelling of enclosure parts with QR codes.
Details the scope of delivery for different models.
Specifies requirements for the installation site.
General assembly instructions and warnings.
Instructions for siting and floor mounting.
Procedure to switch door hinges for 1-door enclosures.
Procedure to switch door hinges for 2-door enclosures.
Instructions for switching door hinges.
Procedure to remove the tubular door frame.
Instructions for fitting cross members.
Instructions for fitting front trim panels.
Instructions for mounting partial doors.
Fitting partial doors with right-hand hinges.
Fitting partial doors with left-hand hinges.
Instructions for fitting the door lock.
Procedure to switch door hinges.
Instructions for changing the lock insert.
Disassembling/assembling mini-comfort handle on partial doors.
Instructions for fitting the perforated mounting strip.
Instructions for earthing the enclosure.
Procedure for removing and installing the rear panel.
Procedure for removing the roof plate.
Instructions for fitting gland plates.
Instructions for mounting side panels.
Instructions for earthing and potential equalisation.
Earthing connection points for VX25 enclosures.
Securing the enclosure in case of dynamic load.
Instructions for transporting the enclosure.
General installation guidelines and safety measures.
Details on automatic potential equalisation and PE conductor connection.
Notes on the operation of the enclosure's locking mechanism.
Recommended maintenance plan and intervals.
Guidelines for storing the enclosure.
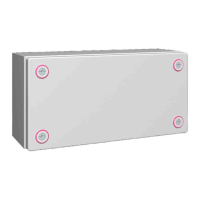
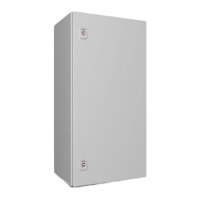
Technical data, protection categories, and load capacities.
Provides heat dissipation values for different enclosure models.
Information on finding spare parts.
States that sales and delivery conditions apply.
Provides contact details for Rittal customer services.
| Category | Enclosure |
|---|---|
| Material | Sheet steel |
| IK code | IK10 |
| Width | 600 mm |
| Protection Class | IP66 |
| Color | RAL 7035 |
| Mounting | Wall mounting |
| Door | Single door |