2 Anreih-Schranksystem VX25 SV / Enclosure baying system VX25 SV / Armoires juxtaposables VX25 SV
Inhaltsverzeichnis
Contents
Sommaire
1. Hinweise zur Dokumentation 4
1.1 CE-Kennzeichnung 4
1.2 Aufbewahrung der Unterlagen 4
1.3 Verwendete Symbole 4
1.4 Mitgeltende Unterlagen 4
1.5 Normative Verweise 4
2. Sicherheitshinweise 11
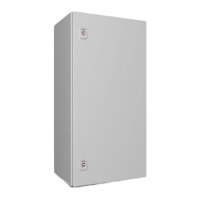
3. Produktbeschreibung 16
3.1 Funktionsbeschreibung und
Bestandteile 16
3.2 Kennzeichnung 17
3.3 Lieferumfang 18
4. Montage und Aufstellung 19
4.1 Anforderungen an den Aufstellort 19
4.2 Türanschlagwechsel, 1-türig 20
4.3 Türanschlagwechsel, 2-türig 21
4.4 Türanschlagwechsel 22
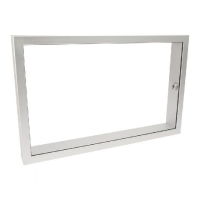
4.5 Türrohrrahmen demontieren 23
4.6 Trennstege montieren 24
4.7 Frontblenden montieren 25
4.8 Teiltüren montieren 27
4.9 Teiltüren montieren –
Türanschlag rechts 28
4.10 Teiltüren montieren –
Türanschlag links 29
4.11 Türverschluss montieren 30
4.12 Türanschlag wechseln 31
4.13 Verschlusseinsatz wechseln 33
4.14 Mini-Komfortgri an Teiltüren de-/
montieren 34
4.15 Montagelochleiste montieren 35
4.16 Erdung 36
4.17 Rückwand demontieren und
montieren 37
4.18 Dachblech demontieren 37
4.19 Bodenbleche montieren 38
4.20 Seitenwände montieren 39
4.21 Erdung und Potenzialausgleich 40
4.22 Schutzleiteranschlussstellen VX25
Schaltschrank 41
4.23 Befestigung bei dynamischer
Belastung 42
5. Transport 42
6. Installation 43
7. Erdung und Potenzialausgleich 44
8. Bedienung 44
9. Inspektion und Wartung 45
10. Lagerung 46
11. Technische Daten/Schutzgrade 46
12. Wärmeabfuhr über Oberflächen 47
13. Ersatzteile 48
14. Garantie 48
15. Kundendienstadressen 48
1. Notes on documentation 4
1.1 CE labelling 4
1.2 Storing the documents 4
1.3 Symbols used 4
1.4 Other applicable documents 4
1.5 Normative references 4
2. Safety instructions 11
3. Product description 16
3.1 Function description and components 16
3.2 Labelling 17
3.3 Scope of delivery 18
4. Assembly and siting 19
4.1 Site requirements 19
4.2 Switching the door hinges, 1-door 20
4.3 Switching the door hinges, 2 door 21
4.4 Switching the door hinges 22
4.5 Removing the tubular door frame 23
4.6 Fitting the cross members 24
4.7 Fitting the front trim panels 25
4.8 Fitting the partial doors 27
4.9 Fitting the partial doors – R/h door
hinges 28
4.10 Fitting the partial doors – L/h door
hinges 29
4.11 Fitting the door lock 30
4.12 Switching the door hinges 31
4.13 Changing the lock insert 33
4.14 Disassembling/assembling the mini-
comfort handle on partial doors 34
4.15 Fitting the perforated mounting strip 35
4.16 Earthing 36
4.17 Removing and installing the rear panel 37
4.18 Removing the roof plate 37
4.19 Fitting the gland plates 38
4.20 Fitting the side panels 39
4.21 Earthing and potential equalisation 40
4.22 Earthing connection points VX25
enclosures 41
4.23 Securing in case of dynamic load 42
5. Transport 42
6. Installation 43
7. Earthing and potential
equalisation 44
8. Operation 44
9. Inspection and maintenance 45
10. Storage 46
11. Technical specifications/Degrees
of protection 46
12. Heat dissipation over surfaces 47
13. Spare parts 48
14. Warranty 48
15. Customer services addresses 48
1. Remarques relatives à la docu-
mentation 4
1.1 Certification CE 4
1.2 Conservation des documents 4
1.3 Symboles utilisés 4
1.4 Autres documents applicables 4
1.5 Renvois à la norme 4
2. Consignes de sécurité 11
3. Description du produit 16
3.1 Description du fonctionnement et
composants 16
3.2 Traçabilité 17
3.3 Composition de la livraison 18
4. Montage et implantation 19
4.1 Exigences concernant le lieu
d'implantation 19
4.2 Inversion du sens d'ouverture, 1 porte 20
4.3 Inversion du sens d'ouverture,
2 portes 21
4.4 Inversion du sens d'ouverture 22
4.5 Démontage du cadre de porte
tubulaire 23
4.6 Montage des traverses de séparation 24
4.7 Montage des bandeaux de finition 25
4.8 Montage des portes partielles 27
4.9 Montage des portes partielles –
portes avec charnières à droite 28
4.10 Montage des portes partielles –
portes avec charnières à gauche 29
4.11 Montage des verrouillage de porte 30
4.12 Inversion du sens d'ouverture 31
4.13 Remplacement du dispositif de
verrouillage 33
4.14 Démontage / montage de la mini-
poignée sur portes partielles 34
4.15 Montage des bandeaux de montage 35
4.16 Mise à la masse 36
4.17 Démontage et montage du panneau
arrière 37
4.18 Démontage du toit 37
4.19 Montage des plaques passe-câbles 38
4.20 Montage des panneaux latéraux 39
4.21 Mise à la masse et équipotentialité 40
4.22 Points de raccordement de mise
à la masse pour armoires électriques
VX25 41
4.23 Fixation en cas de charge dynamique 42
5. Transport 42
6. Installation 43
7. Mise à la masse et
équipotentialité 44
8. Utilisation 44
9. Inspection et entretien 45
10. Stockage 46
11. Caractéristiques techniques/
Indices de protection 46
12. Dissipation thermique par surface 47
13. Pièces de rechange 48
14. Garantie 48
15. Coordonnées des services après-
vente 48