4
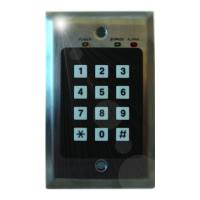
Access Keypad Installation Guide
Specifications
Installation Tips
• Select the appropriate mode for this installation.
Identify whether the facility requires unique PIN codes or not.
• Select the appropriate volume level for audible alarm indication.
Is the keypad located in an area that must be kept quiet? The keypad has 5 volume
levels plus inaudible (off). Select the level according to facility requirements.
• Decide whether the keypad should initiate bypass prior to or after tag
detection.
Mount the keypad outside the exciter field to allow bypass before tag detection.
• Use the Y adapter for dual keypad installations.
If the exit requires two keypads (one on each side of the door), use the supplied Y
splitter to connect both keypads to the jack on the front of the controller.
Installation Procedure
Follow these steps to install the keypad:
1 Place the jumper on the upper 2 pins of JP3 on the keypad back to select
Mode 1 (unique PIN codes) or place the jumper on the lower two pins to
select Mode 2 (generic codes). If this is to be a Mode 2 keypad, continue
with “Mode 2 Passcode Programming Procedure” on page 5 after
completing keypad installation. See Figure 1 on page 7.
2 Set the appropriate volume level on
J1 on the keypad back. Place the jumper
on the top pair of pins to set the volume to inaudible (off). Each lower pair
of pins increases the volume, with the bottom pair being the loudest. See
Figure 1 on page 7.
3 Mount a standard single-gang electrical box (not supplied), or the supplied
low-voltage retrofit bracket, at a convenient height (usually wall switch
height) in the selected location (usually just outside the exciter field). Careful
Input Rating 12 VDC @ 200 mA
Operating/Storage Temp 32° F to 120° F (0° C to 49° C)
Relative Humidity 0-85% RH @ 70° F (21° C) non-condensing
Dimensions 4.5” L x 2.75” W x 2.5” H (11.5 x 7.0 x 6.5 cm)
Mounting B11R Carlon Retrofit box (supplied)
 Loading...