5-4-4
CONNECTING
ROD
(1)
Before installing the piston and connecting rod
in
the cylinder, oil the piston, piston rings and
cylinder wall.
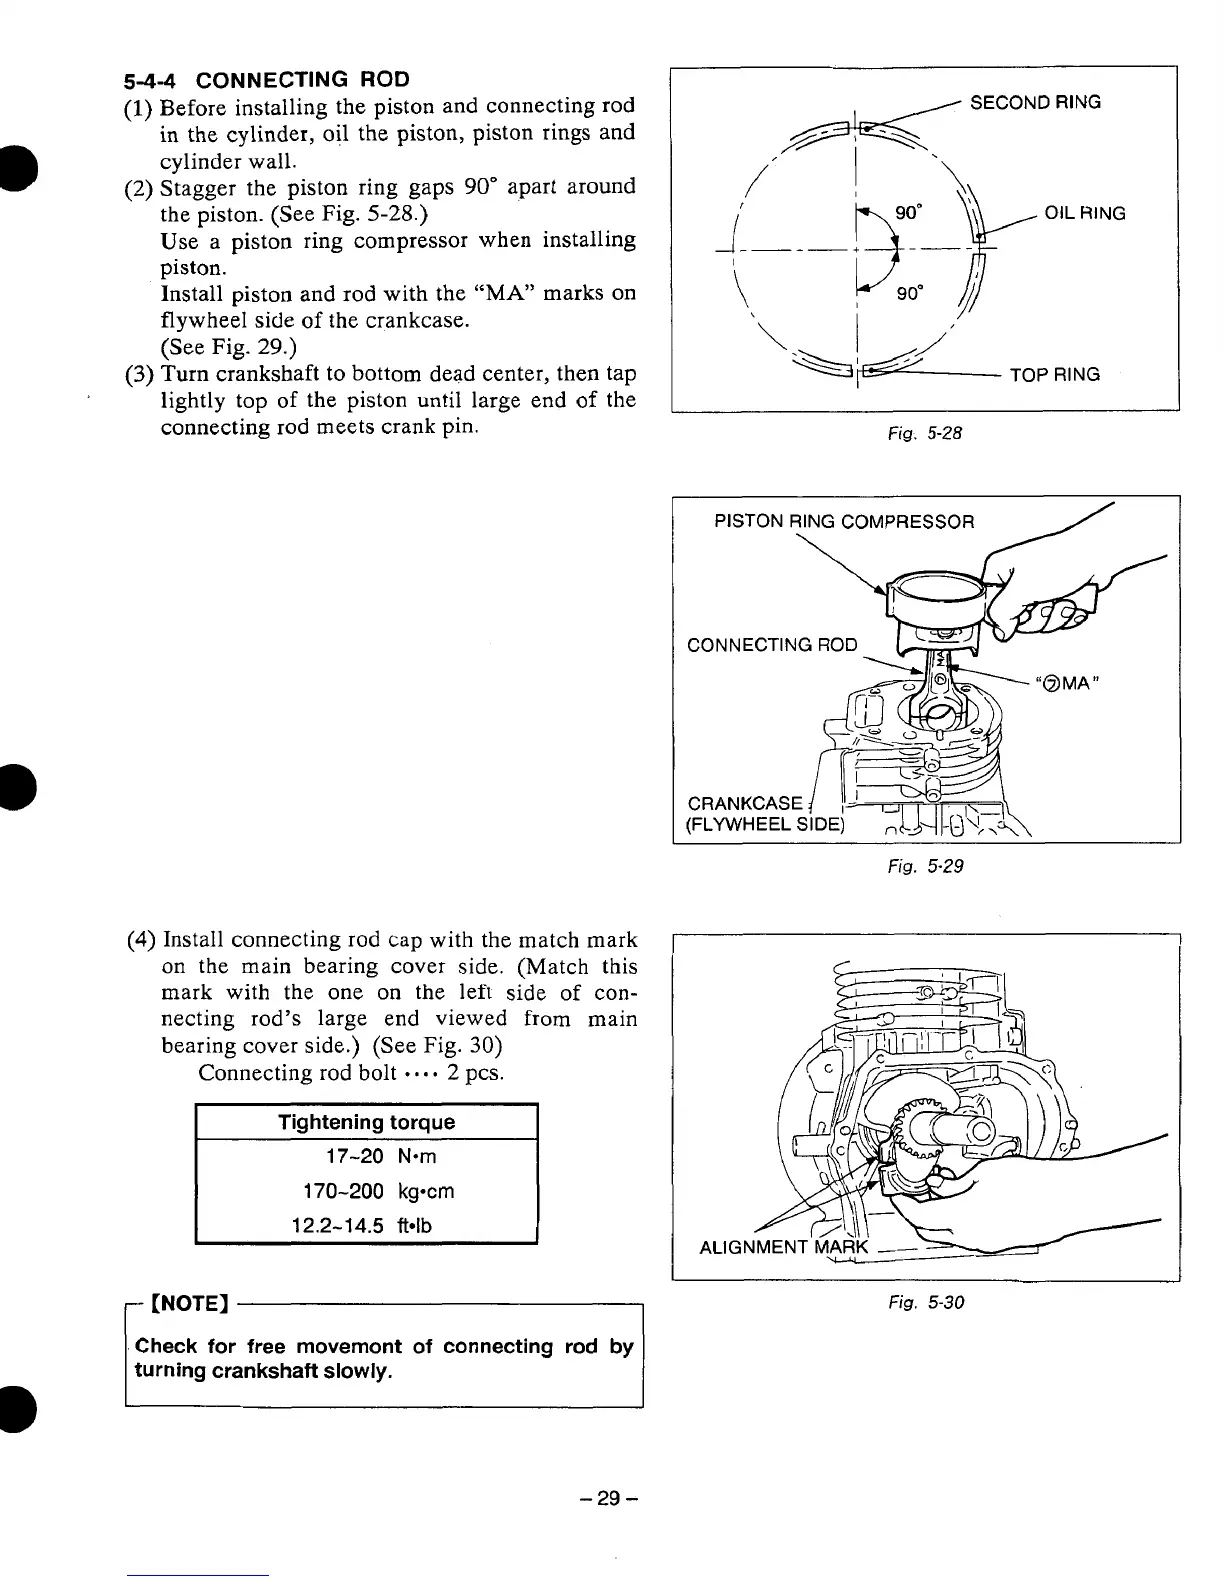
(2)
Stagger the piston ring gaps
90”
apart around
the piston. (See Fig.
5-28.)
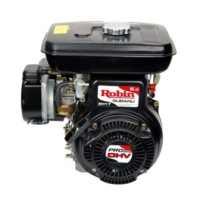
Use a piston ring compressor when installing
piston.
Install piston and rod with the
“MA”
marks
on
flywheel side
of
the crankcase.
(See
Fig.
29.)
(3)
Turn crankshaft
to
bottom dead center, then tap
lightly top of the piston until large end
of
the
connecting
rod
meets crank
pin.
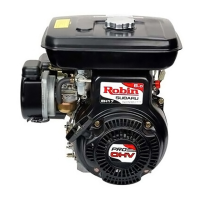
(4)
Install connecting rod cap with the match mark
on
the main bearing cover side. (Match this
mark with the one
on
the left side
of
con-
necting rod’s large end viewed from main
bearing cover side.) (See Fig.
30)
Connecting rod bolt
-0.-
2
pcs.
Tightening torque
17-20
N*m
170-200
kg-cm
12.2-14.5
ft4b
Fig.
5-28
PISTON
RING
COMPRESSOR
CONNECTING
ROD
CRANKCASE
Fig.
5-29
Check for free movemont of connecting rod by
turning crankshaft
slowly.
Fig.
5-30
-29
-