2)
0
3)
4)
5)
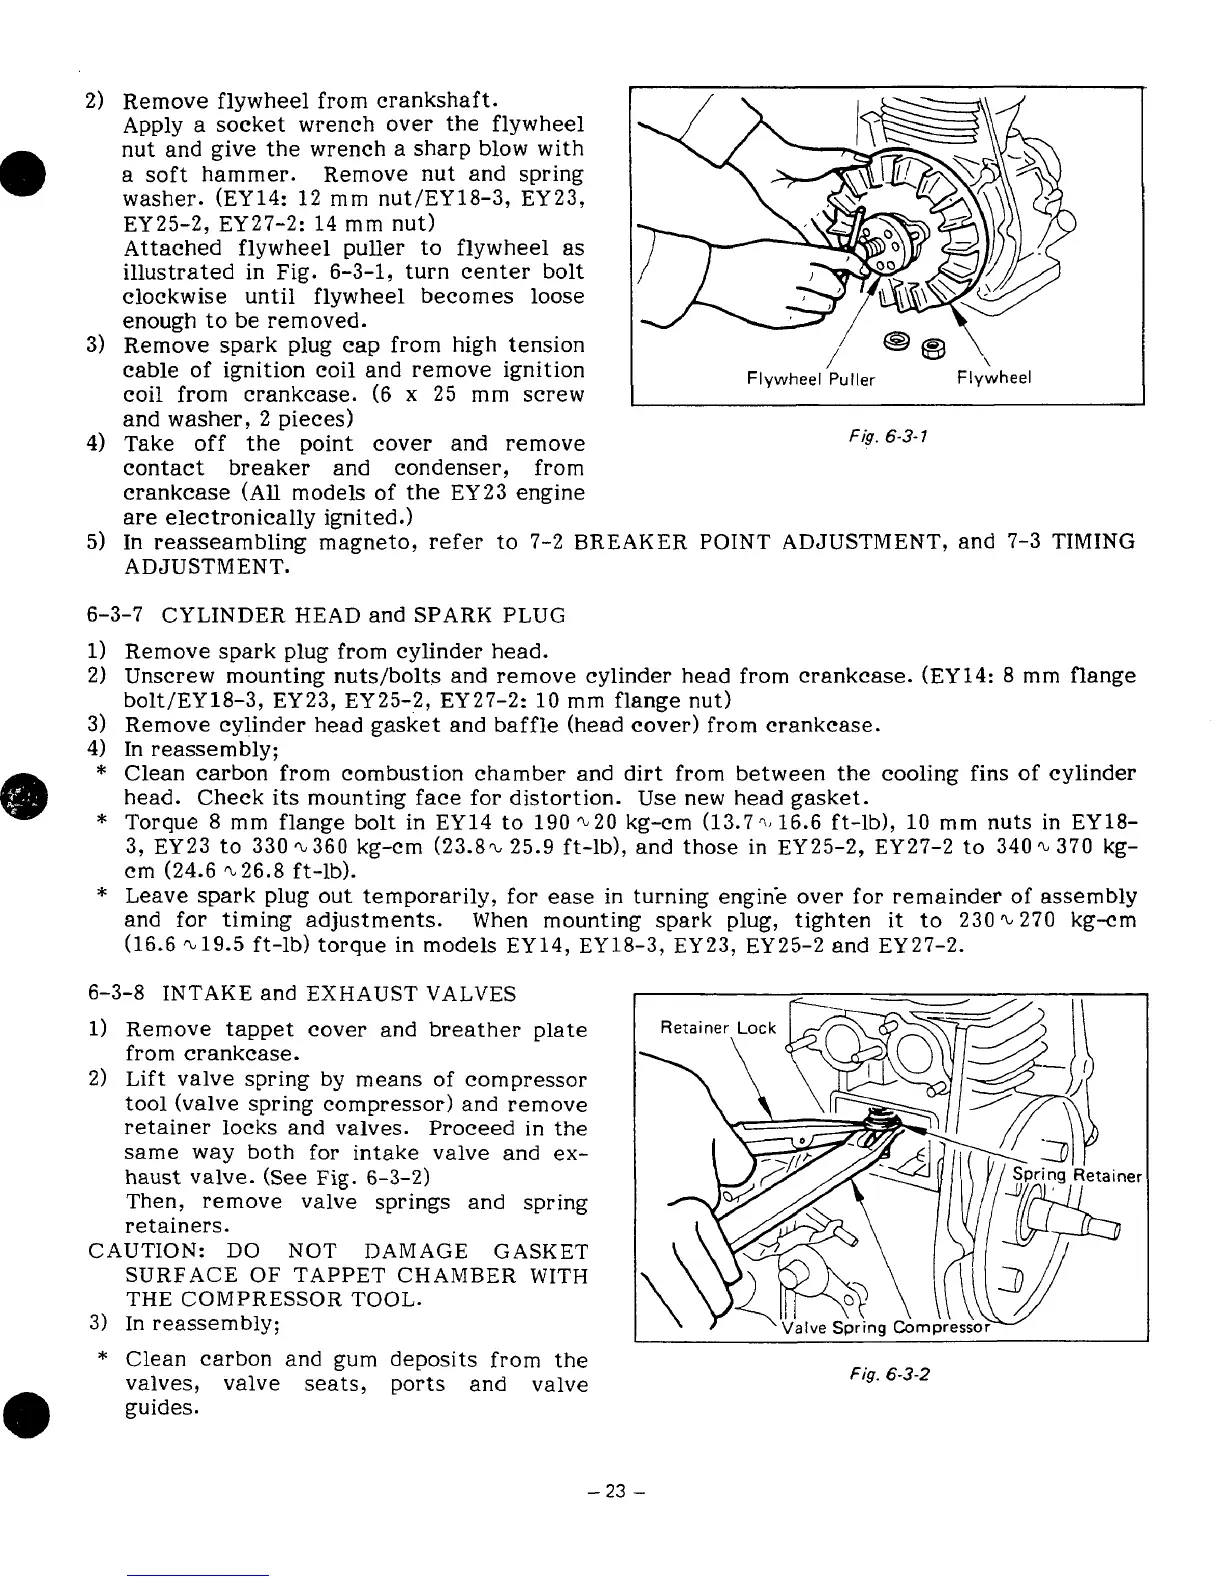
Remove flywheel
from
crankshaft.
Apply
a
socket wrench over the flywheel
nut and give the wrench
a
sharp blow with
a
soft hammer. Remove nut and spring
washer. (EY14:
12
mm nut/EY18-3, EY23,
EY25-2, EY27-2: 14 mm nut)
Attached flywheel puller
to
flywheel
as
illustrated in Fig. 6-3-1, turn center
bolt
clockwise until flywheel becomes
loose
enough
to
be
removed.
Remove spark plug cap from high tension
cable
of ignition
coil
and remove ignition
coil from crankcase.
(6
x
25 mm screw
and washer,
2
pieces)
Take off the point cover and remove
contact breaker and condenser, from
crankcase (All models of the EY23 engine
are
electronicallv ignited.)
I
Flywheel Puller Flywheel
Fig.
6-3-
7
In reasseambling magneto, refer
to
7-2 BREAKER POINT ADJUSTMENT, and 7-3 TIMING
ADJUSTMENT.
"
6-3-7 CYLINDER HEAD and SPARK PLUG
1)
Remove spark plug from cylinder head.
2)
Unscrew mounting nuts/bolts and remove cylinder head from crankcase. (EY14:
8
mm flange
3) Remove cylinder head gasket and baffle (head cover) from crankcase.
4) In reassembly;
bolt/EY18-3, EY23, EY25-2, EY27-2:
10
mm flange nut)
*
Clean carbon from combustion chamber and dirt from between the cooling fins
of
cylinder
head. Check
its
mounting face for distortion. Use new head gasket.
*
Torque
8
mm flange bolt in EY14
to
190 2.20 kg-cm (13.7.> 16.6 ft-lb),
10
rnm
nuts in EY18-
3,
EY23 to 330
%
360 kg-cm (23.8% 25.9 ft-lb), and those in EY25-2, EY27-2
to
340
%
370 kg-
cm (24.6 -26.8 ft-lb).
*
Leave spark plug out temporarily, for
ease
in turning engine over for remainder
of
assembly
and
for
timing adjustments. When mounting spark plug, tighten
it
to
230
Q,
270 kg-cm
(16.6 %19.5 ft-lb) torque in models EY14, EY18-3, EY23, EY25-2 and EY27-2.
6-3-8 INTAKE and EXHAUST VALVES
1)
Remove tappet cover and breather plate
from crankcase.
2) Lift valve spring
by
means
of
compressor
tool (valve spring compressor) and remove
retainer locks and valves.
Proceed
in
the
same way both
for
intake valve and ex-
haust valve.
(See
Fig.
6-3-2)
Then, remove valve springs and spring
retainers.
CAUTION:
DO
NOT DAMAGE GASKET
SURFACE
OF
TAPPET CHAMBER WITH
THE COMPRESSOR
TOOL.
3)
In
reassembly;
*
Clean carbon and gum deposits from the
I
Fig.
6-3-2
-
23
-