Robo Support Documentation, Release 0.1.0
Layer 1
5. 19V power supply
6. 2 filament spool arms
Layer 2
7. Toolbox with 2 allen wrenches, lubricant, and screwdriver.
8. Robo USB drive
Layer 3
9. 500g Robo light blue filament
10. Spatula
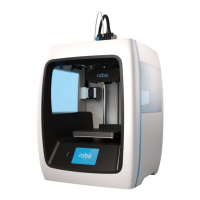
3.1.2 Unboxing Robo C2
Now that you’ve received your Robo C2, it’s time to unbox it and get familiar with your printer and accessories.
Your C2 is housed in 3 styrofoam pieces, secured together by a nylon strap. Simply lift the printer from the box using
the strap and set it down. Unclip the black nylon strap and remove the two halves of the top styrofoam shell. Finally,
using the handholds on the bottom of your C2, lift the printer out of the bottom styrofoam piece.
Tip: Save your printer box, nylon strap, foam inserts, and inclusions box. You will need the original packaging to
exercise your warranty or ship your printer in the future.
The printer’s accessories are stored in the inclusions box inside the printer. Simply slide the inclusion box out and be
sure to remove the foam.
3.1.3 Register your Robo C2
Before you start, please register your Robo C2 for any servicing or warranty needs if they’re ever required. You can
register your product by visiting robo3d.com/register.
3.1.4 Initial set-up
Now let’s move forward with your initial set-up of Robo C2.
First, insert the spool holder into the rear slot of the printer.
3.1. Getting Started 9


 To Next Page