Robo Support Documentation, Release 0.1.0
3.2.8 Downloading the Robo App
From your iOS Device
1. Open the App Store app
2. On the bottom dock, tap on search
3. Enter “Robo App”
4. Tap on the Robo App with this Icon (show icon here)
5. Tap download on the right of the icon, and rate us 5 stars if you like it
3.2.9 Connecting your iOS device to your Robo C2
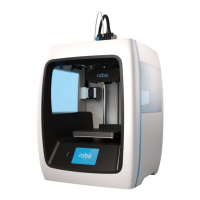
Connecting via a local wifi network
1. Make sure your smart device is connected to the same wifi network as your Robo C2
2. In the ‘dashboard’ screen of the Robo App, tap ‘+Add a Printer’ in the middle of the screen
3. Select ‘Scan for Printer Name/IP’
4. A pop up will appear with all of the printers on the same network as your smart device, go ahead and select
which printer you would like to add (your printer has a unique name, example - Curious Tesla, or Brilliant
Einstein). (You may look on the back of your printer and find out which name your printer has been givin).
5. Now you will need to scan the QR code on your screen to fully connect the 3d printer to your smart device.
• On the screen of your machine, select ‘Utilities’
• Select ‘network’
• Select ‘QR Code’
6. Tap on ‘Scan Printer Barcode for Key’
7. Point your camera at the barcode and wait for the app to recognize the 3d printer
8. Tap ‘add printer’ at the bottom of the screen
9. Congratulations, you have now added your Robo C2 to your app
10. note that you can add multiple machines to the same app, and control each one independently)
Connecting via Hotspot Mode
1. Make sure that you are connected to the wifi signal that the machine is emitting
2. Follow steps in the previous section (D1.1.2) to successfully connect your printer to the app
3.3 Software
RoboOS
3.3.1 Cura
To get your 3d prints out looking great, Cura for Robo Desktop Software is the recommended software. This software
takes your 3d models, and turns them into a language that the Robo C2 can read, and uses it to product an object
30 Chapter 3. Logging into your Robo account


 To Next Page