Robo Support Documentation, Release 0.1.0
Downloading and Installing Desktop Software
• The Cura for Robo Desktop Software is included in your USB drive that came with your printer, and is
also available at www.robo3d.com/software
• Download the latest version of Cura for Robo for your operating system. This software is easily supported
by Windows Vista or higher, Mac OSX 10.7 or higher, and Ubuntu 14.04 or higher operating systems. (put
logos of operating systems here)
• Open the installer and follow the on screen installation instructions
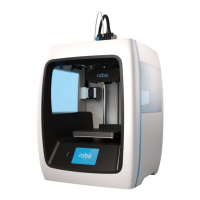
• Once opened, select Robo C2 3d Printer to get the correct configuration for your machine
Downloading and importing a file into the software
• Open your web browser and go to a 3d file sharing site. We recommend either www.thingiverse.com or
www.youmagine.com for getting free, online 3d models.
• Browse around and choose a model you like
• Download the .stl version of the 3d model and save it somewhere you can retrieve it easily on your com-
puter
• In your Cura for Robo Desktop Software, click on the ‘Load’ button and choose your .stl file you just
saved. This will insert your model onto the platform in the software.
Preparing a 3D Model
• Once your 3d model is inserted into the software, go ahead and select the settings you want your 3d model
to be prepared
• The 3d model will automatically generate with the setting you have selected
• Press ‘save to disk’ and the model will automatically save to your USB drive you have inserted, or, if there
is no inserted USB drive, save it in a folder of your choice.
• Before taking out your USB drive, make sure to eject it safely
From Model to your printer
• There are two ways to get a file from your computer to you Robo C2 3D printer. Note that a 3d printable
file is a .gcode file that you just created from the Cura for Robo desktop software
Printing from USB Drive
• If you have saved your file to a USB drive, simply put the USB drive into the slot on the front of your machine
– Tap on the upper left file icon
– The printer will automatically search through your USB drive and display all of the 3d printable
files
– Select the file you want to print, and press ‘print’
Uploading to cloud storage
• Once you have your 3d printable file, upload it to your same cloud storage you set up in your Robo App earlier.
– In the Robo App, go to your dashboard
– Tap on the cloud storage icon you saved your file to
– Once in your cloud storage, find the file you just uploaded, and tap on it. This will bring you to a
print page.
3.3. Software 31


 To Next Page