21
$GMXVWࢊRZUDWH
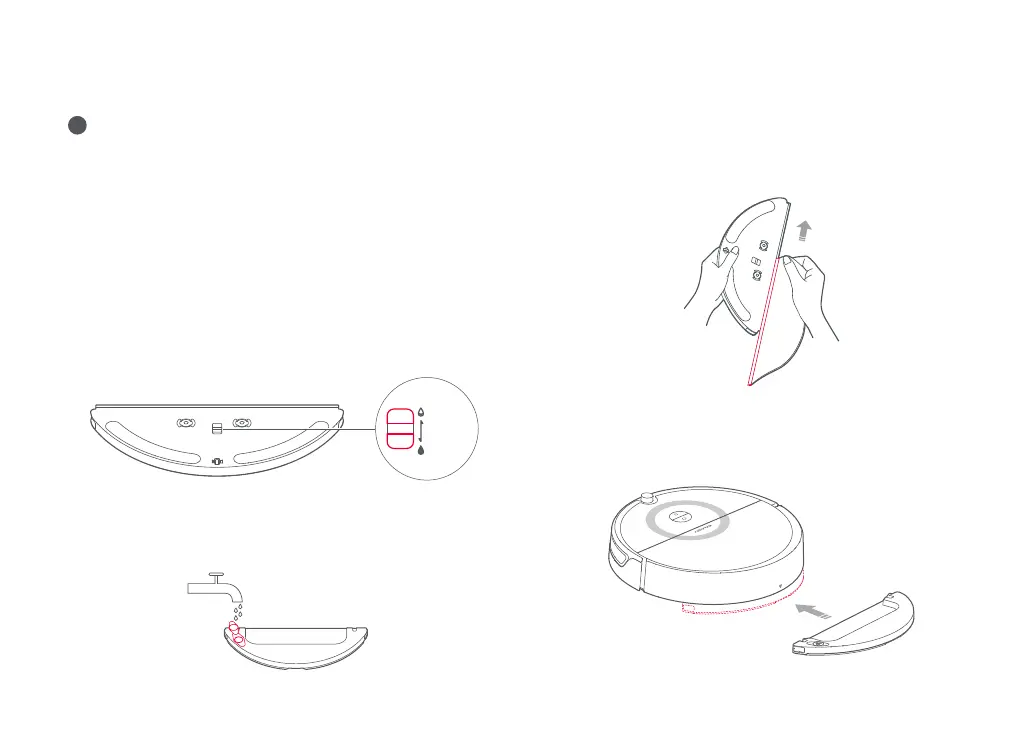
3. Install the mop cloth
4. Install the module
2. Fill the water tank
7RJJOHWKHVZLWFKWRDGMXVWWKHࢊRZUDWHDFFRUGLQJWR\RXU
needs.
'DPSHQWKHPRSFORWKDQGVTXHH]HLWXQWLOLWVWRSVGULSSLQJ
Insert it into the mounting slot in the water tank.
Slide the mop module in line with the alignment marks on the
rear of the machine until you hear a "click".
2SHQWKHZDWHUWDQNࢉOOLWZLWKZDWHUDQGFORVHLWWLJKWO\
Installation
Mopping
5
Note:
Ŏ
,WLVUHFRPPHQGHGWKDWDOOࢊRRUVDUHYDFXXPHGDWOHDVWWKUHHWLPHVEHIRUHWKHࢉUVW
PRSSLQJVHVVLRQWRUHGXFHH[FHVVLYHGLUWEXLOGXSRQWKHPRS
Ŏ
Use barrier tape to prevent mopping carpeted areas, or remove carpets prior to
mopping.
Ŏ
7RSUHYHQWFRUURVLRQRUGDPDJHGRQRWXVHFOHDQLQJࢊXLGRUGLVLQIHFWDQWLQWKHZDWHU
tank.
Ŏ
&OHDQLQJWKHPRSFORWKHYHU\PLQXWHVLVUHFRPPHQGHGWRHQVXUHWKHZDWHUࢊRZ
UDWHDQGFOHDQLQJHࢆHFW
Low
High