28
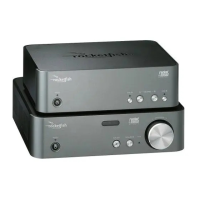
4 Press and hold the button on your Rocketboost Hub device for more
than three seconds to put it into joining mode. The power indicator
starts blinking rapidly and the unit will stay in joining mode for 30
seconds.
5 Press and hold the button on the receiver for more than three seconds
so the Hub device and receiver enter joining mode.
• The power indicators light steadily if the joining was successful.
• The power indicators blink slowly if the joining was not successful.
Note: Rocketboost devices have their own memory. After the devices are joined once,
they will remember each other and join automatically when your devices are
powered on again. Because of this, you can join all of your network components in
the same room before installing them in their permanent locations throughout the
house.
Configuring 4-channel lock
4-Channel Lock is a special feature used for 4-channel wireless
surround sound applications (for example if you are using
Rocketboost for wireless rear and side surround sound in a 7.1 home
theater system).
The 4-Channel Lock switch is on the back of the wireless sender. When
the switch is set to ENABLE, the volume level from both INPUT A and B
on the sender will be synchronized, allowing 7.1 systems to optimize
speaker volume levels.
Set the 4-Channel Lock switch to DISABLE to allow separate control of the
volume levels for Inputs A and B.
If you are using Rocketboost for wireless rear and side surround
sound in a 7.1 home theater system, see the following procedure,
otherwise leave the 4-Channel Lock switch in the DISABLE position.
To configure 4-channel lock for wireless rear and side surround sound (7.1 home
theater):
1 To support both rear and side wireless surround sound, an additional
RF-RBREC wireless receiver (sold separately) is required. See the example
configuration, “Wireless Surround Sound for 7.1-channel home theater”
on page 18 for how to set this up.
2 After you have joined the RF-RBKIT sender and receiver to your
Rocketboost network, join the additional RF-RBREC receiver to your
network. To do this, follow steps 4 and 5 in “Joining the sender and
receiver to an existing Rocketboost network” on page 27.
RF-RBKIT_10-1157_MAN_V4.fm Page 28 Friday, October 8, 2010 12:53 PM

 Loading...