7
makes contact. Secure it by driving #8 x 1
3
⁄4" Screws (19)
through the predrilled holes in the back edge of the Fixed
Fence. Use a combination or engineer’s square to verify
that it’s square to the router table fence. Fig. 5.
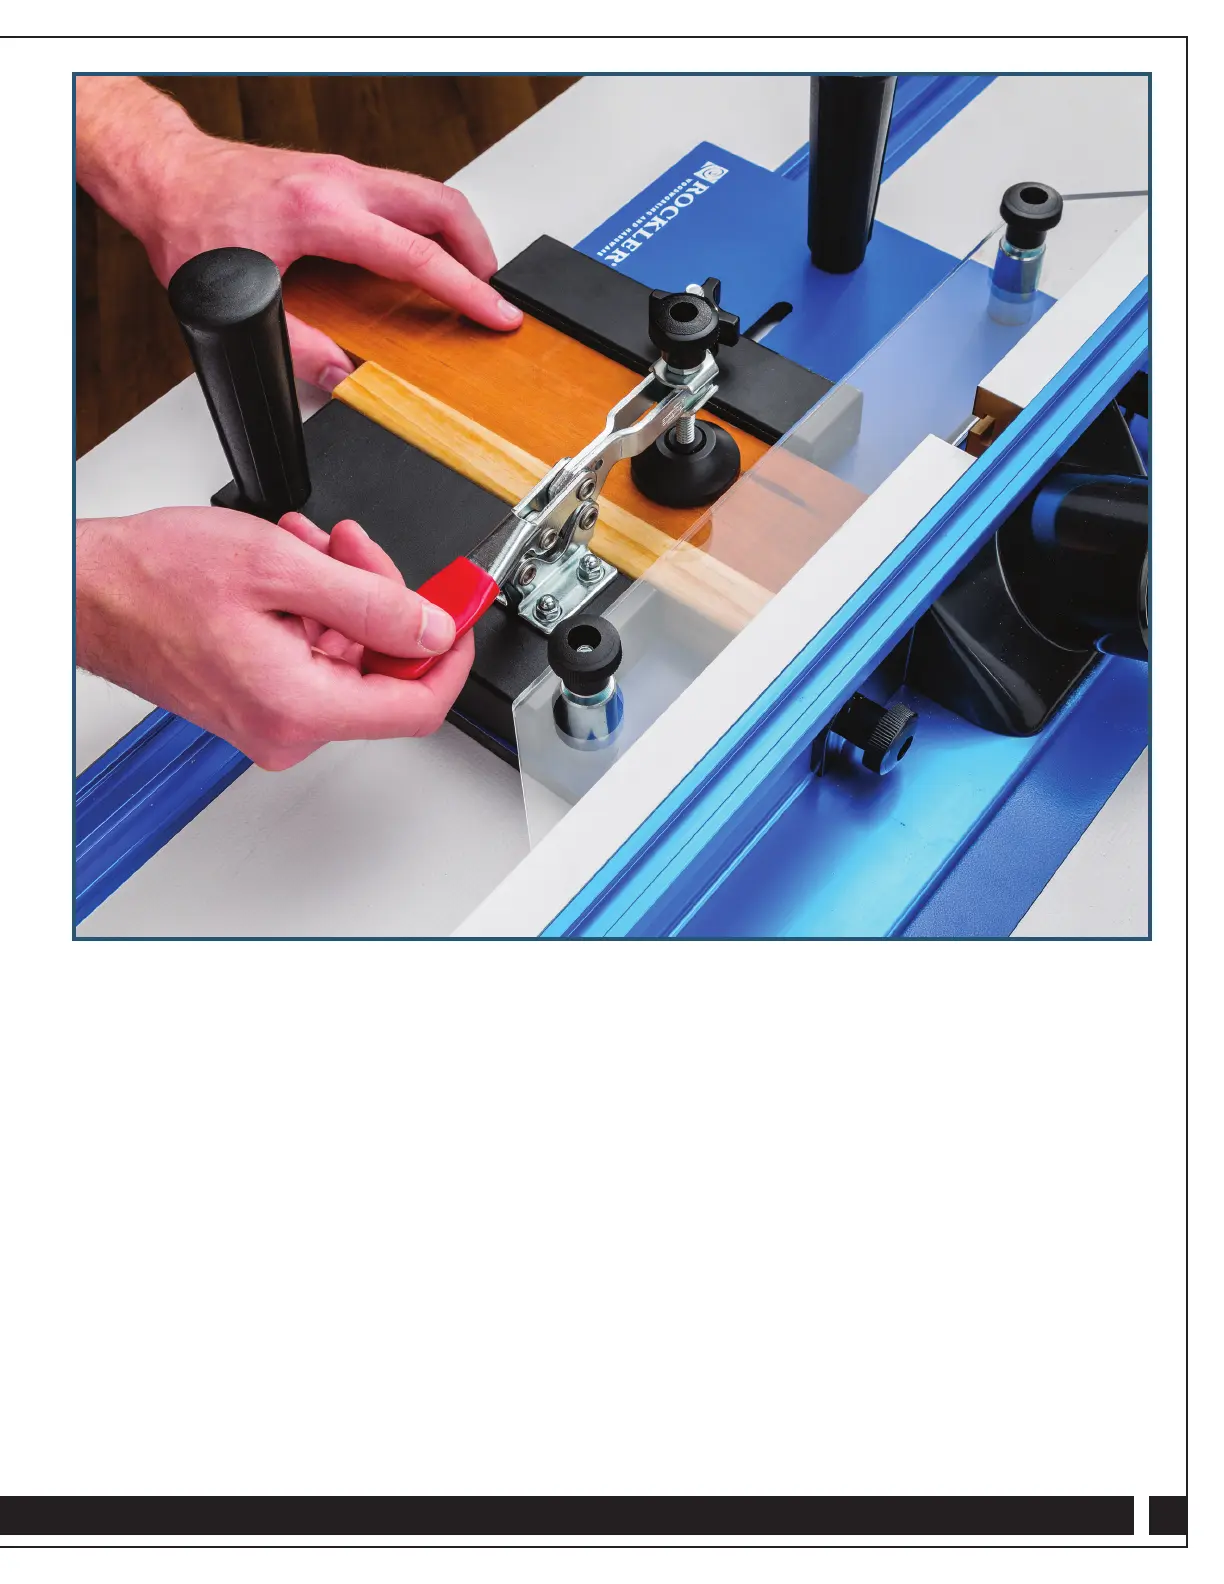
11. Clamp your project stock in the sled, up against the
Sacrificial Piece (6), and make your cuts, moving the
sled from right to left on the router table. Fig. 6.
Fig. 6
Check Rockler.com for updates. If you have further questions, please
contact our Technical Support Department at 1-800-260-9663
or support@rockler.com


 To Next Page