41
Press the right “arrow key” to switch the turn-
out. You may hear an acoustic confirmation
depending on the turnout drive in use. The
vacant digits between “T” and the address “24”
are filled with a “0”.
Note: Pressing the key for a long time may
damage or destroy older turnouts which do not
have a cut-off.
Press the “Locomotive / turnout” key again to return to drive mode (library or locomotive address mode).
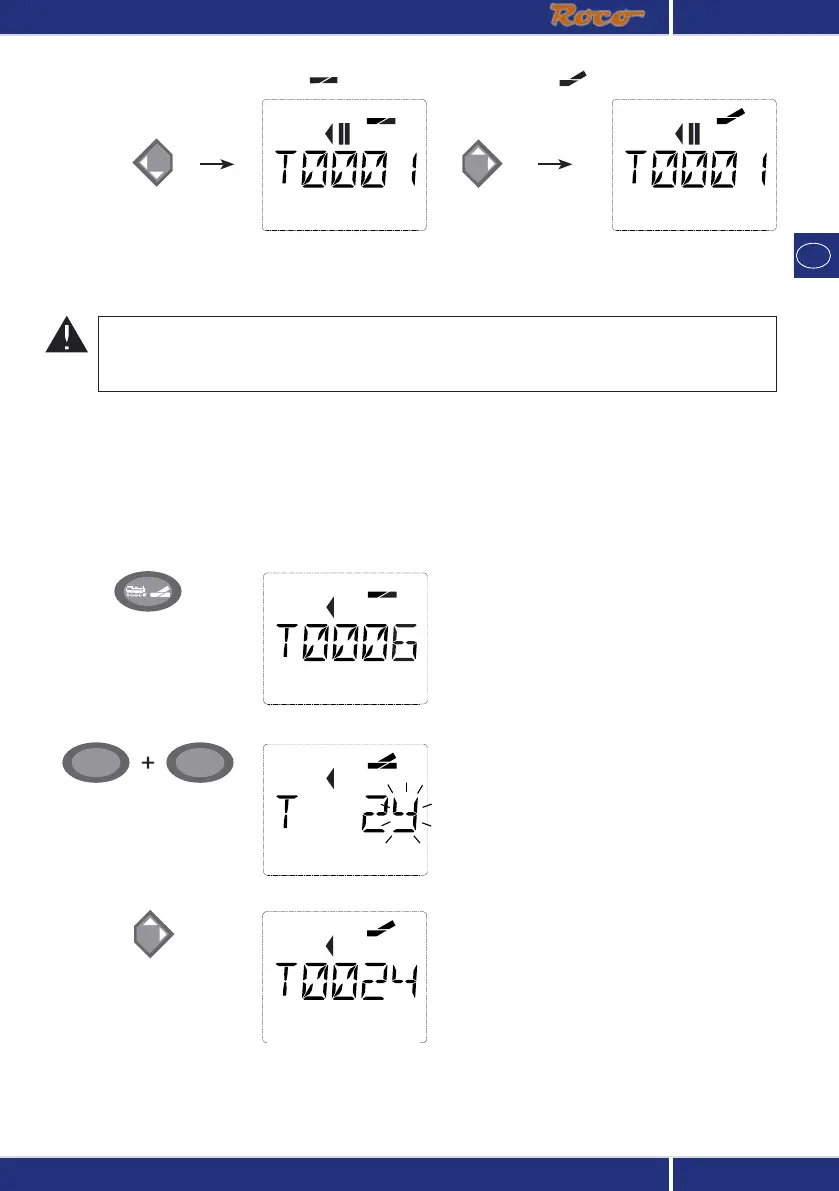
You use the function keys to enter the turnout address and the “arrow keys” to switch the drive to
set the turnout to “straight-on ” (left arrow key) or “branch-off ” (right arrow key).
The turnouts are switched over the moment you press on of the “arrow keys”. This also saves the
turnout setting. The first free numbers after the “T” are set as “0” as confirmation (of course, for 1,
2 or 3 digit turnout addresses only).
The display of the turnout positions on the screen does not denote a response from the turnout
drive. The only way to check whether the turnout has actually changed is to check the turnouts
themselves.
You can now exit turnout mode by pressing the “Locomotive / turnout” key or call up and switch an
-
other set of turnouts by entering the address. If you call up another turnout address, the cursor and
the entered number flash alternately until the turnout has been switched using the “arrow keys”.
Example: You wish to drive a locomotive (travel direction left) to branch off at turnout no. 24.
After the “Locomotive / turnout” key has been
pressed, the
multi
MAUS switches from drive
mode (library or locomotive address mode) to
turnout mode.
The turnout last called up always appear. In this
case, turnout “6”, position “straight-on”.
The flashing cursor indicates that the turnout
address can be entered. You enter the address
“24” using the “function keys” “2” and “4”.
If the turnout has not yet been switched, the
complete turnout symbol appears in the dis-
play.
Input Display message Comment
2 abc
4 ghi