42
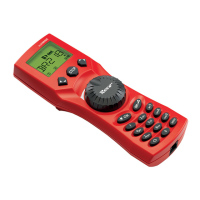
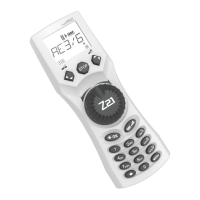
6. Quick programming
The most important decoder settings for drive mode, known as configuration variables �CVs, can be
made using the combination of “MENU” + “function key”.
CV1 = Locomotive address (A change to this value has a direct effect on the decoder but not on the
locomotive library. The address saved there has to have the same value as the CV.),
CV2 = Minimum speed,
CV3 = Acceleration,
CV4 = Braking time
CV5 = Maximum speed,
CV8 = Reset
all decoder data to the factory settings.
You can perform quick programming in both “library mode” and “locomotive address mode”. All
changes to CVs 1 – 5 only have an effect on the locomotive in digital operation.
The
multi
MAUS cannot read CVs when used in conjunction with ROCO amplifiers 10764 and
10761 and therefore a fictitious value is displayed for the CV called up. To read CVs, use, for
instance, a PC with ROCOMOTION 10785 or Lenz devices.
ROCO decoders already installed in locomotives are delivered with the suitable settings. You should
therefore check before performing programming whether it is really necessary.
Programming has to be performed on a separate programming track unless there is only one
digital locomotive or turnout decoder connected to the booster by the tracks or other wiring or if
the
multi
MAUS is switched to “POM” mode (see section 2). If programming is performed on the
normal driving track and there is more than one digital locomotive on the track (or other turnout
decoders than ROCO articles 42624 and 10775), the settings for all decoders in the system are
changed with one single program command. Thus you could, for instance, unintentionally program
all decoders to the same locomotive address.
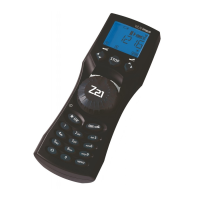
Three useful
multi
MAUS aids for the turnout mode:
Toggle mode
You can switch between the current turnout and the turnout last called up by pressing the “Light / OK”
key. This provides you with quick access to two sets of turnouts which, for instance, are next to each
other on a stretch of track.
Address scrolling
Press the “shift” key and one of the “arrow keys” at the same time and the
multi
MAUS will scroll
through all the turnout addresses.
Turnout short-cut keys
For quick access you can store the 10 most frequently used turnouts as a short-cut function on the
“function keys”. To do so, proceed as in the following example:
– Turnout 5 and 14 are to be made available for activation using “function keys” 1 and 2. First call up
turnout 5 as usual in turnout mode. Press the “MENU” key and “function key” 1 together and confirm
with the “Light / OK” key.
Then call up turnout 14. Press the „MENU“ key and “function key 2” together again and confirm with
the “Light / OK” key.
You can now call up these two sets of turnouts at any time by pressing the “shift” key and the respec-
tive “function key”. You can switch the turnouts by using the depressed “switch” key together with
the respective “function key”.
In the factory setting, the turnouts 1 – 10 are set to the “function keys” with the same numbers (turn-
out 10 = “function key” 0). You can overwrite this saved order.