14
Mop disassembly and cleaning
Remove the mopping module from the disk and remove the mop from the mopping
bracket. Rinse the mop with clean water and use it after it dries completely to prevent
the dust from clumping and causing unpleasant odours when used again.
Notes:
• Only replace with the original mop designated by the manufacturer, to avoid
affecting the cleaning effect of the appliance due to product incompatibility.
• Be sure to remove the mop for cleaning to prevent dirty water from overflowing.
• It is recommended to replace the original mop every 3-6 months to ensure a
better cleaning effect.
Robot cleaner part cleaning
Wipe and clean the charging contacts, anti-fall sensors, LDS sensors, and infrared
transmitters on the back of the robot cleaner with a soft, clean cloth. Turn over the
appliance and pull out the universal wheel to clean the hair and dirt on the wheel body
and axle. The universal wheel can be washed with water, and then reinstall after
complete drying.
Notes:
• When cleaning the anti-fall sensors, infrared sensor and charging contacts, please
use a dry cloth to prevent damage caused by water.
• Be careful when using a screwdriver to replace parts to avoid causing damage to
the parts.
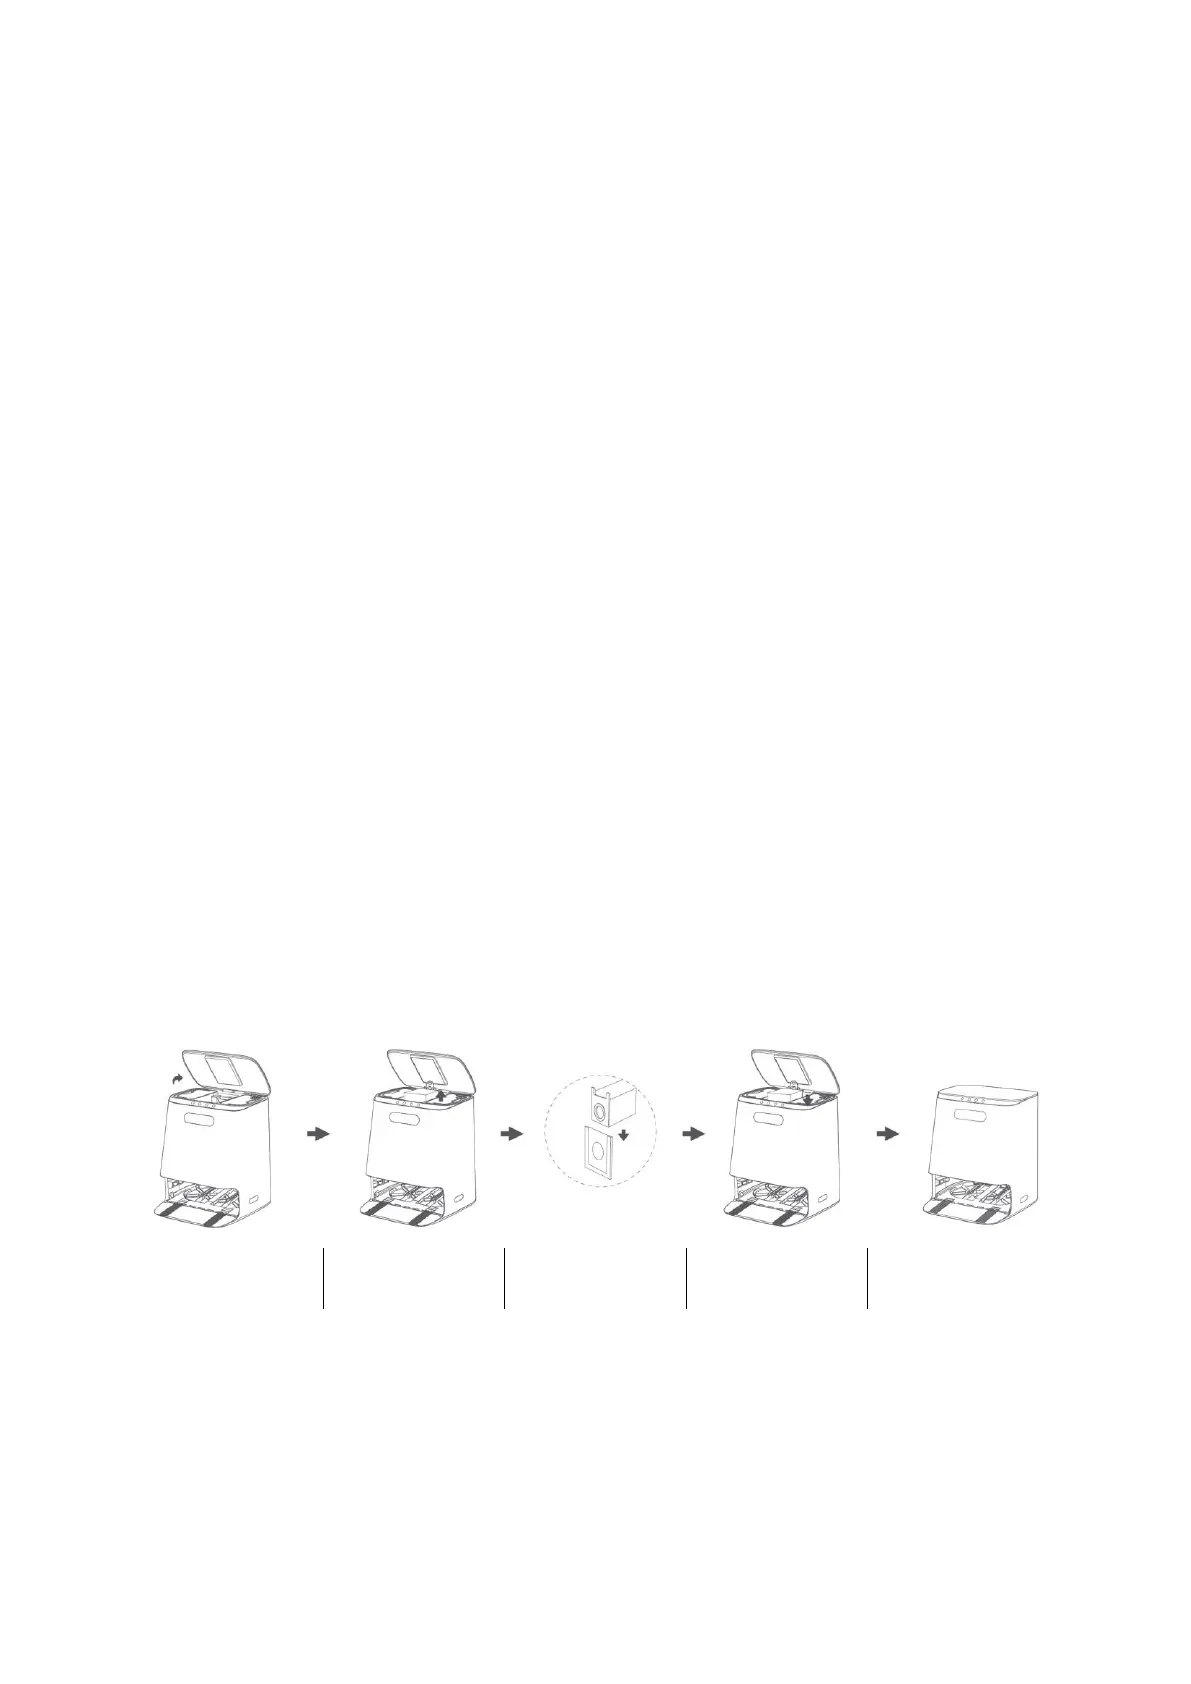
Base station cleaning
When the dust bag is full, the dust-full indicator flashes. Replace the dust bag according
to the display on the base station. It is recommended to replace it every 6-8 weeks.
In the power-off state, check whether there is any abnormal blockage on the
transparent module of the dust channel and the dust inlet. If there is blockage, please
clean up the wedged objects in time. Wipe and clean the infrared lens and charging
ports with a soft clean, soft cloth to ensure that it is clean and free of debris.