Do you have a question about the Roland EM-55 and is the answer not in the manual?
Encompasses three functions for switching/muting parts, selecting phrase patterns, and creating remixes.
Use the supplied adapter only; avoid power circuits with line noise and turn off units before connecting.
Avoid direct sunlight, heat sources, enclosed vehicles, and areas with radio/TV interference.
Protect disks from dust, magnetic fields, temperature extremes, and avoid touching the magnetic medium.
Adjusts pitch bend (up/down) and adds modulation (vibrato) to notes.
Infrared controller for influencing timbre, controlling Arranger, and creating effects via hand movements.
Selects User Programs or saves current settings to a User Program memory.
Activates, assigns, and selects effects from the multi-effects processor.
Engages the instrument's built-in song recording functionality.
Connects to computers or other MIDI instruments for data exchange.
Connects the supplied AC adapter for powering the instrument.
Unpack, connect the AC adapter, and power on the EM-55.
Engage the Arranger mode and control playback using Start/Stop buttons.
Select from 64 internal Music Styles using the numeric keypad or EZ Search.
Easy method to select Music Styles using the EZ Search button and panel lists.
Load and use additional Music Styles from floppy disks via the Disk Link function.
Assign different sounds (Tones) to the right-hand part using TONE button and A/B selection.
Efficiently locate desired Tones from the large library using the EZ Search function.
Split the keyboard to play separate sounds with the left and right hands.
Choose from 116 Drum Sets, accessed via Bank/Number buttons or EZ Search.
Play back recorded songs using the Song mode controls and navigate through the song.
Turn individual Arranger parts (Drum, Bass, Accomp) on/off during playback.
Add an extra phrase to Arranger playback using the Style Pad function.
Prepare song settings using the Music Assistant function for styles, tones, and effects.
Adds harmony to melodies by analyzing right-hand melody and left-hand chords.
Vary accompaniment patterns by selecting complexity levels (Drum & Bass, Combo, Big Band).
Combines accompaniment parts from different Music Styles to create new sounds.
Manually assign a different 'B' Style for Style Morphing combinations.
Use the STYLE DISK function to load and play Music Styles directly from a floppy disk.
Link Music Styles from floppy disks to Disk Link memories for quick access.
Apply M-FX processor to Keyboard parts; select M-FX types for sound manipulation.
Apply the M-FX processor to Upper 1, Upper 2, or Lower parts.
Changes the pitch of notes and chords; accesses transpose interval parameters.
Set how key velocity affects volume and brightness (Off, Low, Med, Hig).
Use the lever for vibrato, pitch bending up/down, and controlling M-FX Rotary speed.
Assign D Beam controller to DJ Gear, Sound FX, Instruments, or Controls for expressive performance.
Use D Beam to play notes (Instruments) or control parameters like Start, Fade, Filter, and Pitch.
Details on ALL, Keyboard, Single, and Punch I/O modes for recording new songs or parts.
Reset all factory settings of the EM-55's Function menu.
Save current panel and parameter settings to one of 64 User Program memories.
Load previously saved User Programs using the User Program/Write button.
Set MIDI transmission/reception and synchronization parameters.
Transfer User Programs from floppy disk to the EM-55's internal memory.
Save songs and all User Program memories to a floppy disk.
Create backup copies of entire floppy disks by copying Source disk to Destination disk.
Reset the EM-55 to its original factory settings, clearing Recorder and User Programs.
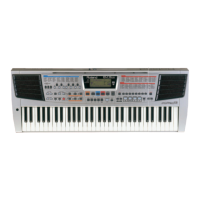
| Number of Keys | 61 |
|---|---|
| Tones | 128 |
| Styles | 100 |
| Rhythms | 100 |
| Display | LCD |
| Weight | 4.5 kg |
| Keyboard | Velocity Sensitive |
| Sound Source | PCM |
| Effects | Reverb, Chorus |
| Connectivity | USB, MIDI, Headphone output |
| Power Supply | AC Adapter |