31
FANTOM-X6
fig.test-pad-adj1_70
Using the push-pull gauge you provided, apply pressure of 3 (kgf) to
[DYNAMIC PAD 4].
When you press the [ENTER] button, the setting will be saved and you will
automatically proceed to the next test item.
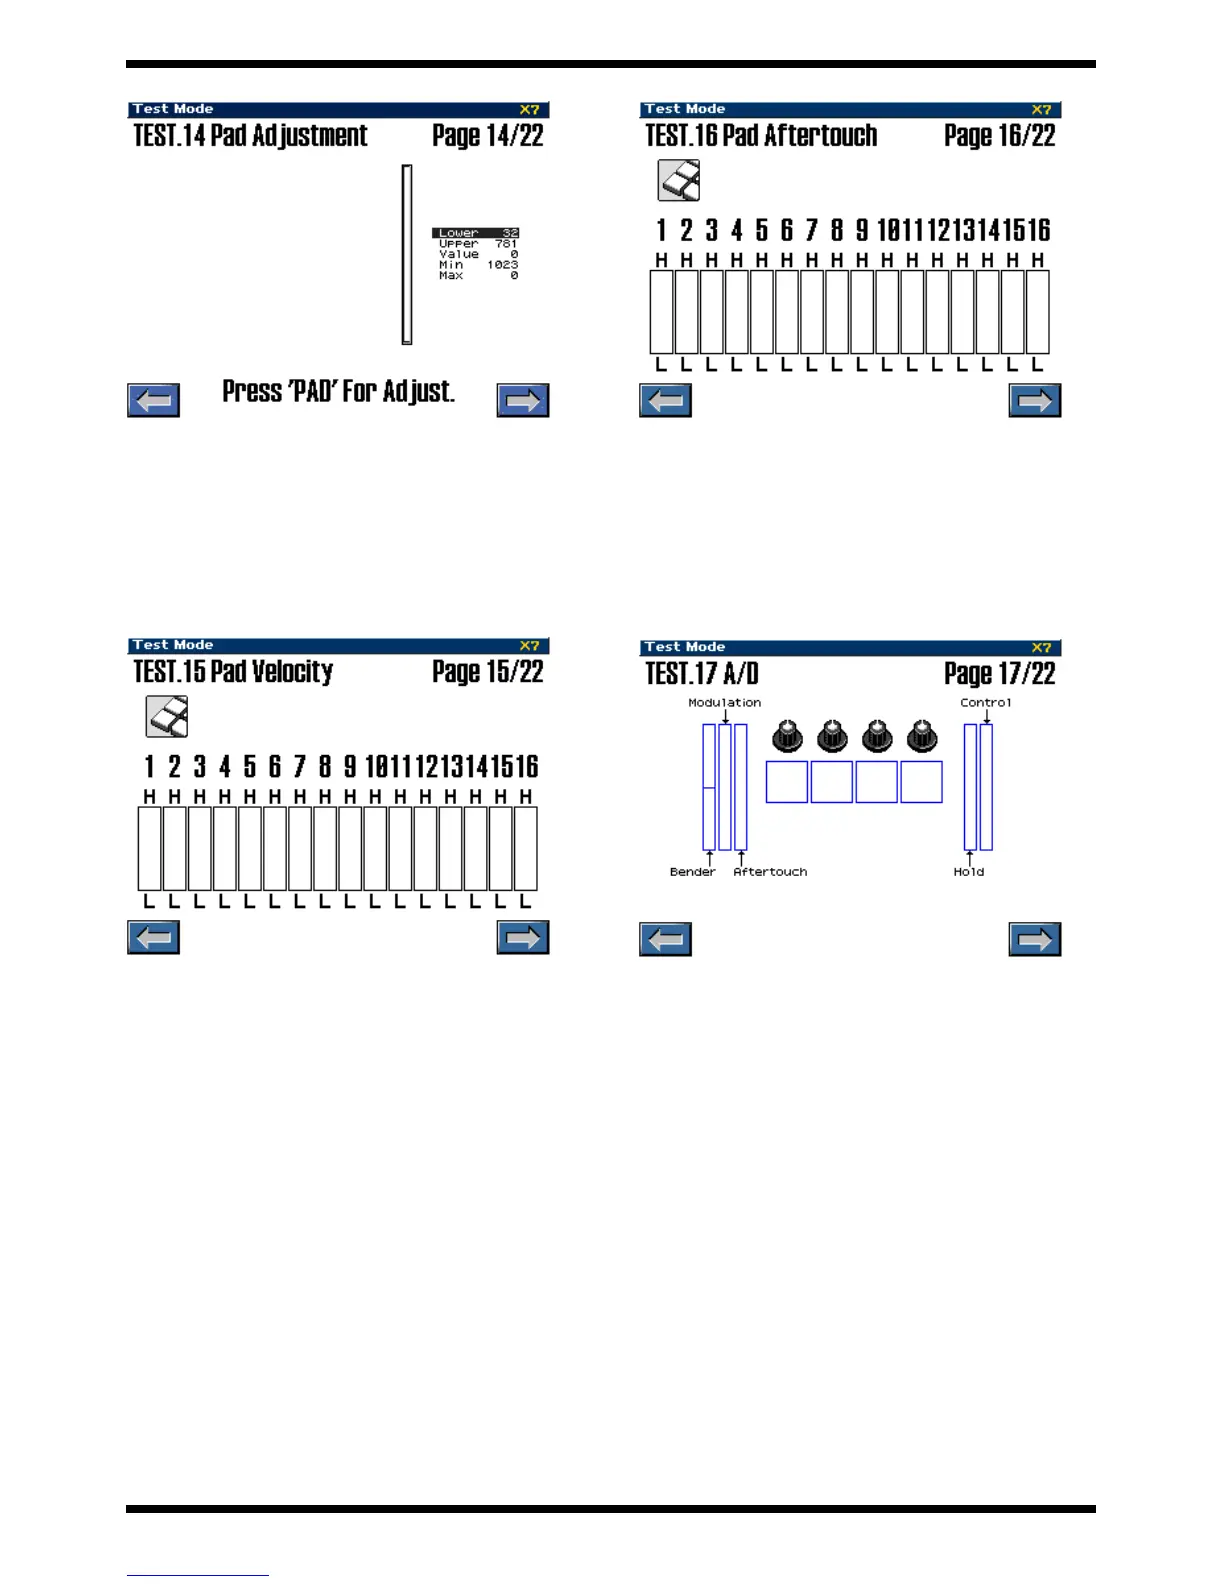
15. Pad Velocity
This tests [DYNAMIC PAD] operation.
When you enter the Pad Velocity test, every [DYNAMIC PAD] will blink, and
the LCD display will show as follows.
fig.test632_70
Lightly press each [DYNAMIC PAD] from [1] through [16].
Verify that the LED of the [DYNAMIC PAD] you press changes from blinking
to lit, and that in the LCD display the “L” indication for the corresponding
button becomes lighter.
Strongly press each [DYNAMIC PAD] from [1] through [16].
Verify that the LED of the [DYNAMIC PAD] you press changes from lit to
dark, and that in the LCD display the “H” indication for the corresponding
button becomes lighter.
If the test result is OK, you will automatically proceed to the next test item.
16. Pad Aftertouch
This tests [DYNAMIC PAD] operation.
When you enter the Pad Velocity test, every [DYNAMIC PAD] will blink, and
the LCD display will show as follows.
fig.test769_70
Strongly and slowly press each [DYNAMIC PAD] from [1] through [16].
Verify that the LED of the [DYNAMIC PAD] you press changes from blinking
to dark, and that in the LCD display the bar graph for the corresponding
button becomes lighter.
If the test result is OK, you will automatically proceed to the next test item.
17. A/D
This tests the operation of each rotary control and slide control.
When you enter the A/D test, the LCD display will show as follows.
fig.test606_70
One by one, operate all controls (other than the [VOLUME OUTPUT] knob and
the [VOLUME INPUT] knob), including the bender, aftertouch, [CONTROL]
jack (connect an expression pedal such as the EV-5), and [HOLD] jack (connect
an expression pedal such as the EV-5), to adjust through their variable range
from MAX to MIN.
Verify that the corresponding indicator in the LCD display becomes lighter.
When all indicators have become light, and the test results are OK, you will
automatically proceed to the next test item.

 Loading...