Panel Descriptions
33
Song player
Use these buttons to play back audio files.
[Song]
button
Selects the song to play back.
* Long-press the [Song] button to start
the demo function.
[òò]
button
Plays/stops the song.
* Long-press the [ò] button to return
to the beginning of the song.
[öö/ùù]
button
Pressing these buttons shows the Song
Position window, where you can use the
[+] button to fast-forward and the [-]
button to rewind the song.
You can also configure the LOOP MODE
settings with these buttons.
For details, refer to the Reference Manual
(web).
[óó]
button
Records a new song.
Center Cancel/Mic FX
[Center Cancel]
button
Reduces the volume of sounds that are
playing the center of the stereo field (such
as vocals, melodic instruments and so on)
during playback.
This works with audio or Bluetooth audio
files that play on the song player, as well as
on the signal from the Input Stereo jack.
[Mic FX]
button (*1)
Applies effects to the mic input signal.
Power
[ĀĀ]
(power) button
Turns the power on/off.
To turn the instrument off, long-press the
button.
ØØ “Turning On/O the Power” (p. “Turning On/O the Power” (p.
55
))
Menu/Metronome/Tempo
[Menu]
button
Press this button to show the menu. Select
the menu to make detailed settings.
For details, refer to the Reference Manual
(web).
* Long-press the
[Menu] button to
start Bluetooth
pairing.
[Metronome]
button (*1)
Turns the metronome on/off.
[Tempo]
button
Changes the metronome and arranger
tempo.
* Long-press the [Tempo] button to
show the tap tempo screen, where you
can set the tempo at the timing with
which you press the [Enter] button
(tap tempo).
Rear Panel
* To prevent malfunction and equipment failure, always turn down the volume, and turn o all the units before making any connections.
DC In
DC In
jack
Place the AC adaptor so that the side with the
indicator (see illustration) faces upwards.
The indicator lights up when you plug the AC
adaptor into an AC outlet.
Cord hook
Use the cord hook to secure the cord of the
AC adaptor as shown in the illustration.
This prevents the plug from getting pulled
out and the power getting cut off if you
accidentally tug on the cord, and also
prevents unnecessary force from being
applied to the DC IN jack.
Output
Output L/Mono, R
jacks
Connect these jacks to your amplified
speakers, recording equipment or other
devices for audio output.
If you’re outputting in mono, connect only
to the L/Mono jack.
Input
Input Stereo
jack
Connect your audio equipment
here to record the input audio or
mix the sound with the audio from
this instrument.
You can apply center cancel to the
playback of your audio equipment.
You can also adjust the input level.
Mic
[Gain]
knob
Adjusts the volume of audio input from
the Mic Input jack.
Mic Input
jack
Connect a dynamic mic
here.
Pedal
Pedal1
jack
Connect the included pedal
switch, a damper pedal: DP-10
(sold separately), an expression
pedal: EV-5 (sold separately)
here.
* Use only the specified expression
pedal. By connecting any other
expression pedals, you risk causing
malfunction and/or damage to the
unit.
Pedal2
jack
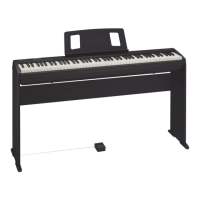
Connect the pedals here (KPD-70), sold
separately. To use the KPD-70, install them
onto the dedicated stand (p. 1).
USB
USB Memory
port
Connect a USB flash drive here .
Use this to import audio files
and to save the songs you’ve
recorded or the settings of this
instrument to the USB flash drive.
* Never turn off the power or remove
the USB flash drives while the screen
indicates “Executing...”.
USB Computer
port
Connect to your computer
via USB cable.
This lets you transmit/
receive MIDI data and
record the audio that’s
playing on your computer.
IndicatorIndicator
Cord hook