18
Mar. 2006 HPD-10
(8) Encoder/LCD Test [8. Encoder &
LCD]
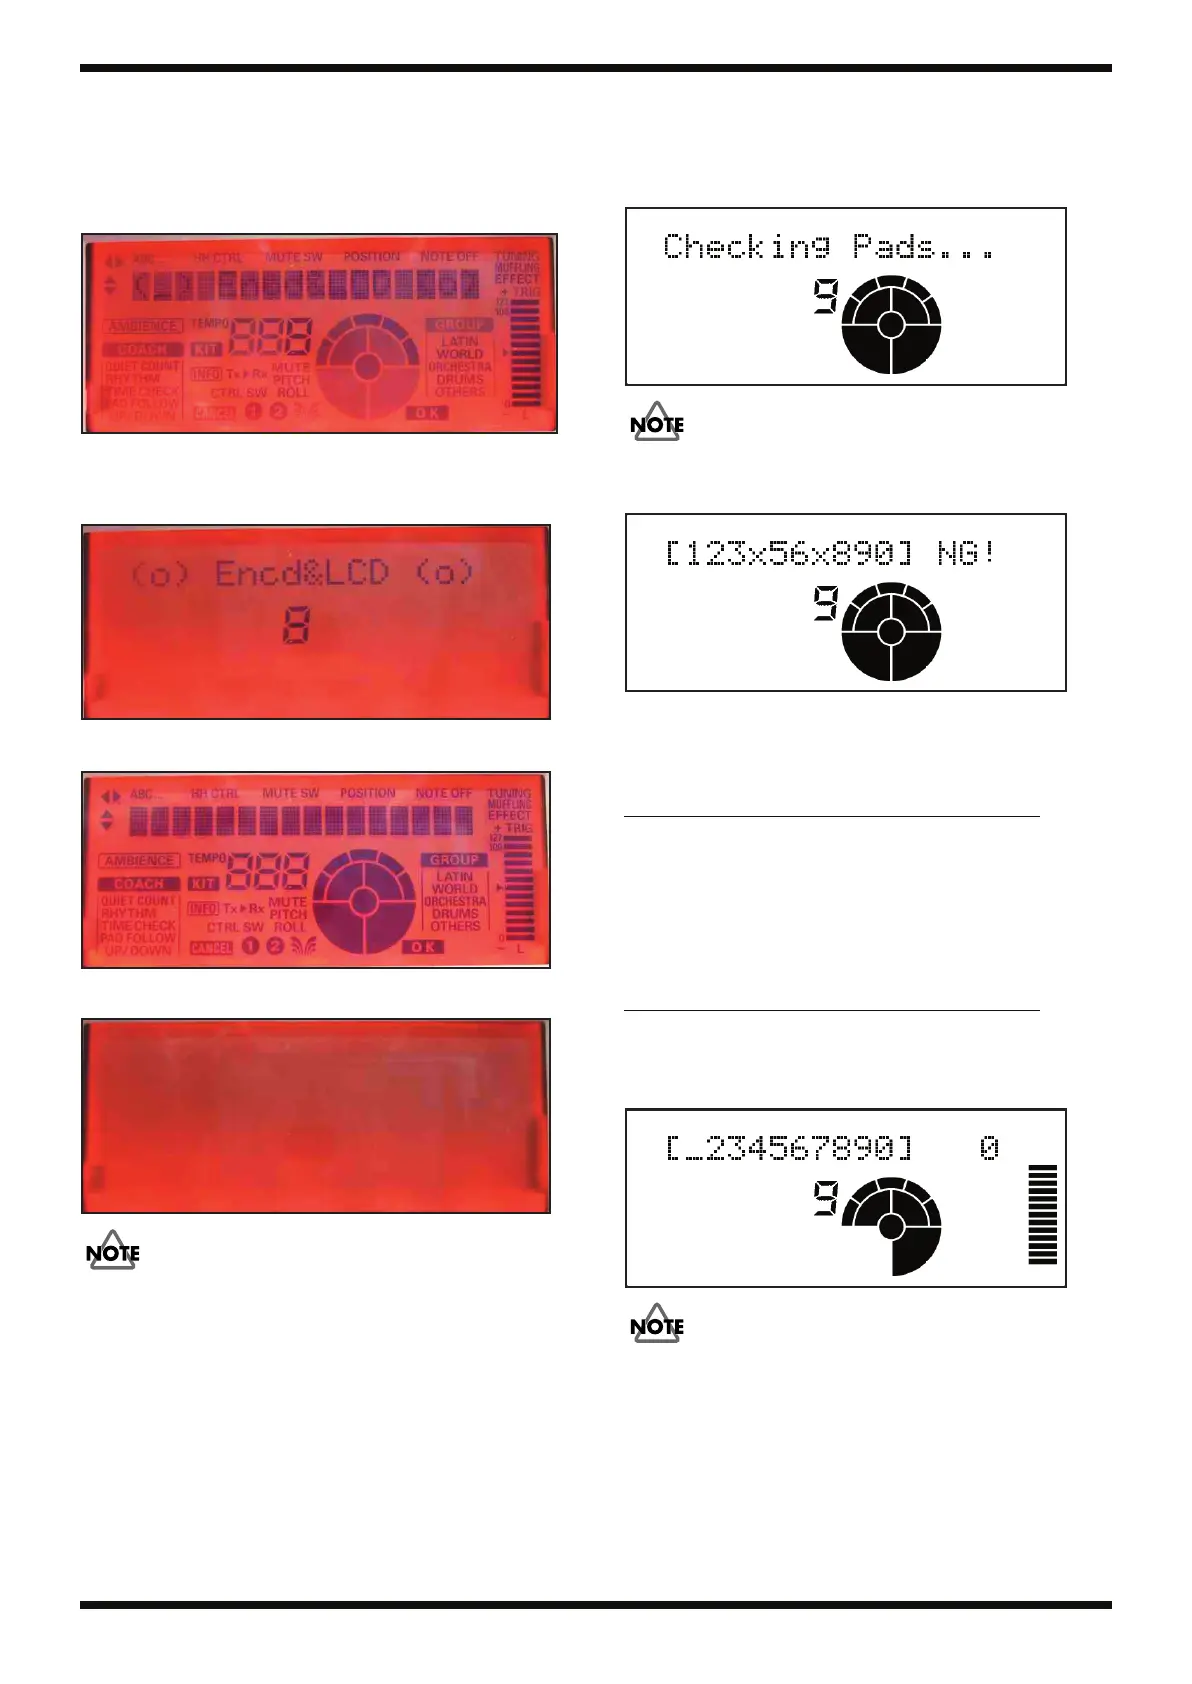
1.
Gradually rotate the Encoder to the right (clockwise). Rotate the knob
until the level meter is completely lit, and confirm that the LCD contrast
darkens.
fig.test23.eps_35
2.
Gradually rotate the Encoder to the left (counterclockwise). Rotate the
knob until the level meter is completely off, and confirm that the LCD
contrast becomes lighter.
fig.test24.eps_35
3.
Press [1 (CONGA)] to check all segments in the LCD turn on.
fig.test25.eps_35
4.
Press [2 (TABLA)] to check all segments in the LCD turn off.
fig.test26.eps_35
If you press [3 (STEELDRUM)], the LCD goes back to the initial condition.
5.
If the test passes, press [4 (DRUMS)] to advance to the next section.
(9) Pad Pressure Test [9. Pad Pressure]
The test program automatically checks whether or not the pressure value
changes.
If the test passes, the test program advances to the next section automatically.
fig.test27.eps_35
If any pad is being touched at the time the test begins, the test fails (NG) and
the pad failing the test is indicated as flashing in the LCD.
fig.test28.eps_35
1.
Press each pad with gradually increasing pressure.
Press value and level meter appear in the LCD display.
[FLASH Ver. 1.01 or later]
When the values for the three levels are reached, the pad passes the test
and the LCD for the pad goes off.
[FLASH Ver. 1.00]
fig.test29.eps_35
The test doesn’t return OK unless the value reads 0 when you release the pad.
Pressure
Pressure Value LED
Weak
3--7 [EFFECT] turns on
Middle 22--45 [KIT] turns on
Strong 60--111 [D-BEAM] turns on
Pressure
Pressure Value LED
Weak
5--15 [EFFECT] turns on
Middle 55--65 [KIT] turns on
Strong 95--105 [D-BEAM] turns on
Service Notes(A4)_e 18 ページ 2006年6月1日 木曜日 午後4時5分
 Loading...