5
Introduction
Contents
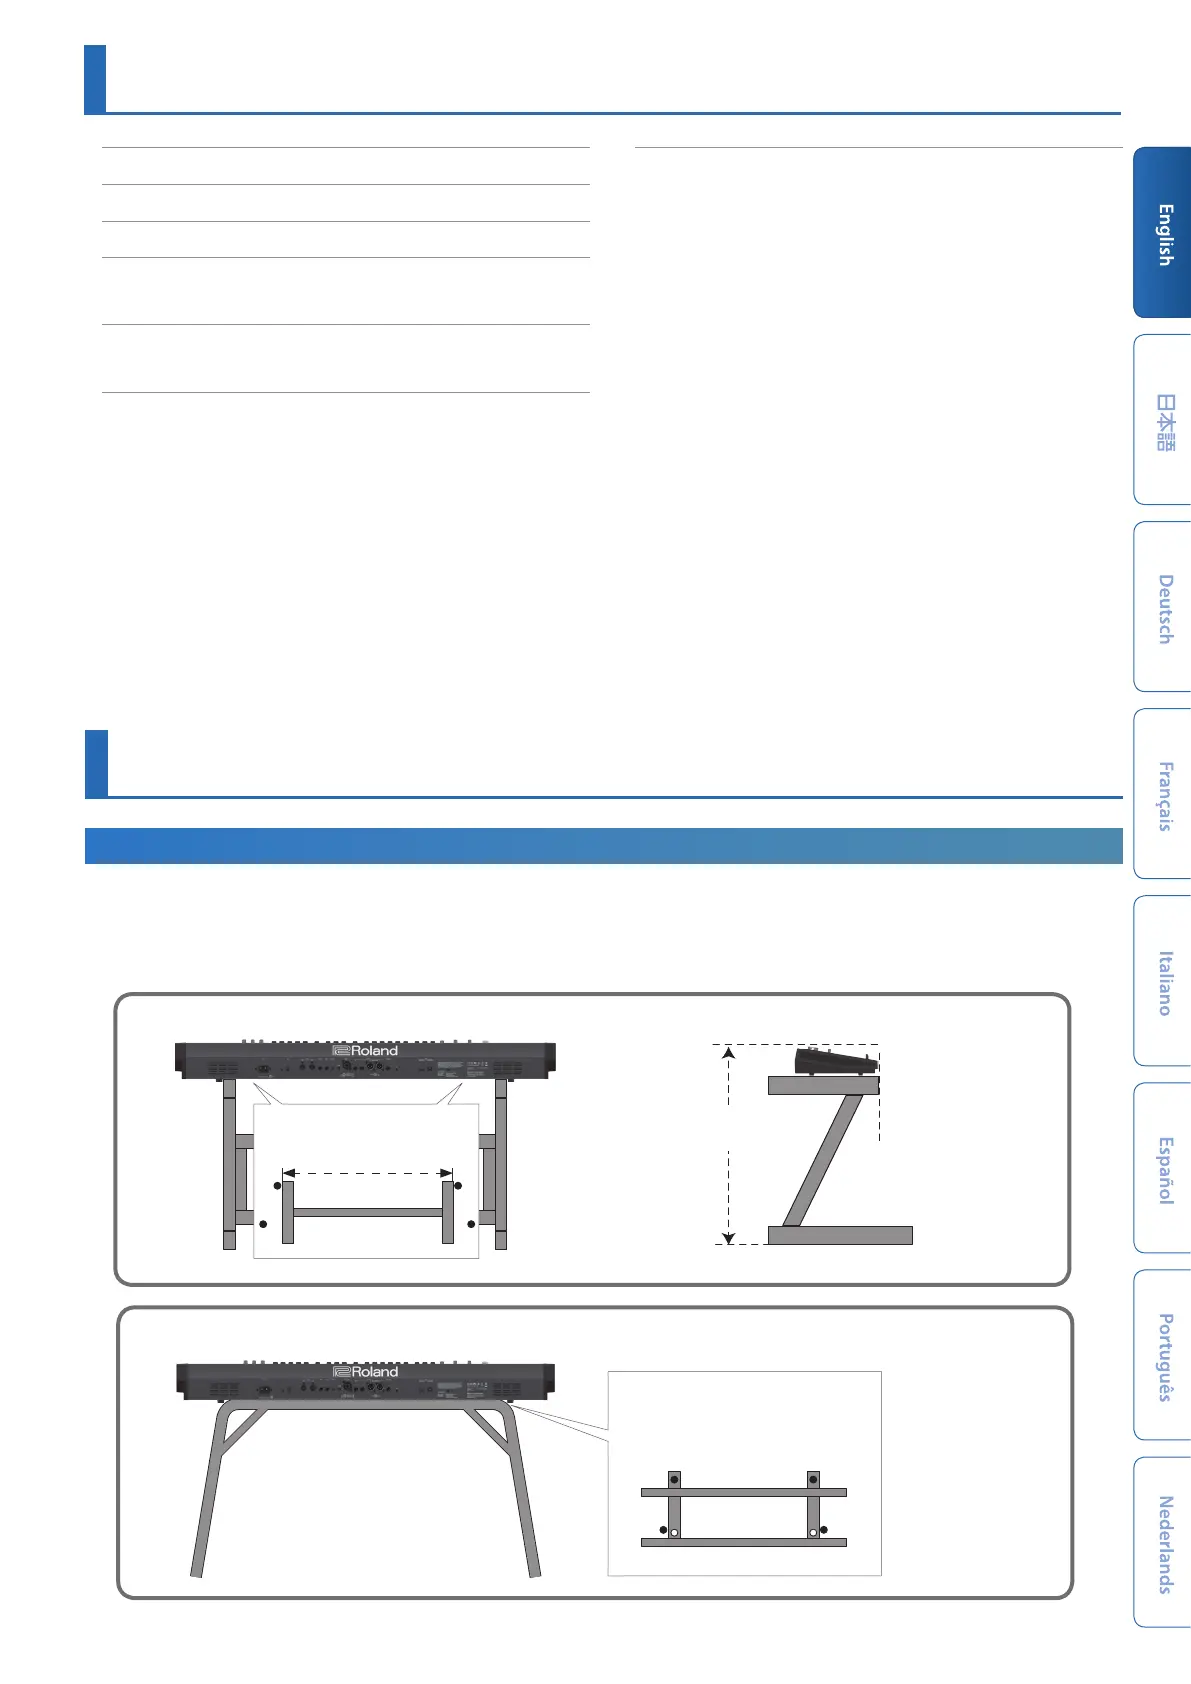
Placing the JUNO-X on a Stand
If you want to place the JUNO-X on a stand, use the Roland KS-10Z or KS-12. Place the JUNO-X on the stand as follows.
Be sure to follow the instructions in the Owner’s Manual carefully when placing this unit on a stand. If it is not set up properly, you risk creating an
unstable situation which could lead to the unit falling or the stand toppling, and may result in injury.
* Be careful not to get your fingers pinched in the stand when setting it up.
KS-10Z
Adjust the horizontal width of the
stand as shown in the illustration.
Top view
Adjust so that the height
does not exceed 1 meter.
Align the front of the JUNO-X
with the front of the stand.
790 mm (2’ 7” inches)
KS-12
Adjust the width of the stand so that the
two rubber feet located on the player’s
side fit into the holes provided on the
stand.
Top view
(Player’s side)
USING THE UNIT SAFELY...................... 2
IMPORTANT NOTES........................... 3
Main Specifications .......................... 4
Introduction.................................. 5
Ä Placing the JUNO-X on a Stand.................. 5
An Overview of the JUNO-X .................. 6
Ä Basic Structure ............................... 6
Panel Descriptions ........................... 8
Ä Top Panel .................................... 8
Ä Rear Panel (Connecting Your Equipment)............... 11
Ä Front Panel (Connecting Your Equipment) .............. 11
Ä Turning the Power On and Adjusting the Volume .. 12
Turning the Power Off ........................... 12
Ä Using the Built-In Speakers ..................... 12
Convenient Functions (UTILITY) ................ 13
Ä Backing-Up Data to a USB Flash Drive............ 13
Formatting a USB Flash Drive (FORMAT USB MEMORY) ..... 13
Backing-Up Data to USB Flash Drive (BACKUP) ......... 13
Restoring Backup Data (RESTORE) ................... 13
Ä Returning to the Factory Settings (FACTORY RESET) ... 14

 Loading...


