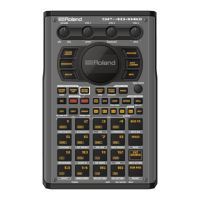
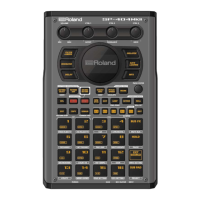
Appendix
146
[SHIFT] button + [REMAIN]
button
The [SHIFT] button remains in a “pressed-down” state. This makes it easier to select
a marker and play back.
Press the [EXIT] button to cancel this behavior.
[SHIFT] button + [MARK]
button
You can add markers while playing samples in DJ mode.
[SHIFT] button +
[START/END] button
You can edit markers while playing samples in DJ mode.
[SHIFT] button + [DEL]
button + pads [1]–[16]
While in DJ mode, you can delete the markers you’ve set for samples.
[SHIFT] button + [ROLL]
button
Sets the roll interval (1/4, 1/2, 1 or 2 measures).
Set the ROLL SIZE before playing back rolls. (You can’t change the ROLL SIZE with
this operation while a roll is playing back).
(CH1)
[ROLL] button + pad [15]
Repeats the sample playback in more detailed intervals (ROLL).
Note that when the ROLL SIZE (roll interval) is longer than the sample length, a roll
cannot played back.
[ROLL] button + pads [1]–[4]
Changes the roll interval while the roll is playing back.
[ROLL] button + pad [1]: quarter-note (1/4 of a measure)
[ROLL] button + pad [2]: half-note (1/2 of a measure)
[ROLL] button + pad [3]: whole note (1 measure)
[ROLL] button + pad [4]: two whole notes (2 measures)
[REMAIN] + pad [14] (CH1)
[REMAIN] + pad [16] (CH2)
You can set the bus to which the CH1/CH2 sample playback is sent (meaning
which effects are used).
While holding down the [REMAIN] button, each time you press pad [14] or pad [16]
switches the effect to use as follows: “BUS-1” -> “BUS-2” -> “DRY” -> “BUS-1”.
Press [RESAMPLE] button +
[VALUE] knob
CURVE
Selects the volume curve characteristics used for each slider (CH1 LEVEL, CH2
LEVEL, X-FADE) in DJ mode.
Each time you hold down the [RESAMPLE] button and press the [VALUE] knob, the
characteristic switches in this order: “FAST CUT” -> “LINEAR” -> “SQUARE” ->
[DEL] button + pad [2] + pad
[6] (CH1)
[DEL] button + pad [4] + pad
Resets the tempo to the default value.
Switches between the functions (CUE MIX or X-FADE) for the [CTRL 3] knob.
[PITCH/SPEED] button
Changes the number of digits shown for the BPM.
Each time you press the [PITCH/SPEED] button, the display switches in the
following order: integers only -> to the second decimal place -> to the first decimal
place -> integers only....
When you set the BPM value using pads [2] [4] (BPM+) and pads [6] [8] (BPM-), the
number of digits shown for the BPM changes according to the minimum unit.
Switches between the EFX and MIXER screen views.
[BPM SYNC] button
Selects the channel (CH1/CH2) used to control reverse playback ([REVERSE]
button).
Shortcuts used in TR-REC
[DEL] button + [A/F] button
Deletes the notes (for one measure) corresponding to the selected
pad.
[DEL] button + [B/G] button
Deletes the notes (for one measure) corresponding to all pads.
[ROLL] button + [CTRL 1] knob
You can record the motion of [CTRL 1] knob in the steps.
* This is enabled when MODE is “TRIG”.
[ROLL] button + [CTRL 2] knob
You can record the motion of [CTRL 2] knob in the steps.
* This is enabled when MODE is “TRIG”.
[ROLL] button + [CTRL 3] knob
You can record the motion of [CTRL 3] knob in the steps.
* This is enabled when MODE is “TRIG”.
[VALUE] knob (press) + [SUB PAD] button + pads [1]–
[16]
You can select samples without playing them back.
 Loading...