12
USING THE UNIT SAFELY
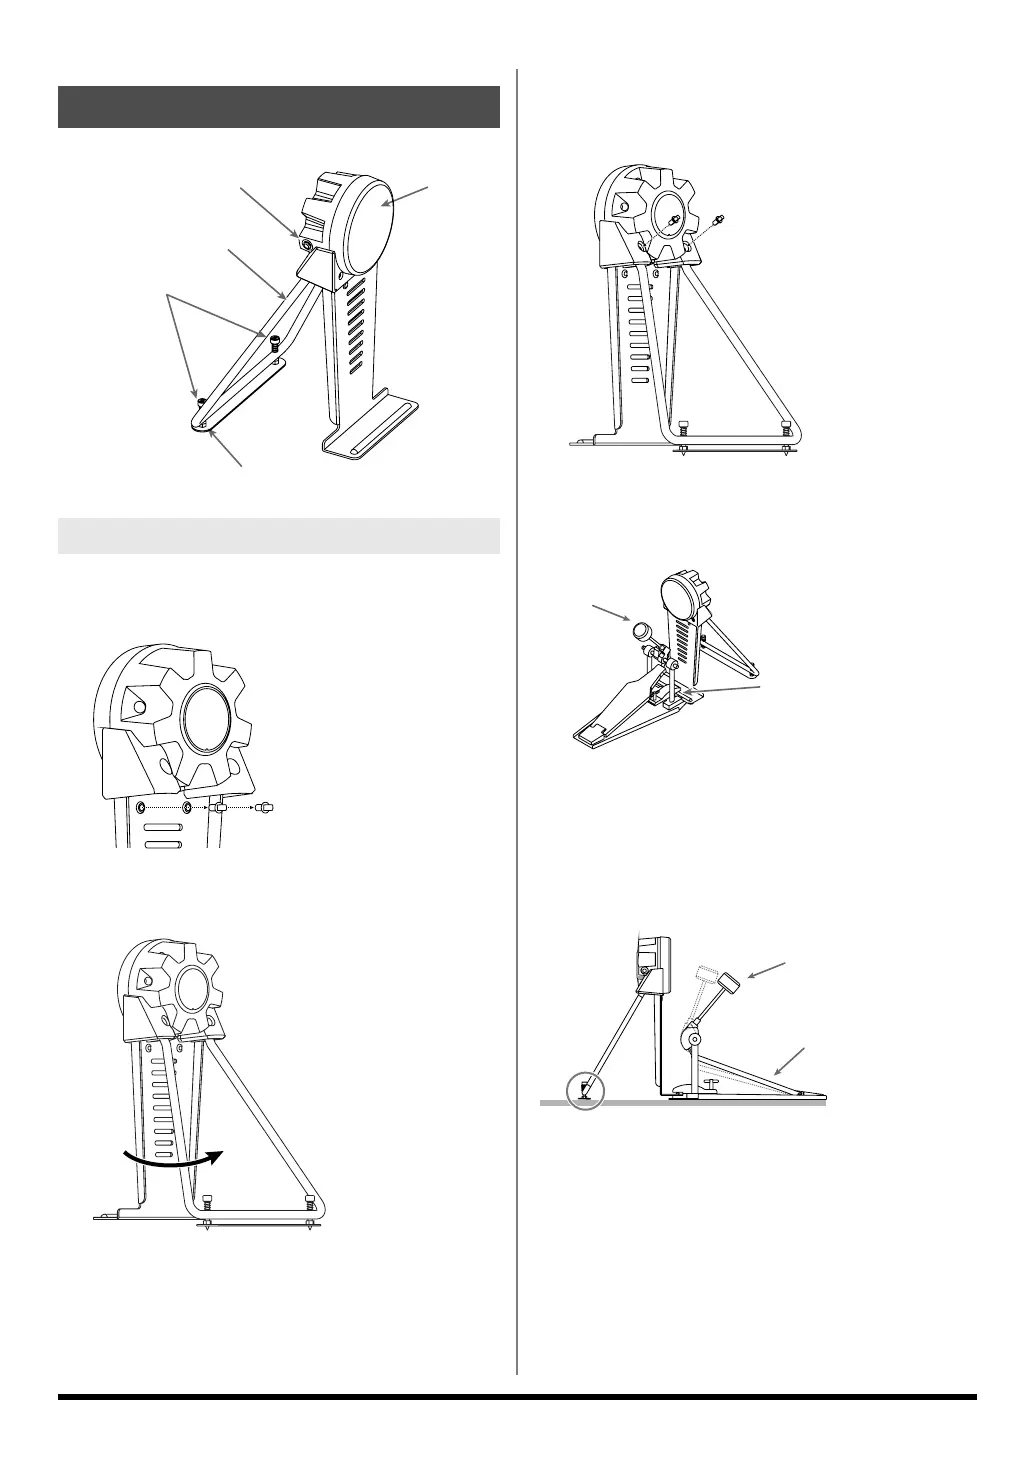
fig.KD-8.e
1.
Remove the screws attached to the reverse side
of the KD-8’s trigger.
fig.KD-Assy01
2.
Pull out the stand in the direction indicated by
the arrow until it is fully extended.
fig.KD-Assy02
3.
Use a tuning key supplied with the FD-8 to
tighten the screws removed in Step
1
so that
the stand is firmly secured.
fig.KD-Assy03
4.
Attach the kick pedal.
Position the beater so that it strikes the center of the head,
then secure the kick pedal and KD-8 firmly in place.
fig.KD-Assy04.e
Adjusting the Foot Plate Height
Depending on your kick pedal, it can be unstable when you
attach it to the KD-8. Be sure to adjust the foot plate height so
that the entire bottom surface of the pedal is attached to the
floor.
fig.KD-Assy05.e
KD-8
(Kick)
Making the Settings
Anchor Bolt
Head
Foot Plate
Stand
Output Jack
Install the kick pedal securely.
Beater
Commercially Available Kick Pedal
Beater
* Adjust the height so that the entire pedal comes
into contact with the floor.
TD-3KW_e 12 ページ 2006年1月24日 火曜日 午後6時7分
 Loading...