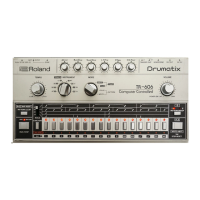
4. Start the rhythm.
Check the Rhythm LED indicators (L), which display the Rhythm Pattern
numbers.
5. If the rhythm number is wrong, press the SELECTOR switch (K) to rewrite
the correct Rhythm Pattern, and then press the TAP button (M) to write it into
Memory.
If it is all right, just press the TAP button (M) to advance to the next bar.
6. Repeat step 5 until you reach the last bar (D.C. bar).
7. Stop the rhythm.
A composition of up to 64 bars in a Track can be programmed. The TR-606 has 8
Tracks. Refer to the ADVANCED COURSE MANUAL
for details.
Playing the Rhythm Track
1. Stop the rhythm.
2. Set the MODE selector (B) to TRACK PLAY.
3. Set the TRACK/INSTRUMENT selector to #1.
* The PATTERN GROUP will be selected automatically
4. Press the CLEAR/RESET button (F) to reset the Track to the 1st bar.
5. Start the rhythm.
* The rhythm will run and return to the 1st bar of the track at the end of the
D.C. bar. This will be continuously repeated.
ADVANCED COURSE
PATTERN PLAY Mode allows performance of the 32 available Rhythm Patterns you
have programmed. Rhythm Pattern selections are made using the 16 Selector
Switches (K) and the Pattern Group (N) Selector. Within certain guidelines, adjacent
Rhythm Patterns may be chained together to perform as single, or more complex
Rhythm Patterns.
TRACK PLAY Mode allows the performance of an entire Rhythm Track composition
programmed into one or more of the 8 TRACK Selector positions.
TRACK WRITE Mode allows any of the 16 Rhythm Patterns programmed into
Pattern Group I (N) (or the 16 Pattern Group II rhythms) to be combined into
compositions (Tracks) and programmed into any one or more consecutive memories
selected by the Track selector.
(A) POWER Switch/VOLUME Control
The master VOLUME Control (A) also serves as the power On/off Switch, cutting off
all D.C. power to the TR-606 when rotated fully counter clockwise. For the TR-606 to
perform any function, this switch must be rotated clockwise past its initial detent. The
'On' status of the TR-606 may be checked using the various LED indicators (L) on the
front panel.
Once the POWER Switch/VOLUME Control (A) is pasts its initial detent, it will

 Loading...