Do you have a question about the Roland VersaUV LEC2-300 and is the answer not in the manual?
Covers essential information about the printer, including part names, operation panel, display, and media types.
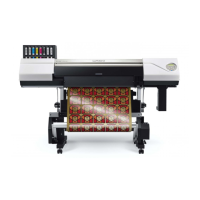
Details the names and functions of various parts of the printer unit, front and rear.
Describes the printer's operation panel buttons and lights, and their functions.
Explains the display screen elements and how to navigate settings using cursor keys.
Introduces the two main types of media: roll and sheet media for output.
Lists the size and other conditions for media compatible with the printer.
Provides a diagram showing the structure of the main menu and its submenus.
Details the menu structure for functions like cleaning, printing tests, and cut settings.
Explains how to change the printer's menu language and units of measurement.
Covers fundamental operations such as power supply, media setup, and output controls.
Guides on turning the printer on/off and precautions for power supply usage.
Explains the sleep mode feature and recommends settings to reduce power consumption.
Provides detailed procedures for loading both roll and sheet media onto the printer.
Explains the procedure for separating media after output or cutting operations.
Details how to accurately adjust ink landing position misalignment after initial setup.
Covers LAN settings verification and how to prevent ink sedimentation.
Instructions on how to pause, resume, or cancel printing operations.
Explains out-of-ink warnings and the process for preventing ink sedimentation.
Details the steps for printing, including preparations and output procedures.
Outlines the daily workflow, printing tests, and normal cleaning procedures.
Details batch settings for printing and the steps to start the printing output.
Covers the procedures for cutting media, including preparations and output.
Covers preventing media pulling and adjusting cutting settings based on tests.
Explains batch settings for cutting and the procedure to start the cutting output.
Guides on combined printing and cutting operations, including preparations and output.
Covers printing tests, normal cleaning, and cutting adjustments for combined operations.
Guides on batch settings and starting combined print and cut jobs.
Provides methods to improve the quality of printed and cut output.
Explains how to use functions for improving output quality.
Details accurate adjustments for ink landing position misalignment.
Describes feed correction to reduce horizontal bands or banding.
Covers adjusting print head height and settings for different media.
Guides on fine-tuning cutting conditions like force, speed, and offset.
Explains how to adjust blade extension for precise cutting.
Details cutting tests and adjustments for cutting print surfaces.
Explains how to align cut line lengths during cutting.
Describes adjusting cutting for attractive corners, useful for stickers.
Explains how to set machine cutting priority over software RIP settings.
Guides on correcting misalignment between printing and cutting.
Covers manual alignment with crop marks and sensor correction.
Details correcting the crop mark sensor for different media.
Explains how to adjust sensor level based on media characteristics.
Guides on resetting the crop mark sensor to initial settings.
Covers methods to improve the speed and efficiency of operations.
Explains saving and loading custom settings as presets for different media.
Guides on loading saved presets to quickly apply optimized settings.
Details setting the base point to define the print area on the loaded media.
Covers speeding up output for narrow media by reducing head movement.
Provides information on the optional media take-up unit.
Lists and briefly explains other useful functions like horizontal printing tests.
Provides an introduction to maintenance, including handling notes and basic knowledge.
Provides critical notes on handling the machine, print heads, and ink cartridges safely.
Outlines types, timing, and knowledge required for regular and advanced maintenance.
Explains the automatic maintenance feature and important notes for its proper function.
Details steps to take when the printer will be unused for an extended period.
Covers routine maintenance tasks for the printer.
Guides on cleaning the media path, carriage roller, and platen to maintain print quality.
Covers precautions and proper methods for disposing of discharged fluid.
Details daily maintenance tasks, including ink cartridge care and printing tests.
Provides medium and powerful cleaning methods when normal cleaning fails.
Explains when and how to perform manual cleaning for print heads.
Details cleaning procedures for UV-LED devices, required monthly or more.
Covers specialized maintenance procedures for advanced issues.
Addresses uneven color issues with white ink via ink circulation and light choke cleaning.
Provides solutions for uneven color issues with non-white inks.
Explains ink renewal and print head restriction methods for severe quality issues.
Details how to restrict specific print heads to mitigate discharge issues.
Describes an emergency measure to clean the print head surface when issues persist.
Addresses issues affecting print quality, such as stripes, soiling, and uneven colors.
Discusses print head issues, media loading, and settings causing coarse prints or stripes.
Addresses print heads touching media or dirty rollers causing soiled prints.
Covers causes for unstable colors, including ink shaking and media wrinkles.
Explains why cutting might be misaligned due to media, conditions, or roller placement.
Addresses misalignment between printing and cutting, especially with crop marks.
Troubleshoots issues specific to cutting with crop marks.
Troubleshoots issues with automatic crop mark detection, including media condition and reflectivity.
Addresses misalignment when printing and cutting with crop marks, suggesting correction methods.
Covers issues related to media feeding, including wrinkles, jams, and smoothness.
Discusses causes for media wrinkling or shrinking, like loading and humidity.
Covers issues related to media not feeding straight, often due to loading.
Addresses causes of smooth media feeding, like object contact or dirty rollers.
Provides troubleshooting steps for media jams, including error messages and head height.
Covers common machine malfunctions and their troubleshooting steps.
Offers emergency measures if the print head carriage stops or does not move.
Covers troubleshooting steps if the printer unit does not power on or operate.
Addresses issues with media separation, checking for installed knives and cut rails.
Lists common messages prompting correct operation and required actions.
Lists common messages that prompt correct operation and required actions.
Describes various error messages and the actions needed to remedy them.
Provides detailed steps for preparing the machine before moving it.
Details the necessary preparations before physically moving the printer.
Guides on removing media and the blade holder as the first step before moving.
Details ink circulation procedure, specifically for white ink usage.
Covers precautions and proper methods for disposing of discharged fluid.
Explains how to remove ink collected below the wiper.
Guides on securing the print heads using the retainer for safe transport.
Provides instructions for reinstalling the printer after it has been moved.
Lists key technical specifications of the printer, including areas and blade details.
Details the maximum printing and cutting areas and their dimensions.
Specifies the maximum printing area when crop marks are utilized.
Defines the separation location for media during continuous printing.
Provides information on cutting conditions and service life for different blades.
Contains licensing information and company trademarks.