10
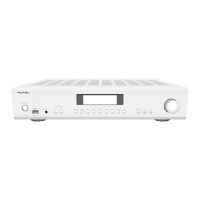
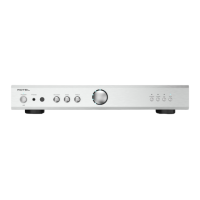
A8 Stereo Integrated Amplifier
Headphone Output
3
The headphone output allows you to connect headphones for private
listening. This output accepts a standard 3.5 mm (1/8”) mini stereo
headphone connector. Plugging in a set of headphones will mute the
signal to the speaker outputs.
NOTE: Because the sensitivity of speakers and headphones can
vary widely, always reduce the volume level before connecting or
disconnecting headphones.
Auto Power Down
e
This function allows the A8 to enter STANDBY mode when there is no
audio input detected.
When the
selector
is in the ON position, the A8 will automatically power
off to standby mode if there is no audio signal for 20 minnutes. The auto
power off timer will be restarted if changes made to the volume or source
or audio are detected.
To disable above functions, push the
selector
to the OFF position.
SERVICE Connector
r
The SERVICE connector is for use by Authorized Service Centers only.
Audio Controls
Volume Control
8C
Turn the controls clockwise to increase the volume, or counter clockwise
to decrease the volume. From the remote control press the volume +
or - button
C
to turn the volume up or down. Press the button
D
to
completely mute the volume.
Balance Control
5
The Balance Control adjusts the left-to-right balance of the sound
output. Normally the control should be left in the center position. In
some situations, typically when the main listening position is not ideally
centered between the speakers, it may be necessary to adjust the control
to achieve proper left-to-right balance. Turning the Balance rotary knob
5
counter-clockwise shifts the sound balance to the left. Turning the
Balance rotary knob
5
clockwise shifts the sound balance to the right.
Bass and Treble Controls
67
Turn the Bass / Treble rotary knobs
67
clockwise to increase the bass or
treble output. Turn the Bass / Treble rotary knobs
67
counterclockwise
to decrease the bass or treble output.
A properly setup high-performance audio system produces the most
natural sound with little or no adjustment of the tone controls. Use these
controls sparingly. Be particularly careful when turning the controls up
(clockwise). This increases the power output in the bass or treble range,
increasing the load on the amplier and speakers.
NOTE: The Bass and Treble controls circuits are bypassed to ensure
the purest possible sound, which is defaulted. Turn the Bass / Treble
rotary knob if you want to adjust the Controls.
Source Input Selector
9G
Press the corresponding input button on the front panel
9
or remote
control
G
to select the desired listening source.
LED Control
LED Dimmer Control
B
To temporarily change the brightness of the LEDs on the front panel,
press the DIM
B
button on the remote control.
To permanently change the LED brightness or disable the LEDs press and
hold the CD button
9
on the front panel for 5 seconds. Cycle through
the dim patterns Bright, Dim, Off by repeatedly pressing the CD button.
The selected brightness will be permanently saved if there is no activity
for 5 seconds.
NOTE: The volume and source LEDs will illuminate with any changes
to the volume or source selection. The LEDs will automatically dim
to the user selected level after 5 seconds of no further changes.
LED Color Control
There are four color settings for the LED ring around the volume knob
and the LEDs above the source buttons: Red, Green, Blue and Purple.
The default color setting is blue. To change the LED lighting color, press
and hold the
AUX
button
9
on the front panel for 5 seconds and toggle
through the different colors by repeatedly pressing the AUX button. The
unit will time-out and select the current color if there is no activity for
5 seconds.
NOTE: This setting is saved permanently even after the A8 is
powered off.
Protection Circuit
The unit has both thermal and over-current protection circuitry that
protects the amplier against damage in the event of extreme or faulty
operating conditions. The protection circuits are independent of the audio
signal and have no impact on sonic performance. Instead, the protection
circuits monitor the temperature of the output devices and shut down
the amplier if temperatures exceed safe limits.
Most likely, you will never see this protection circuitry in action. However,
should a faulty condition arise, the amplier will stop playing and the
POWER indicator
2
on the front panel will turn red.
If this happens, turn the amplier off. Let it cool down for several minutes,
and attempt to identify and correct the problem that caused the protection
circuitry to engage. When you turn the amplier back on, the protection
circuit will automatically reset and the POWER indicator
2
should be
blue, indicating that the amplier is operating normally.
In most cases, the protection circuitry activates because of a fault condition
such as shorted speaker wires, or inadequate ventilation leading to an
overheating condition. In very rare cases, highly reactive or extremely low
impedance speaker loads could cause the protection circuit to engage.
Headphone Output
Auto Power Down
SERVICE Connector
[
Audio Controls
©
□
LED Control
®
Protection Circuit
 Loading...