4 Installation
Installation manual
6
RBLQ05+07C2V3
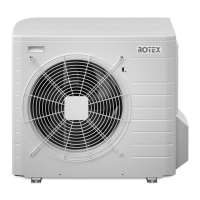
ROTEX HPSU monobloc compact outdoor unit
4P501825-1 – 2017.08
4.2.2 To install the outdoor unit
CAUTION
Do NOT remove the protective cardboard before the unit is
installed properly.
1 Lift the outdoor unit.
2 Install the outdoor unit as follows:
a Air outlet
NOTICE
Properly align the unit. Make sure the backside of the unit
does NOT protrude.
3 Remove the protective cardboard and instruction sheet.
a Protective cardboard
b Instruction sheet
NOTICE
To prevent damage to the supporting feet, do NOT tilt the
unit sideways in any way:
4.2.3 To provide drainage
Make sure that condensate can be evacuated properly. When the
unit is in cooling mode, condensate may also form in the hydro part.
When providing drainage, therefore make sure to cover the entire
unit.
NOTICE
If the unit is installed in a cold climate, take adequate
measures so that the evacuated condensate cannot
freeze.
INFORMATION
For information on the available options, contact your
dealer.
NOTICE
Provide at least 300 mm of free space below the unit.
Additionally, make sure the unit is positioned at least
100mm above the expected level of snow.



 To Next Page

