3 x Installation
25
FA ROTEX Solaris RPS3 25M - 03/2010
2. Align the hot water storage tanks. The centre-to-centre distance between the storage tanks must be 830 mm. Also observe
the necessary clearance of 200 mm to any wall.
3. Screw the connecting T-pieces from the CON RA 25M connection set and the storage tank extension kits CON SX and
CON SXE to the return connections of the hot water storage tanks.
4. Fit the return lines to the connecting T-pieces between the hot water storage tanks with ball valve and push-in fittings
Ø28mm.
5. Fit the return line to the pump-side connection of the T-piece on the first hot water storage tank with ball valve and push-
in fitting Ø 28 mm from the CON RA 25M connection set.
6. Insert the blanking plug from connection set CON RA 25M into the free connection of the T-piece on the last hot water
storage tank in a row and secure it with the retaining bracket.
7. Fit equalising pipe AGL for connecting 2 hot water storage tanks ( 16 01 08) and the equalising pipe AGLE (
16 01 12) for connecting a further hot water storage tank to the corresponding storage tank connections (see chapter 2.1,
Image 2-1, Pos. 18) in a row.
8. Install circulation pump and where applicable optional booster pump near the storage tank return connections. Pumps, piping
and installation material must be provided on-site.
The circulation pump and the optional booster pump must be of sufficient capacity to ensure the nominal flow rate in the
collector circuit (see section 3.2, Image 3-4).
9. Fit one FlowGuard to each Solaris flow connection of the storage tanks (see chapter 3.6).
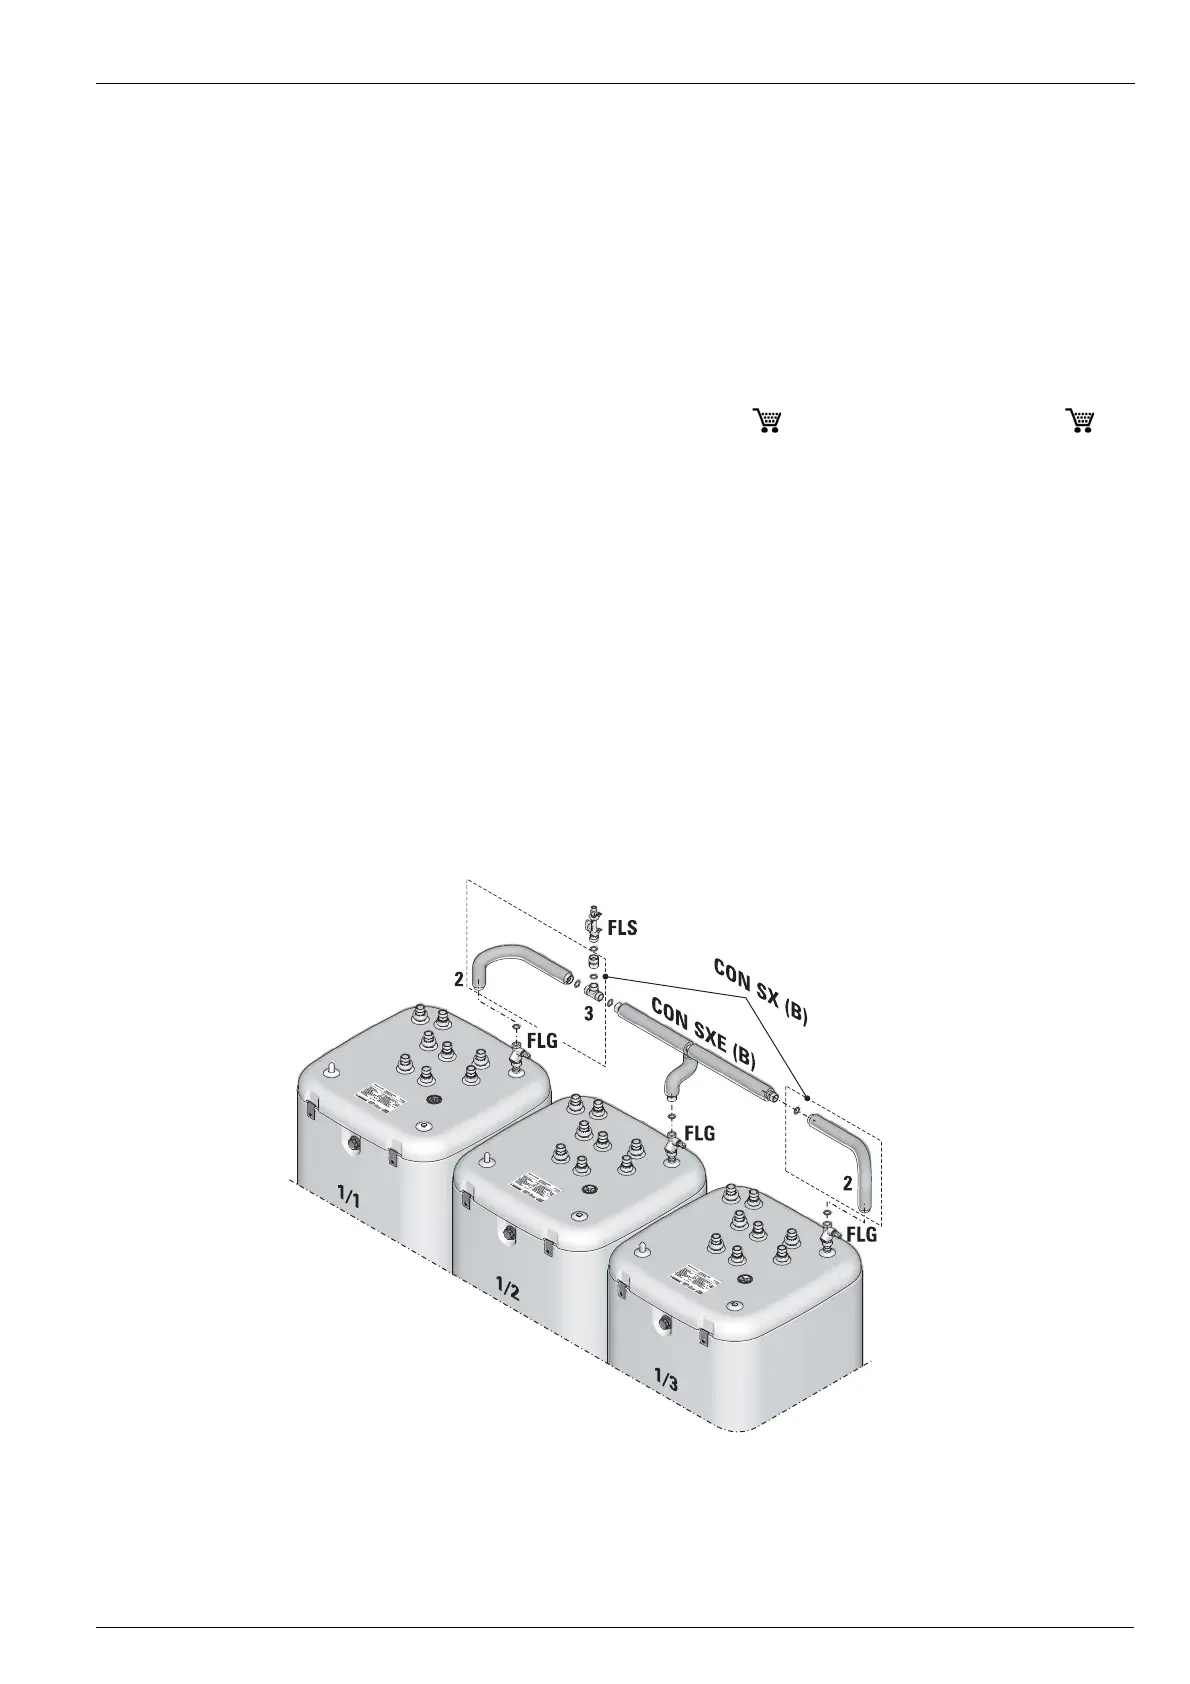
10. Fit flow manifolds CON SX (B) on the left and right of the connecting T-piece (Image 3-34, Pos. 2 and 3).
When installing 3 hot water storage tanks, fit flow manifold from CON SXE (B) between connecting T-piece and 3rd hot
water storage tank.
11. Place flat seals on the FlowGuards and screw the flow manifold to the FlowGuards using union nuts.
12. Fit a seal to the connecting T-piece and screw on the double union nut (1").
13. Insert the seal in the double union nut (1").
14. Fit the FlowSensor (see Chapter 3.6).
1/1-3 ROTEX Hot water storage tank
2 Solaris flow manifold
3 Connecting T-piece
CON SX (B) flow manifold from storage tank extension kit
CON SXE (B) flow manifold from storage tank extension kit 2
FLS FlowSensor
FLG FlowGuard
Illustration 3-34 Installing the flow manifold from storage tank extension kits CON SX and CON SXE
 Loading...