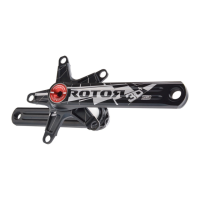
#1. Montaje del Spidering / araña en eje y posicionamiento OCP.
Posicione el Spidering / araña (1) sobre el eje (2).
Para regular la posición OCP de su plato ovalado debe alinear la marca
del Spidering / araña con la línea del eje de su posición OCP.
Coloque el brazo de biela derecho sobre el conjunto de Spidering / araña
+ eje. Posicione la biela sobre el pivote roscado en el Spidering.
Rosque el tornillo de la biela con una llave allen 8 mm hasta que la biela
toque el plato Spidering.
Allen 8 mm
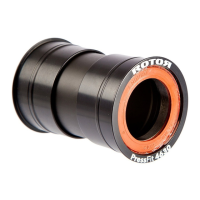
#6. Tightening and adjusting non drive side.
Tighten clockwise the non drive side crank arm bolt with an 8 mm Allen
key to 35 Nm torque.
#6.1 Turn the preload nut clockwise to eliminate any lateral play in the
crankset.
#6.2 Secure the preload nut by tighten clockwise the preload bolt with a
2 mm allen key.
Fine adjustment
If the crankset do not rotate smoothly, remove a 0.5 mm plastic
washer from the non drive side and repeat the assembly
adjustment steps #6.1 and #6.2
If there is lateral play, add an addittional 0.5 mm plastic washer
on the non drive side.
Ensure that the preload nut is still tightening on the non
drive side crank arm.
#6.3 Fine adjustment:
35 Nm
8 mm Allen
2 mm Allen
#6.1
#6.2
1
2

 Loading...