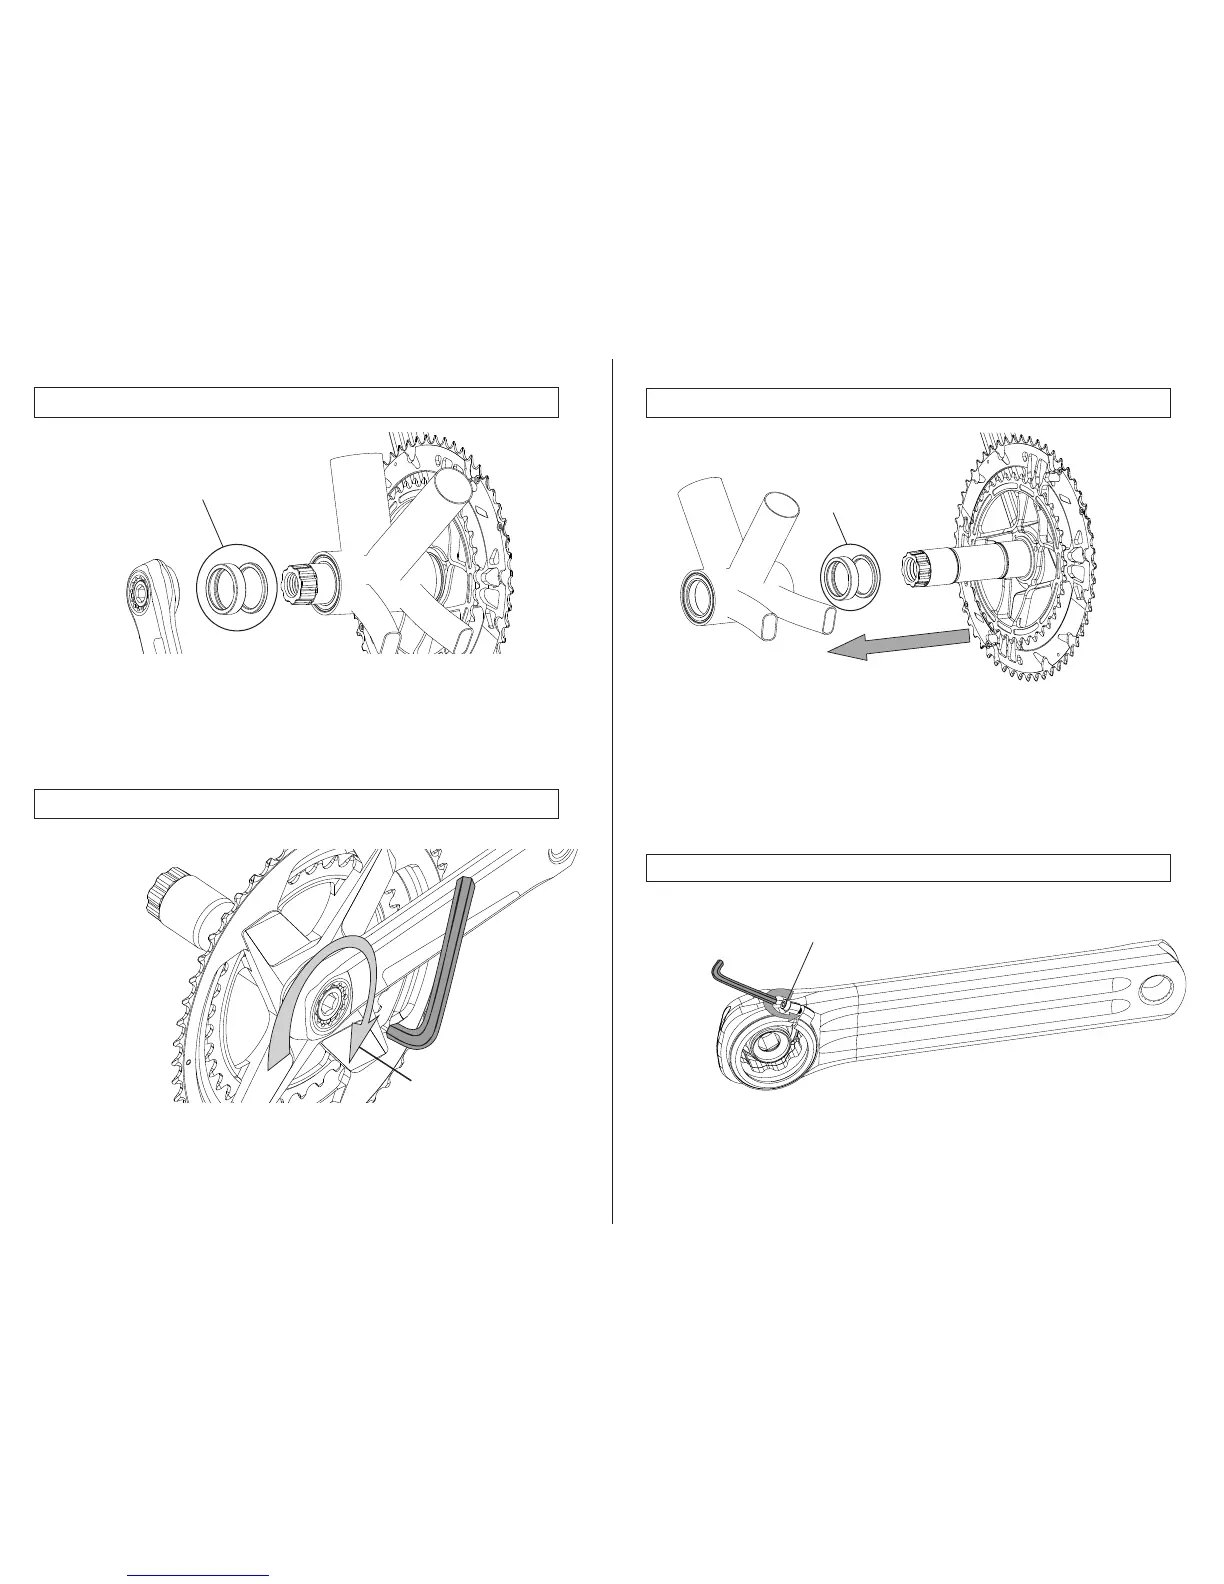
#3. Preparación conjunto izquierdo.
#2. Montaje del conjunto derecho en cuadro.
Afloje el tornillo de cierre “T” con una llave allen 2 mm girando en
dirección antihoraria; no lo desmonte.
Gire la tuerca de precarga en sentido antihorario hasta que toque la
biela.
Revise el manual de compatibilidad para seleccionar los espaciadores
necesarios para montar sus bielas ALDHU 3D+ en su cuadro.
Introduzca los espaciadores correspondientes al lado derecho “DS” en el
eje.
Introduzca el conjunto derecho de biela + Spidering / araña + eje en su
cuadro.
DS
Allen 2 mm
T
NDS
Review the compatibility manual to select the necessary spacers for
ALDHU 3D+ cranksets into your frame.
Install the selected non drive side spacers “NDS” onto the axle.
Install the non drive side assembly (non drive side crank arm + preload
nut) onto the axle.
#4. Non drive side assembly process.
#5. Tightening drive side assembly.
Tighten clockwise drive side crank arm bolt with an 8 mm Allen key to 35
Nm torque.
8 mm Allen
35 Nm

 Loading...