SAFETY WARNING
This owners manual contains important and useful information regarding the proper installation, operation,
care, and maintenance of your ROTOR product. Carefully read, follow and understand the instructions as
detailed in this owner’s manual. Keep this manual in a safe place for future reference.
If you have any doubt whatsoever regarding your ability to install or service this product, please consult your
ROTOR dealer and seek the assistance of a professional bicycle mechanic. Do not perform any
modifications or adjustments that are not outlined in this manual.
Incorrect installation or servicing may impair performance, and could result in a dangerous situation leading
to serious injury or death.
Components that have experienced excessive wear, deformations or impacts or other damage need
immediate professional inspection or replacement.
Please have this product regularly inspected by a qualified mechanic for any signs of wear or damage.
Failure to perform necessary and essential maintenance could drastically reduce the service life of your
ROTOR product and reduce its performance.
If you have any questions, please contact a professional bike mechanic or your nearest ROTOR dealer for
additional information.
Caution!: Please consult the relevant manufacturer’s instruction manuals for your BB set or pedals, If
necessary, consult their technical service department for the correct installation procedure.
MAINTENANCE
Inspect your ROTOR product for wear, looseness or damage including cracks, dents and serious scratches,
before each ride and after every fall or crash. Do not use your ROTOR product until it has been thoroughly
inspected, repaired or replaced.
WARNING: Continuing to use damaged parts may lead to loss of control and cause serious injury or death.
Cyclists should inspect their whole bicycle and parts on a regular basis or consult with a professional bicycle
mechanic, to determine the need for service, or replacement and to detect damage that may have occurred
from normal use.
Check all parts for damage and wear before every use. Check the bolts and other fasteners periodically for
tightness. Ensure they are tightened to the correct torque values.
ROTOR WARRANTY POLICY:
- The ROTOR products and its components are guaranteed for 2 YEARS against any manufacturer defects or defective materials. In the
event of a warranty defect, ROTOR´s sole obligation under this warranty is to repair or replace, at its option, the defective part or product at
no charge. Moreover, in some countries, ROTOR is obliged to ensure any legal warranty defined by law for the customer's protection.
- Elements subject to wear and breakdowns that the manufacturer is not responsible for, are not covered by this warranty.
- Failures or breakdowns caused by improper use, poor assembly or inadequate maintenance as declared in the supplied instructions or
the user manual are not covered by this warranty.
- Always keep your receipt or invoice.
- The following acts void this warranty:
- Failure to fulfil the requirements above.
- Improper installation.
- Improper use or installation of inadequate parts.
Warranty Service: Original purchaser must send their ROTOR product along with the retailer's original bill, credit card receipt or
other satisfactory proof of date of purchase of the product.
These instructions and instructions for other ROTOR Bike Components products are available for download at:
www.rotorbike.com
ROTOR Componentes Tecnológicos SL - info@rotorbike.com
Pol. Ind. Conmar C/Miño, 14. AJALVIR MADRID SPAIN Tel. +34 918843846 Fax. +34 918843865
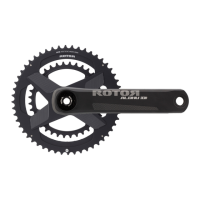
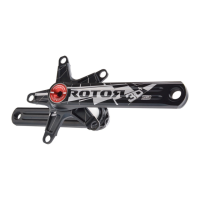
ALDHU 3D+ - OCP MOUNT.
MANUAL DE INSTALACIÓN.
ROTOR COMPONENTES TECNOLÓGICOS SL
Pol.Ind. Conmar. C/Miño, 14. 28864, Ajalvir, Madrid, Spain.
Phone: +34 91 884 38 46 / Fax: +34 91 884 38 65
COMPATIBILIDAD DE BIELAS ALDHU 3D+ CON LOS CUADROS:
Nota: las epecificaciones pueden cambiar por mejoras sin previo aviso.
Revisado: 08/2017
ADVERTENCIAS PREVIAS AL MONTAJE:
Lea este manual en su totalidad antes de montar o desmontar ningún
componente.
No desmonte o modifique el producto más allá de lo establecido en este
manual.
Tenga en cuenta las normas y legislación de su país, estado o región;
para más información contacte a su distribuidor local.
Verifique que todos los componentes son instalados con el par de apriete
indicado en este manual.
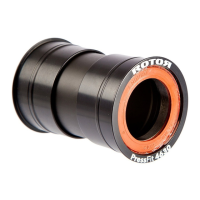
Este manual sólo es válido para los cuadros de
carretera BB30, PressFit30, BBright y BBright Ca.
1
2
3
68mm
68mm
70mm
42mm
46mm
Rosca
ITA
5
86,5mm
41mm
7
79mm
42mm (BBright Ca)/
46mm (PressFit)
6
86mm
46mm
68mm
Rosca
BSA
4
Siga las instrucciones del
manual de compatibilidad.
W
D
W
D
COMPATIBILIDAD DEL MANUAL
CUADRO
Pedalier no incluido con las bielas.
P95-002-00102-002