10 11
STEP 1
INSTALL THE “FEED WATER ADAPTER” (3/8” OR 1/2”)
Note: The “White PE Tubing” has been attached to the “Feed Water Adapter” for easy
installation.
1. Shut o cold water supply valve.
2. Turn on the kitchen faucet to release the water pressure.
Note: Make sure the water has stopped before proceeding to the next step. Get a
towel or bucket to catch any excess water.
STEP 3
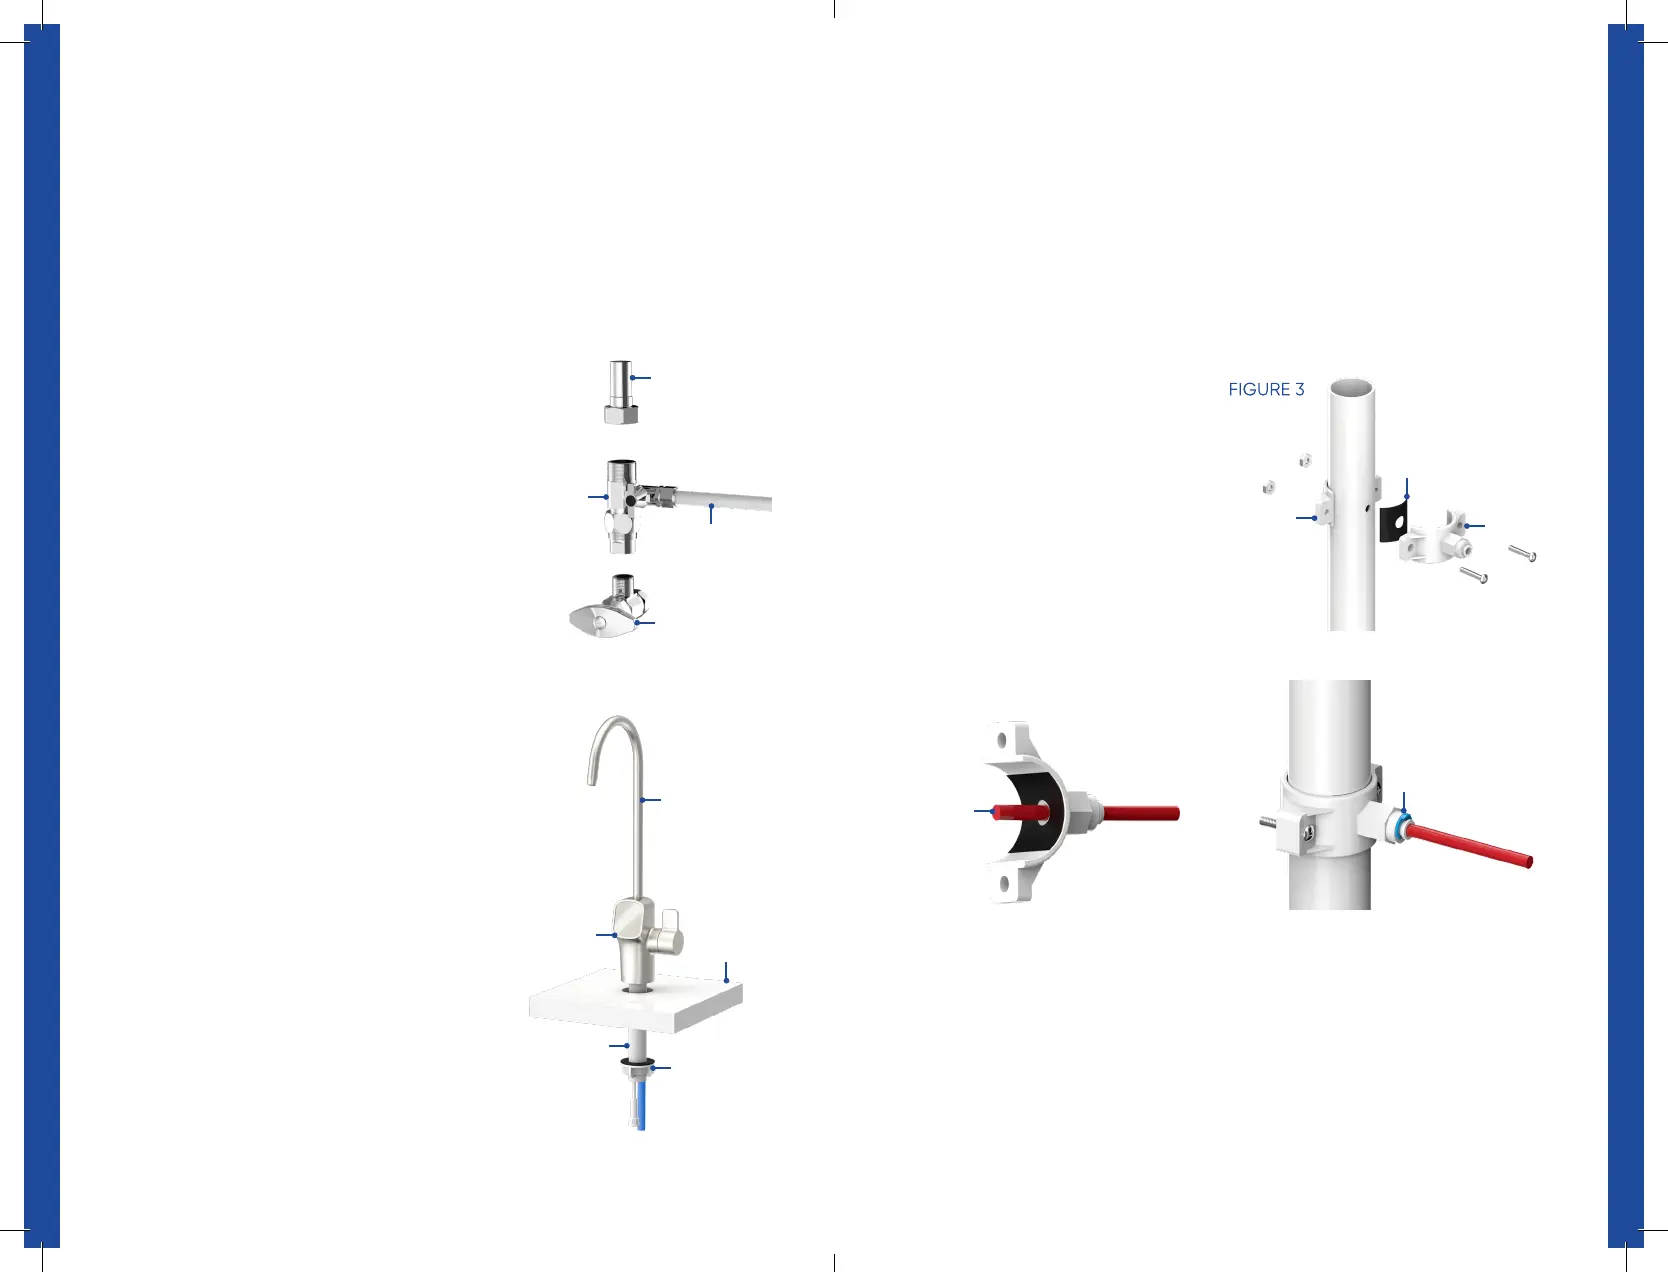
INSTALL THE “DRAIN BRACKET”
1. Paste the “Foam Seal” onto the front plate of the “Drain Bracket”. Make
sure the hole of the “Foam Seal” is aligned with the hole of the ”Front
Plate” (Figure 3).”
2. Select a position as high as possible on the vertical drainpipe and drill a
1/4” hole. Be sure not to penetrate the opposite side of the pipe.
3. Slip the front plate on one end of the tubing and insert the tubing into
the drilled hole about 0.6” (Figure 4).
STEP 2
INSTALL THE ROYAL PRESTIGE
®
FRESCAFLOW FAUCET
Note: If your kitchen sink or countertop does not have
an existing hole, you will have to drill one. Refer to
“Drilling a Hole in Your Countertop” on page 14 & 15.
FIGURE 2
Faucet Spout
Faucet Body
Faucet Stem
Mounting Nut
Countertop
3. Disconnect the cold water pipe from the
cold water supply valve, with an adjustable
wrench or pliers.
4. Attach the “Feed Water Adapter” onto the
cold water supply valve and tighten it with
an adjustable wrench. (See Figure 1).
Note: If the cold-water pipe is 1/2”, unscrew the
two converters from the “Feed Water Adapter”.
5. Attach the cold water pipe onto the “Feed
Water Adapter” and tighten with an
adjustable wrench.
6. Make sure all fittings are tightened.
FIGURE 1
3/8” Cold Water Pipe
Feed Water
Adapter
Cold Water Supply
White PE Tubing
1. Push the “Faucet Spout” into
the “Faucet Body” until all three
black gaskets are fully inserted.
2. Insert the “Faucet Stem,”
“Faucet Power Cord,” and “Blue
PE Tubing” into the hole in the
countertop.
3. Under the sink, slip on the
“Mounting Nut” and tighten.
FIGURE 5FIGURE 4
About 0.6”
4. Position the back plate on the
“Drainpipe” by tightening the
screws and nuts evenly while
leaving the tubing in the hole
(Figure 5).
5. Insert the “Small Blue Lock Clip”
on the fitting to secure the
connection.
Back Plate
Foam Seal
Front Plate
Small Blue Lock Clip
 Loading...