12 13
STEP 6
CONNECT “POWER CORD”
1. Connect the Royal Prestige
®
FrescaFlow Faucet to the system:
• Insert the “Faucet Power Cord” which is attached to the Royal Prestige
®
FrescaFlow Faucet into the “Faucet Power Port” (Figure 10) at the back
of the system housing and tighten the nut.
2. Connect “Power Adapter”:
• Insert the DC head of the “Power Adapter” into the “System Power Port”
at the back of the system housing (Figure 10).
STEP 4
POSITION THE ROYAL PRESTIGE
®
FRESCAFLOW HOUSING
Note: It is not recommended to place the housing against the cabinet, as there maybe
vibrations when the system is running.
1. The Royal Prestige
®
FrescaFlow should be placed under the cabinet on a
flat surface.
2. The front panel of the unit should be facing outward so you can easily
access the filter cartridges and check the status indicators.
STEP 5
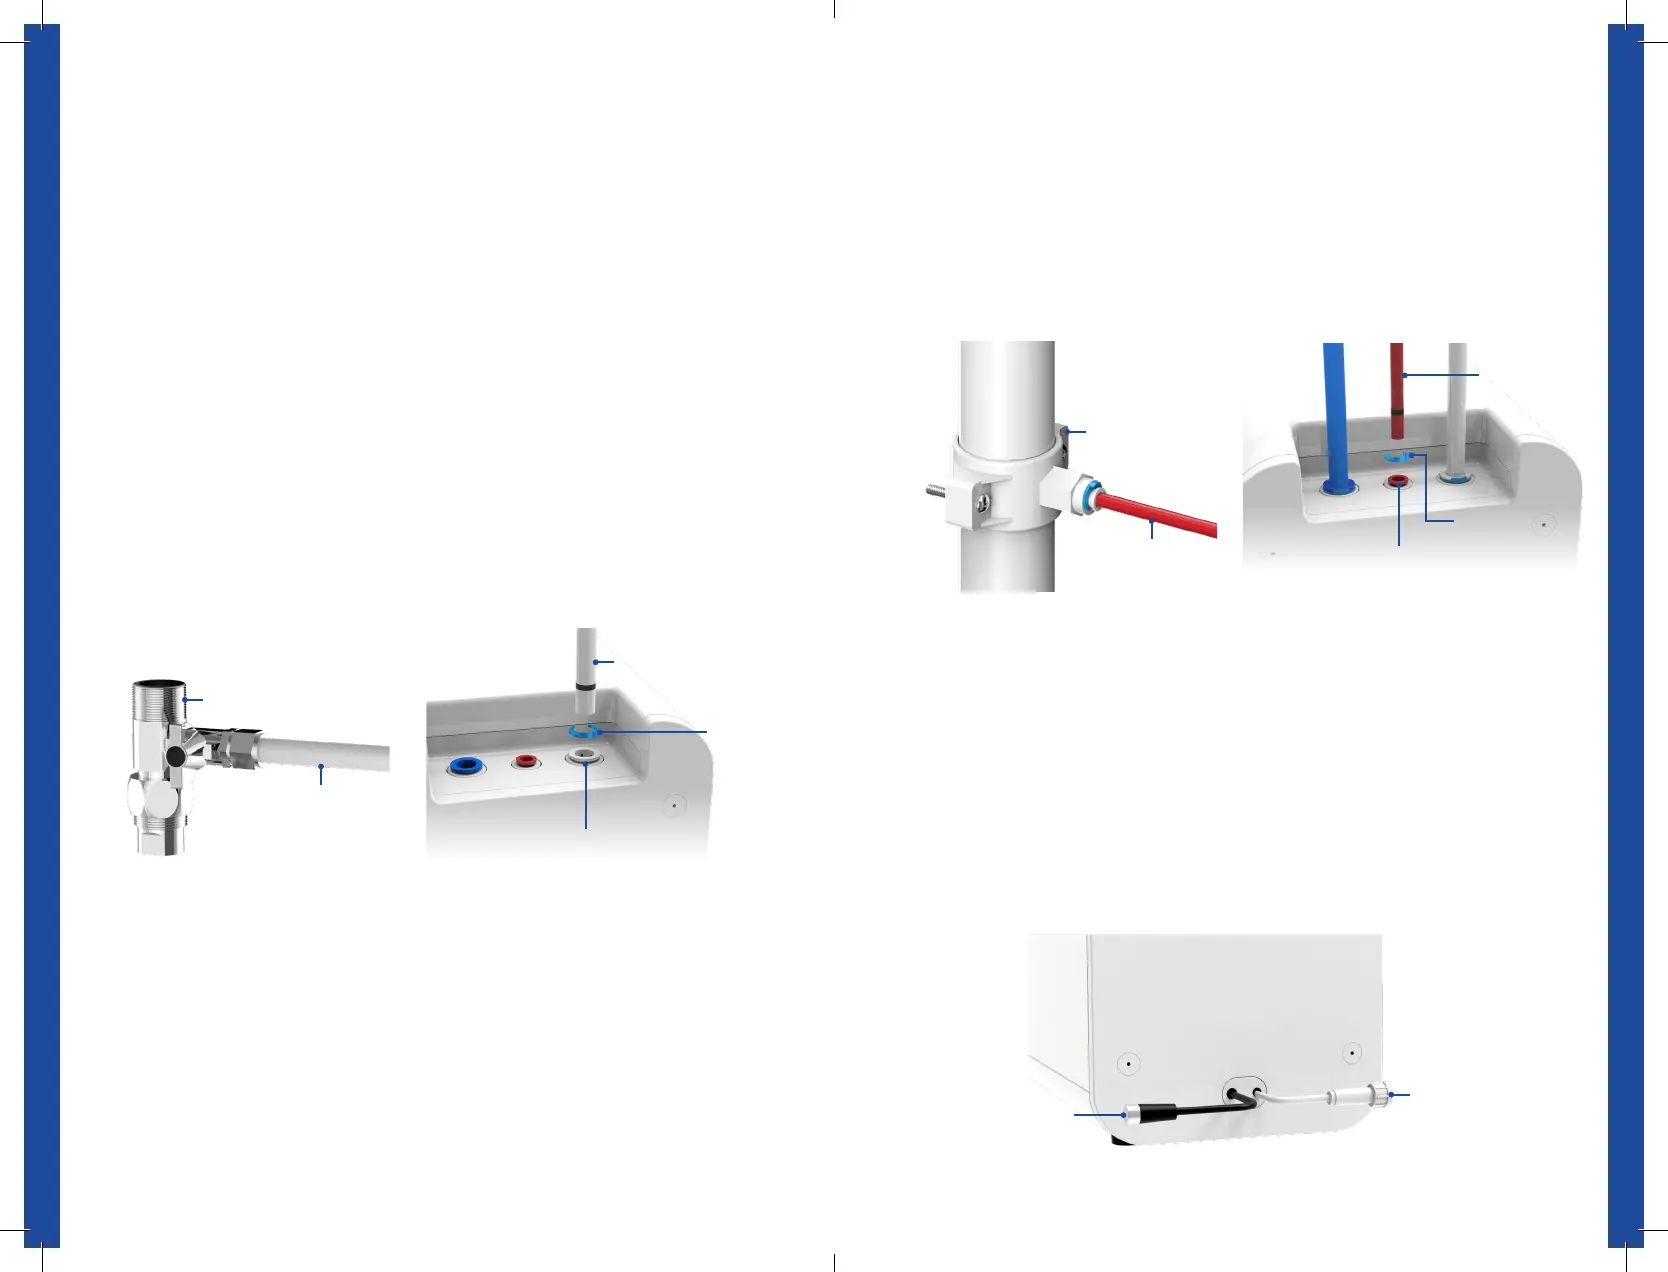
CONNECT TUBING
Note: Confirm the tubing length you need first, and then cut the tubing if it is too long.
Refer to “Installations Tips” on page 8.
INSTALL THE INPUT WATER TUBING (WHITE PE TUBING)
1. Remove the plug from the “Input Water Port”.
2. Identify the “White PE Tubing” which has been attached to the “Feed
Water Adapter” (Figure 6).
3. Insert the other end of the tubing into the “Input Water Port” (Figure 7) and
insert the “Large Blue Lock Clip” on the fitting.
Note: Make sure the tubing is fully inserted until you reach the mark on the tubing.
INSTALL THE FILTERED WATER TUBING (BLUE PE TUBING)
1. Remove the plug from the “Filtered Water Port”.
2. Identify the “Blue PE Tubing” that is connected to the faucet.
3. Insert the other end of the tubing into the “Filtered Water Port” (Figure 9)
and insert the “Large Blue Lock Clip” on the fitting.
Note: Make sure the tubing is fully inserted until you reach the mark on the tubing.
INSTALL THE DRAIN WATER TUBING (RED PE TUBING)
1. Remove the plug from the “Drain Water Port.”
2. Identify the “Red PE Tubing” which has been attached to the “Drain
Bracket” (Figure 8).
3. Insert the other end of the tubing into the “Drain Water Port” (Figure 9) and
insert the “Small Blue Lock Clip” onto the fitting.
Note: Make sure the tubing is fully inserted until you reach the mark on the tubing.
FIGURE 6 FIGURE 7
FIGURE 8 FIGURE 9
Feed Water Adapter
White PE Tubing
White PE Tubing
Faucet Power Port
Red PE Tubing
Red PE Tubing
Drain Water Port
Small Blue
Lock Clip
Drain Bracket
System Power Port
Input Water Port
Large Blue
Lock Clip
FIGURE 10
 Loading...