1.6 Operating Instructions
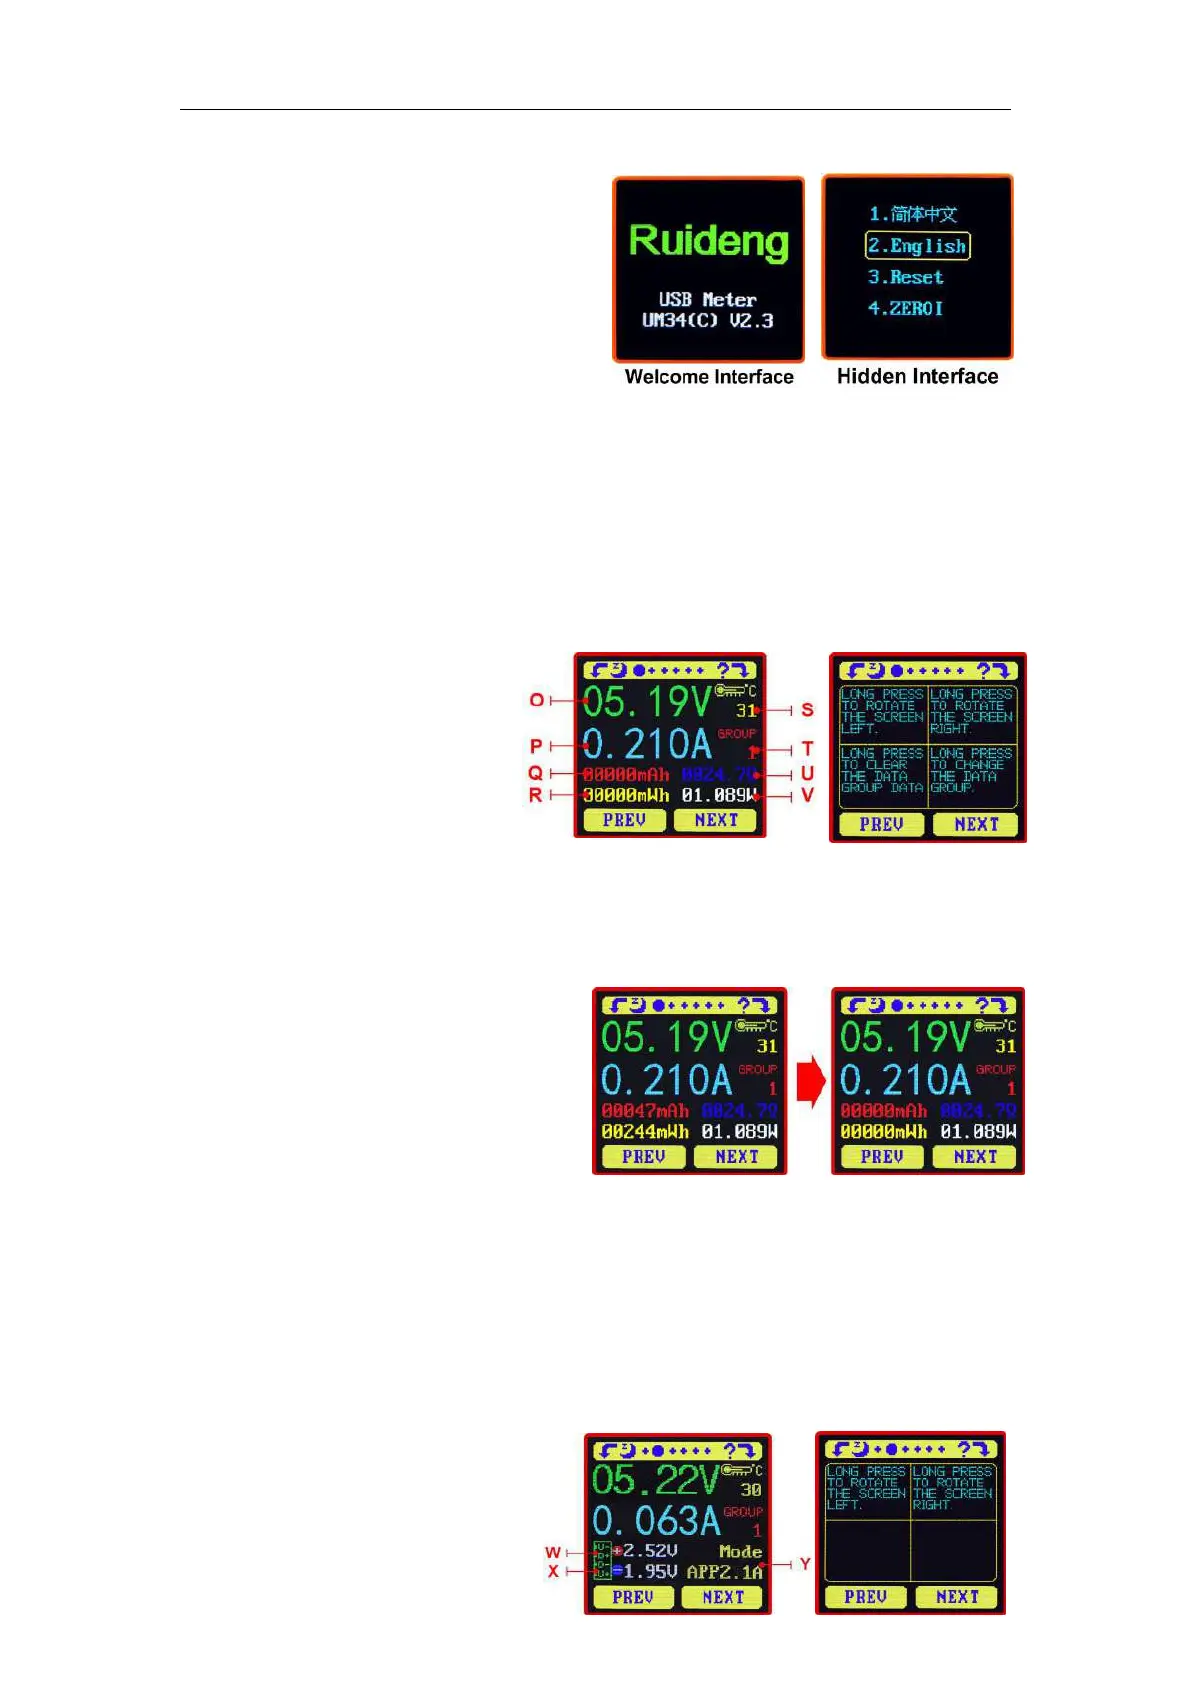
When the unit is first powered on the
welcome screen is displayed followed shortly by
the main interface screen.
Hidden interface: Pressing any button whilst
powering on the module will display four
options. Option 1 selects the Chinese Interface
and option 2 selects the English interface.
The third option is to reset ( after reset, system setting data was restored to the factory
setting, all the stored data was not reset), The four option is to zero the Current reading (Ensure
there is no load connected to the unit). Release the button at the desired selection. Pressing and
holding the button after stepping to the four options will exit the hidden interface.
1.6.1 Interface 1: Main Measurement Interface.( As shown below)
O
:
Voltage Measurement
P
:
Current Measurement
Q
:
Accumulated Capacity
R
:
Accumulated Energy
S
:
Temperature Measurement
T
:
Number of the Data Group in use
U
:
Load Equivalent Impedance
V
:
Power Measurement
Press the ‘ ? ’ button to enter the interface as shown above:
Press and hold the ‘NEXT’ button to switch Data Group. The USB tester can provide a total of 10
groups of data to save and view. These are numbered 0-9.
With Data Groups 1-9 selected the current
mAh and mWh are saved after power off.
They will continue accumulating the next time
the tester is powered on. When the data
group selected is 0 then the current value of
mAh and mWh will be temporarily saved at
power off. When the device is next powered
on these values will be recalled and will begin flashing. When the accumulated mAh exceeds 1
mAh, the previous data will be cleared and accumulation will restart.
With a Data Group selected, press and hold the ‘PREV’ button to clear the mAh and mWh.
(As shown)
Press ‘NEXT’ to switch to the Quick Charge Recognition Interface.
1.6.2 Interface 2: Quick Charge Recognition Interface
W
:
D +: (DP) data positive signal level.
X
:
D-: (DM), data negative signal level.
Y
:
Mode display