12 MH 3 Beam user manual
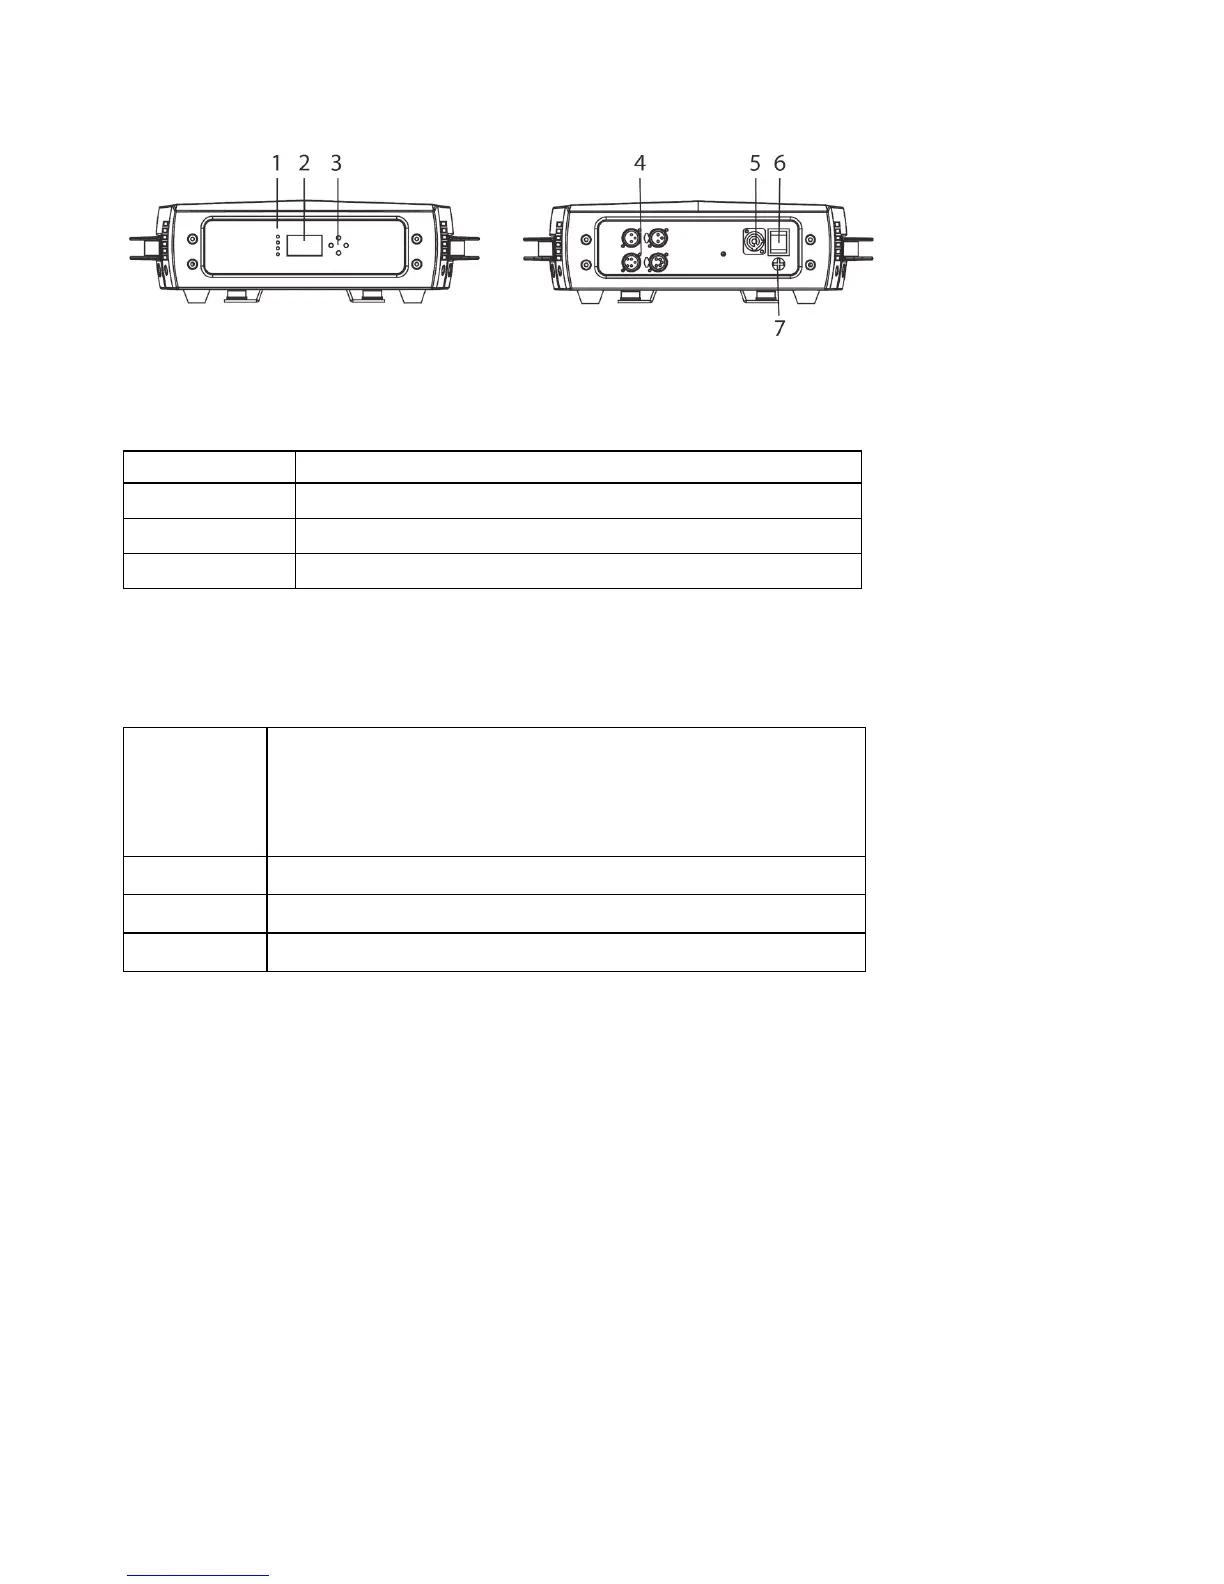
Fixture overview
1 - LEDs
The fixture has four LEDs on the front of the base:
POWER Power on
BATTERY
Reserved for possible future use
WIRELESS
Reserved for possible future use
DMX Valid DMX signal present
2 – Display
3 – Buttons
MENU
•
Activate the menu mode functions, or
•
Return to the previous level of the menu
structure, or
•
Hold to exit the menus
DOWN Go down a menu branch
UP Go up a menu branch
ENTER Confirm the selected function
Hold and press the MENU button to exit the menu mode.
4 - DMX XLR input/output sockets
3 and 5-pin XLR sockets are provided for the DMX input and output
(throughput).
5 – AC mains power input
A blue Neutrik PowerCon socket is provided to connect the fixture to mains
power.
6 – Power on/off switch
7 – Fuse
The T5A fixture fuse is located under the cover below the power switch.