Do you have a question about the Russell Hobbs RH180FFFF55 and is the answer not in the manual?
Ensure appliance is plugged into an earthed socket for safety.
Verify your electricity supply voltage matches the appliance's rating plate (220-240V AC; 50Hz).
Guidelines for appliance use by children and impaired persons, with safety warnings.
Do not store explosive or flammable materials inside the appliance for safety reasons.
Follow instructions to avoid food contamination, especially regarding door opening and cleaning.
Ensure plugs are not damaged and cables are handled carefully to prevent electric shock.
Proper techniques for lifting and moving the heavy appliance to prevent injury or damage.
Proper placement away from heat, sunlight, and with adequate ventilation and clearances.
Use adjustable feet to ensure the appliance is level and stable for optimal operation.
Warning about flammable materials in refrigerant pipes and compressor; keep away from fire sources.
Clean the interior and remove transit materials before the first use.
Allow appliance to stand for 3 hours after positioning before plugging in to settle coolant.
Set thermostat between '3' and '4' after settling, then switch on the appliance.
Diagram identifying all parts, including thermostat, shelves, drawers, and external features.
Check all listed parts are present before proceeding with installation.
Allow appliance to stand for a minimum of 3 hours before plugging into the mains.
Using the temperature control dial to regulate internal temperatures and recommended settings.
Do not open the door for 4 hours after plugging in to allow appliance to reach standard operating temperature.
Fridge compartment: 0-4°C. Freezer compartment: -18°C to -25°C.
Tilt appliance safely (max 45°, min 2 people) and gather required tools for door reversal.
Steps to remove the door by detaching hinges and securing components.
Procedure for removing the middle hinge and transferring screw cap covers.
Placing the freezer door back onto the bottom hinge and aligning the middle hinge.
Ensure freezer door is horizontally and vertically aligned for proper sealing before final tightening.
Placing the fridge door back on the middle hinge and aligning it for proper sealing.
Warning: Light source must only be replaced by a qualified engineer.
Instructions for safely opening the cover, removing, and replacing the LED bulb.
Guidance on storing various foods in different refrigerator compartments for optimal freshness.
Tips for storing fresh food, including using airtight containers and appropriate packaging.
Tips on locating the appliance in a cool, well-ventilated area away from heat sources.
Minimizing door openings and maintaining clean door seals for energy efficiency.
Advice on keeping the freezer door closed and handling food after a power outage.
Steps for cleaning the appliance interior using mild solutions and avoiding excessive water.
Washing the exterior and cleaning the rear components for performance maintenance.
Instructions for preparing the appliance for periods of non-use, including cleaning and ventilation.
Information that the appliance is frost-free and defrosting is rarely needed.
Detailed steps if defrosting becomes necessary, including unplugging and water collection.
Critical warnings against using sharp metal tools or electrical heaters during defrosting.
Diagnostic steps for when the fridge/freezer fails to operate, checking power and connections.
Solutions for when the appliance is too warm or too cold, involving settings and environment.
Identifying and resolving sources of unpleasant smells within the appliance.
Troubleshooting steps for doors not closing properly and understanding unusual operating noises.
Mandatory earthing and confirmation of correct voltage (220-240V) and frequency (50Hz).
Correctly wiring the appliance's plug for UK sockets, matching wire colours to terminals.
Details on the 12-month guarantee, proof of purchase, and how to make a claim.
Understanding the terms and conditions, including what is and isn't covered by the guarantee.
Key specifications including model number, rated voltage, capacity, and external dimensions.
Information on energy consumption, storage volumes, and climate class suitability.
A blank space provided for users to record personal notes or observations.
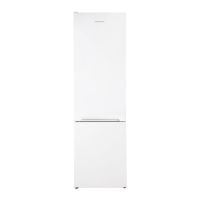
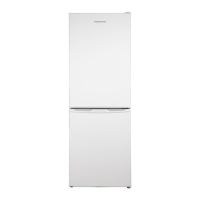
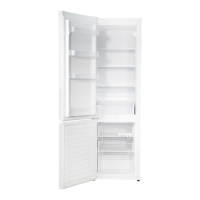
This document is an instruction manual for a Russell Hobbs 54cm Wide Fridge Freezer, identified by model number(s) RH180FFFF55 (B) (C) (G) (R) (S) (W). It provides comprehensive guidance on the installation, operation, maintenance, and troubleshooting of the appliance.
The Russell Hobbs fridge freezer is designed for household use, offering both refrigeration and freezing capabilities. It utilizes a natural refrigerant gas, R600a (Isobutene), as part of its cooling system, which is environmentally friendly. The appliance features separate compartments for fresh food and frozen food, allowing for optimal storage conditions for various items. The temperature within the appliance is controlled by a thermostat dial located inside the fridge compartment, enabling users to adjust cooling levels according to their needs and ambient room temperature. The freezer compartment is designed to be frost-free, eliminating the need for manual defrosting under normal circumstances.
Before initial use, the manual emphasizes the importance of allowing the appliance to stand for a minimum of 3 hours after transportation to allow the coolant to settle. This is crucial for optimal cooling performance. Users are instructed to clean the interior with a bicarbonate of soda solution and warm water before switching it on. The thermostat dial offers settings from 'Off' (off setting) to '5' (coldest setting), with '1' being the warmest. For typical UK homes, a setting between '3' and '4' is recommended. The manual advises adjusting the setting based on ambient room temperature; for instance, a colder setting (4 or 5) in warmer environments and a warmer setting (2) in colder environments. Setting '5' can be used for rapid cooling for up to 2 hours when a large amount of food is introduced, but should be reverted to '3' afterwards to prevent over-cooling.
The manual provides detailed food storage guidelines, recommending specific compartments for different types of food to maintain freshness and prevent contamination. For example, raw meat, poultry, and fish are suggested for the bottom shelf or chiller box, while dairy products and eggs are suitable for the middle shelf. Fruits, herbs, and vegetables should be placed in the crisper drawer, and perishable foods should not be stored in the door balconies. Freezer storage advice includes using airtight containers or wraps for fresh food, avoiding direct contact between frozen and fresh food, and placing pre-frozen food in the freezer quickly after purchase. Suggested maximum storage times for various frozen foods at -18°C are also provided.
The appliance features adjustable shelves in the fridge compartment and glass shelves in the freezer, along with door racks, a bottle rack, a crisper, and freezer drawers for organized storage. An egg tray and an ice cube tray are also included.
A significant usage feature detailed is the door reversal process. This allows users to change the direction in which the doors open, providing flexibility for different kitchen layouts. The instructions outline a step-by-step procedure involving the removal and reattachment of hinges and stoppers, requiring cross-headed and flat-headed screwdrivers. It is advised that a minimum of two people perform this task for safety.
The manual also covers replacing the internal light, which is an energy-efficient, long-life LED. While it should not require frequent replacement, if needed, it must be done by a qualified engineer. Instructions are provided for accessing and replacing the bulb, noting a maximum wattage of 15W.
Regular maintenance is crucial for the appliance's longevity and efficient operation. The manual provides instructions for both internal and external cleaning. Before any cleaning, the appliance must be disconnected from the power supply.
Internal cleaning involves periodically wiping the cavity with a solution of bicarbonate of soda and lukewarm water, and cleaning accessories separately with soap and water. Abrasive products, detergents, or soaps should not be used. After washing, rinsing with clean water and drying carefully is recommended.
For external cleaning, warm soapy water is advised, again cautioning against abrasive products. Users are warned about sharp edges on the underside of the product. It is also recommended to dust the rear of the appliance and the compressor once or twice a year with a brush or vacuum cleaner, as dust accumulation can affect performance and increase energy consumption.
The manual also includes advice for when the appliance is not in use for long periods. In such cases, it should be disconnected from electricity, emptied of all food, cleaned inside, and the door left open to prevent odor build-up.
Energy-saving advice is provided to help users minimize power consumption. This includes avoiding installation near heat sources, ensuring good ventilation, minimizing door opening frequency and duration, keeping door seals clean and intact, storing perishable foods in the coldest part of the fridge, and not overloading the appliance. Hot food should be allowed to cool before being placed in the fridge or freezer.
In the event of a power failure, users are advised to keep the freezer door closed to maintain temperature. Guidance is given on the condition of various foods after a temperature rise, with specific instructions on whether they can be refrozen or should be discarded.
Defrosting, though generally not required for this frost-free model, is outlined for unlikely scenarios. It involves switching off the appliance, removing the plug, opening the freezer door, and collecting defrosted water. The vaporisation container at the rear should also be cleaned periodically to prevent odors. Sharp metal tools or electrical heaters should never be used for defrosting.
Troubleshooting tips are included to address common issues such as the appliance not working, insufficient cooling, over-cooling, and wet internal or external surfaces. Solutions range from checking power connections and thermostat settings to ensuring proper ventilation and door closure. The manual also explains normal operational noises like gurgling, bubbling, and whirring sounds from the refrigerant and compressor.
| Type | Freestanding Freezer |
|---|---|
| Energy Rating | F |
| Weight | 31 kg |
| Freestanding Freezer | Yes |
| Energy Efficiency Class | F |
| Colour | White |
| Defrost Type | Manual |