10
OPERATION
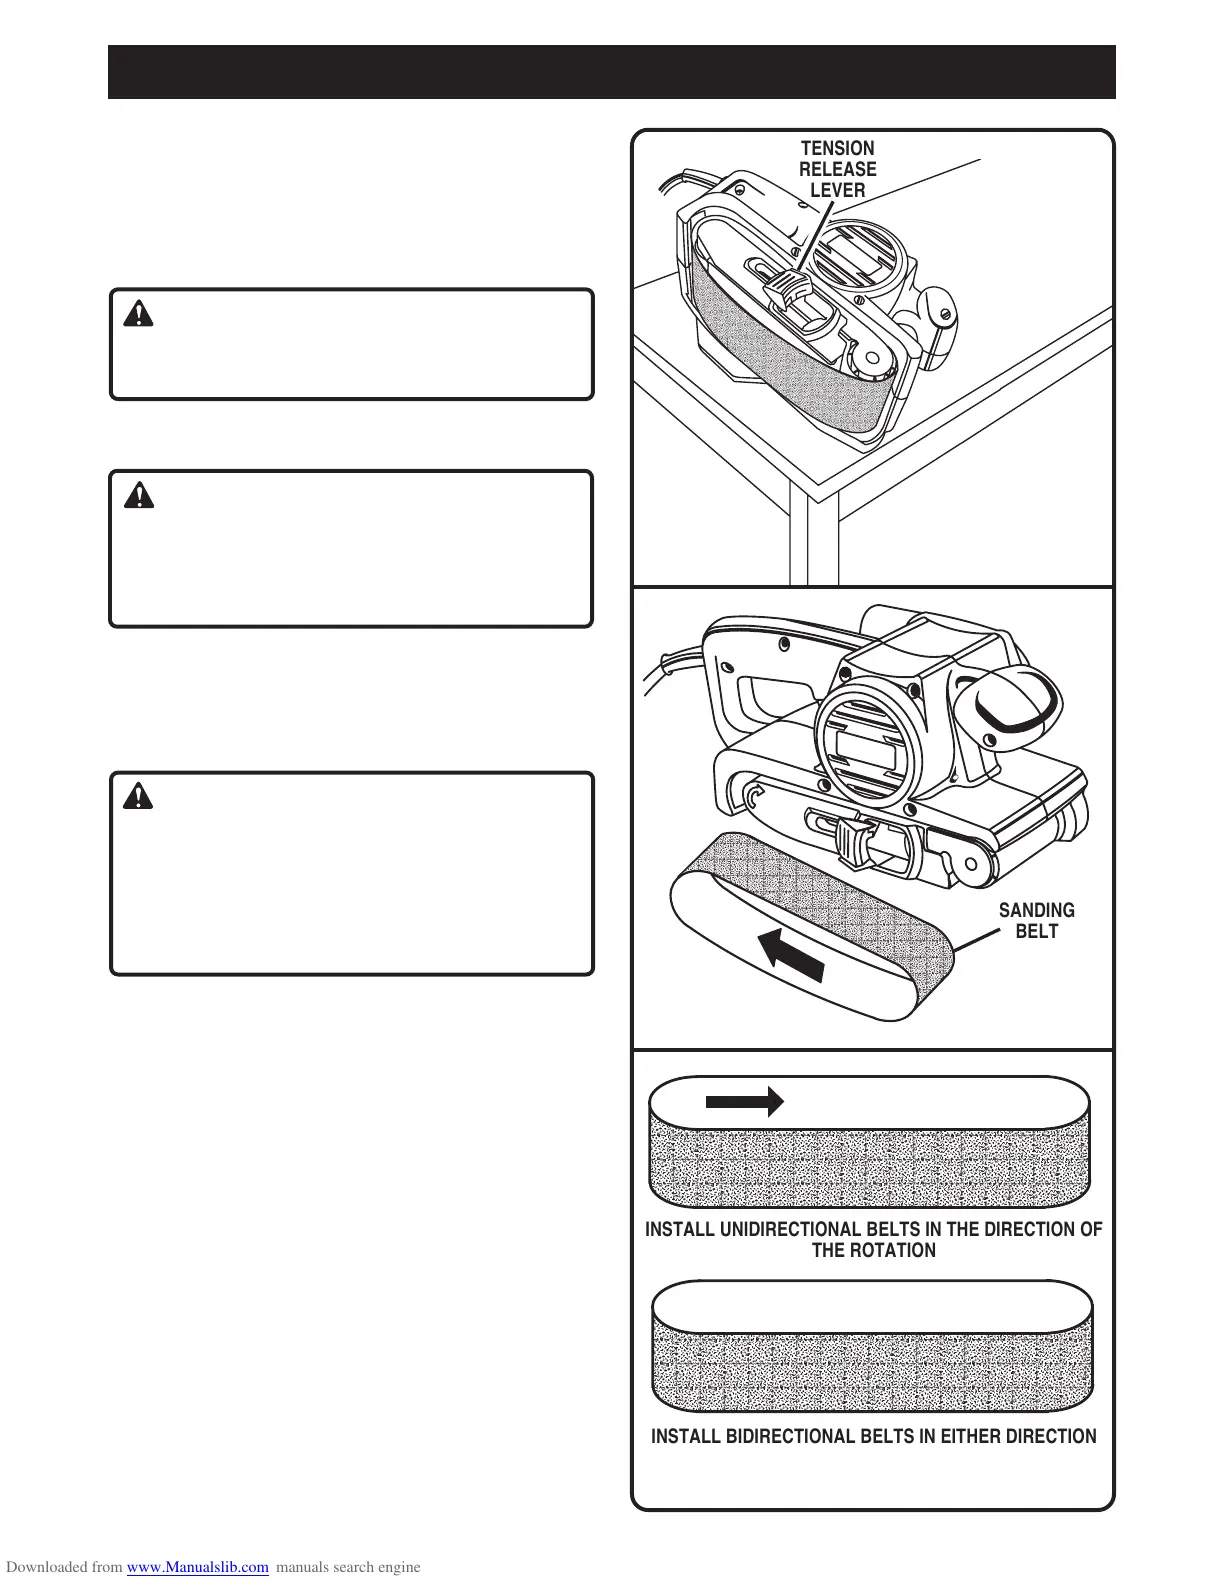
Fig. 4
Fig. 6
USING SANDING BELTS
TO INSTALL/CHANGE SANDING BELTS
See Figures 4, 5, and 6.
Follow these directions to install/change sanding belts.
Unplug the sander.
WARNING:
Failure to unplug the tool could result in accidental
starting causing possible serious injury.
Position the sander on its side with the cord on the
left.
WARNING:
Keep hands and fingers clear of front idler roller and
spring mechanism at all times. Failure to do so could
result in them getting pinched, causing possible seri-
ous injury.
Raise the tension release lever.
NOTE: If you are changing sanding belts, remove
the old sanding belt at this time.
Install the sanding belt.
CAUTION:
If the sanding belt is not a bidirectional belt, ensure
that the arrow inside the belt is pointing in the direc-
tion of the rotation (clockwise when looking into the
open side of the sander). Installing unidirectional
sanding belts backwards can create a hazardous
condition.
Align the sanding belt to its correct position.
Lower the tension release lever to secure the sand-
ing belt.
Fig. 5
SANDING
BELT
INSTALL UNIDIRECTIONAL BELTS IN THE DIRECTION OF
THE ROTATION
INSTALL BIDIRECTIONAL BELTS IN EITHER DIRECTION
TENSION
RELEASE
LEVER