EasyManua.ls Logo

Ryobi BS902 - User Manual

Ryobi BS902
26 pages
Print Icon
To Next Page IconTo Next Page
Loading...
SAVE THIS MANUAL FOR FUTURE REFERENCE
Your band saw has been engineered and manufactured to our high standard for dependability, ease of operation, and
operator safety. When properly cared for, it will give you years of rugged, trouble-free performance.
WARNING: To reduce the risk of injury, the user must read and understand the operator’s manual before using
this product.
Thank you for your purchase.
OPERATOR’S MANUAL
9 in. (229 mm) BAND SAW
BS902
Question and Answer IconNeed help?

Do you have a question about the Ryobi BS902 and is the answer not in the manual?

Summary

INTRODUCTION

WARRANTY

30-DAY EXCHANGE POLICY

Details the policy for exchanging defective Ryobi power tools within the first 30 days of purchase.

WHAT THIS WARRANTY COVERS

Outlines what defects in workmanship or materials are covered by the two-year warranty.

HOW TO GET SERVICE

Provides instructions on how to obtain warranty service, including contact information and required documentation.

WHATS NOT COVERED

Specifies conditions and situations that are excluded from warranty coverage.

ADDITIONAL LIMITATIONS

Discusses implied warranties and limitations on liability for indirect or incidental damages.

GENERAL SAFETY RULES

SPECIFIC SAFETY RULES

SYMBOLS

ELECTRICAL

EXTENSION CORDS

Guides on selecting and using appropriate 3-wire extension cords for the band saw, including wire gauge recommendations.

GROUNDING INSTRUCTIONS

Explains the importance of grounding for safety and how to properly connect the tool to a grounded outlet.

GLOSSARY OF TERMS

FEATURES

PRODUCT SPECIFICATIONS

Lists the technical specifications of the band saw, such as blade width, length, capacity, and weight.

OPERATIONAL FEATURES OVERVIEW

Describes key components like adjustment knobs, guides, safety features, and controls for operation.

TOOLS NEEDED

LOOSE PARTS LIST

Lists all the components included with the band saw that are separate from the main unit.

ASSEMBLY

Unpacking and Mounting Options

Covers initial unpacking, securing the saw to a workbench, and clamping for portability.

Saw Table and Blade Setup

Details mounting the saw table, squaring it to the blade, and adjusting blade tension.

Blade Tracking and Worklight

Guides on adjusting blade tracking and attaching the worklight.

OPERATION

PRINCIPLES AND PROCEDURES

Covers applications, basic operation, cutting techniques, safety during cuts, and removing jammed material.

OPERATIONAL ADJUSTMENTS AND SAFETY

Details scroll cutting, injury avoidance, locking the switch, leaving the saw safely, and table/fence adjustments.

ADJUSTMENTS

BLADE INSTALLATION AND TENSION

Steps for installing a new blade, adjusting tension, and initial blade tracking.

BLADE GUIDE AND SUPPORT ADJUSTMENTS

Procedures for adjusting the blade guide assembly, thrust bearings, and blade guides for optimal support.

MAINTENANCE

General Cleaning and Blade Guides

Covers basic cleaning, avoiding solvents, lubrication, motor maintenance, and blade guide upkeep.

Tire, Brush, and Drive Belt Service

Details cleaning and replacing tires, servicing brushes, and replacing the drive belt.

TROUBLESHOOTING

NOTES

SERVICE AND PARTS

MODEL NO. AND SERIAL NO.

Instructions on locating and recording the tool's model and serial numbers for service or parts orders.

HOW TO ORDER REPAIR PARTS

Details the information required when ordering replacement parts for the band saw.

Overview

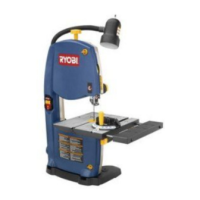
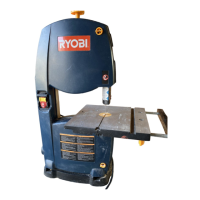
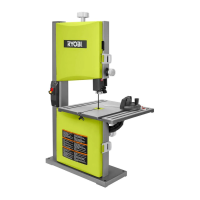
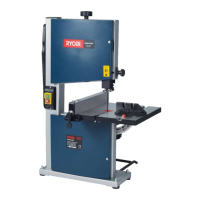
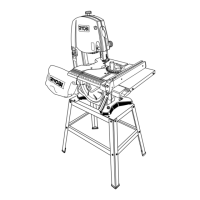
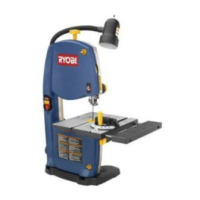
The Ryobi 9 in. (229 mm) Band Saw, model BS902, is a power tool designed for various wood-cutting applications, offering dependability, ease of operation, and operator safety. It is primarily a "curve cutting" machine but can also be used for straight-line cutting operations such as cross-cutting, ripping, mitering, beveling, compound cutting, and resawing. This band saw is specifically designed to cut wood and wood composition products only and is not capable of making inside or non-through cuts.

Function Description:

The band saw operates by moving a continuous loop saw blade around two wheels, an upper and a lower wheel. The motor drives the lower wheel, which in turn moves the blade. The blade passes through a saw table where the workpiece is placed for cutting. The tool is equipped with various features to control the blade's movement, tension, and tracking, as well as to guide the workpiece for accurate cuts. A worklight is integrated to illuminate the cutting area, enhancing safety and precision. The dust exhaust port allows for connection to a dust collection system or shop vacuum, making dustless cutting possible and improving visibility.

Usage Features:

  • Blade Tension Lever (RapidSet™): This lever controls the blade tension, which is crucial for proper cutting performance and blade longevity. It simplifies blade changes and allows for adjustments based on different sawing applications. Proper blade tension prevents the blade from slipping on the wheels or breaking due to excessive tightness.
  • Tracking Knob and View Window: The tracking knob allows the user to adjust the blade's position on the wheels, ensuring it remains centered. The tracking view window provides visibility to the upper tire, making it easier to monitor and adjust the blade's tracking. Correct tracking is essential for smooth operation and to prevent the blade from running off the wheels.
  • Blade Guide Knob with Lock Lever (TrackLock® Blade Guides): These guides, both upper and lower, help keep the blade from twisting during operation, ensuring straight and accurate cuts. The blade guide knob adjusts the height of the blade guide assembly, which should be set approximately 1/8 in. (3 mm) above the workpiece to prevent twisting or breaking of the blade. The lock lever secures the assembly in place.
  • Saw Table with Tilt Control: The aluminum saw table can be tilted for bevel cutting, with an angle adjustment knob and a scale indicator to show the precise angle. A table lock knob secures the table in the desired position.
  • Miter Gauge: This accessory aligns the wood for crosscuts and can be turned 60° to the right or left, with positive stops at 90° and 45°. It helps achieve accurate angled cuts.
  • Rip Fence: A sturdy metal fence guides the workpiece for straight cuts and is secured with a handle. It can be used on either side of the saw table. It is important to ensure the rip fence is parallel to the blade before starting any operation.
  • Switch and Switch Key: The band saw features an easy-access power switch. A yellow switch key can be removed to lock the tool in the OFF position, preventing unauthorized use and enhancing safety, especially around children.
  • Worklight: An integrated worklight illuminates the work area, improving visibility for safer and more accurate cuts.
  • Latches: Easy-open latches allow access to the front cover of the saw housing for making adjustments or changing blades.
  • Cutting Procedures: The manual emphasizes holding the workpiece firmly, using gentle pressure, and keeping hands away from the blade. It also provides guidance on cutting different diameter circles based on blade width and using extra supports for large or awkward workpieces.
  • Relief Cuts: For intricate curves, the manual suggests making relief cuts through scrap sections of the workpiece to reduce blade pressure and prevent binding.
  • Removing Jammed Material: Clear instructions are provided for safely removing jammed cutoff pieces, emphasizing that the blade must come to a complete stop and the saw must be unplugged.

Maintenance Features:

  • General Maintenance: The tool should be kept dry, clean, and free from oil and grease. Solvents should be avoided when cleaning plastic parts. Regular cleaning with a clean cloth is recommended.
  • Tires: The rubber tires on the wheels can accumulate pitch and sawdust, which should be removed with a fine wire brush or a piece of wood. Instructions are provided for replacing worn tires.
  • Brushes: A brush located inside the saw housing helps protect the tire and wheel by brushing off sawdust. The manual explains how to adjust or replace this brush when it becomes worn.
  • Drive Belt: The drive belt, located behind the lower wheel, may need replacement due to wear or breakage. The manual provides steps for removing and installing a new drive belt.
  • Blade Guides: Blade guides may become rounded and worn. They can be filed or ground flat, or replaced if they can no longer be properly secured.
  • Motor/Electrical: The motor should be frequently vacuumed or blown out to remove sawdust.
  • Lubrication: All bearings in the tool are pre-lubricated for the life of the unit under normal operating conditions, so no further lubrication is required.
  • Adjustments: Detailed instructions are provided for squaring the saw table to the blade, adjusting blade tension, tracking the blade, and adjusting thrust bearings, blade guide support, and blade guides. These adjustments are critical for maintaining cutting accuracy and preventing blade damage or personal injury.
  • Cord Inspection: Users are advised to inspect tool cords and extension cords periodically for damage and to have them repaired by a qualified service technician if necessary.

Ryobi BS902 Specifications

General IconGeneral
TypeBand Saw
Power120V
Blade Width1/8 to 3/8 inches
Table Size11-3/4 in. x 11-3/4 in.
Table Tilt0° to 45°
Weight42 lbs
Cutting Capacity Height3-5/8 inches
Cutting Capacity Width9 inches
Motor350 W
Blade Diameter6 mm
Max Cutting Depth at 90°80 mm
Max Cutting Depth at 45°2 inches
No Load Speed2, 460 FPM

Related product manuals