8
WARNING
Always remove battery pack from your tool when you
are assembling parts, making adjustments, cleaning,
or when not in use. Removing battery pack will prevent
accidental starting that could cause serious personal
injury.
■ Insert the battery pack into the product as shown.
WARNING
Make sure the latch (or latches) on the battery pack
snap in place and the battery pack is fully seated and
secure in the power head battery port before beginning
operation. Failure to securely seat the battery pack could
cause the battery pack to fall out, resulting in serious
personal injury.
TO REMOVE BATTERY PACK
See Figure 3.
■ Depress the latches on the battery pack.
■ Remove the battery pack.
WARNING
To avoid serious personal injury, always remove the
battery pack and keep hands clear of the lock-out when
carrying or transporting the tool.
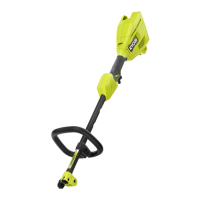
ADJUSTABLE FRONT HANDLE
See Figure 4.
The angle of the front handle can be adjusted 180°.
■ Remove the battery pack.
■ Set the edger on a flat surface and turn the knob
counterclockwise to loosen the handle.
■ For edging, adjust the handle downward.
■ Turn the knob clockwise until the handle is securely
tightened before reinstalling the battery pack.
STARTING /STOPPING THE EDGER
See Figure 5.
To start:
■ Press and hold the lock-out.
■ Depress the switch trigger.
To stop:
■ Release the switch trigger to stop the edger.
■ Upon release of the switch trigger, the lock-out will
automatically reset to the locked position.
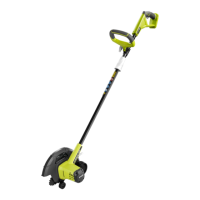
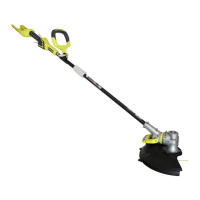
OPERATING THE EDGER
See Figure 6.
■ Hold the edger with your right hand on the rear handle
and your left hand on the front handle.
■ Keep a firm grip with both hands while in operation.
■ Edger should be held at a comfortable position with the
rear handle about hip height.
■ The edger will edge along sidewalks, driveways, flower
beds, curbs, and similar areas.
■ Cut at a steady pace. If the blade begins to bog down,
you are edging too fast; slow your pace. Do not force
the blade into ground.
■ Light contact of the blade against the sidewalk edge,
curb, etc., is acceptable and will not damage the edger.
■ Best appearance is obtained when grass is dry. Avoid
edging in wet soil or wet grass areas or the blade guard
might clog and result in an uneven edge. If the blade
guard becomes clogged, stop the edger, remove the
battery, and remove debris from the blade guard.
WARNING
Always hold the edger away from the body keeping
clearance between the body and the edger. Any contact
with the edger cutting head while operating can result in
serious personal injury.
ADJUSTING DEPTH OF CUT
See Figure 7-8.
■ Remove the battery pack.
■ Loosen the depth adjusting lever and move the wheel
arm up to increase the depth or down to decrease the
depth.
■ Lever locks into one of four positions.
■ Replace the battery pack.
NOTE: Adjust the blade depth from 13 mm (1/2 in.) to 25
mm (1 in.) deep initially. Make a shallow cut to test the
cutting depth. If the cutting depth needs adjusting, this
should be done progressively until the desired depth is
reached.
MAINTENANCE
WARNING
When servicing, use only identical replacement parts.
Use of any other parts may create a hazard or cause
product damage.
WARNING
To avoid serious personal injury, always remove the
battery pack from the tool when cleaning or performing
any maintenance.
GENERAL MAINTENANCE
■ Use only manufacturer’s recommended replacement
parts and accessories.
■ After each use, clean with a soft dry cloth.
■ Before and after each use, inspect the entire product
for damaged, missing, or loose parts such as screws,
nuts, bolts, caps, etc. Tighten securely all fasteners and
caps and do not operate this product until all missing
or damaged parts are replaced. Please call Ryobi
Customer Service or contact an authorized service
center for assistance.