FR
EN DE ES IT PT NL SV DA NO FI HU CS RU RO PL SL HR ET LT LV SK BG
EN
FR DE ES IT PT NL SV DA NO FI
DE
FR EN ES IT PT NL SV DA NO FI
ES
FR EN DE IT PT
PT
NL SV DA NO FI
IT
FR EN DE ES NL SV DA NO FI
PT
FR EN DE ES IT NL SV DA NO FI
NL
FR EN DE ES IT PT SV DA NO FI
SV
FR EN DE ES IT PT NL DA NO FI
DA
FR EN DE ES IT PT NL SV NO FI
NO
FR EN DE ES IT PT NL SV DA FI
FI
FR EN DE ES IT PT NL SV DA NO
HU CS RU RO PL SL HR
HU CS RU RO PL SL HR
HU CS RU RO PL SL HR
HU CS RU RO PL SL HR
HU CS RU RO PL SL HR
HU CS RU RO PL SL HR
HU CS RU RO PL SL HR
HU CS RU RO PL SL HR
HU CS RU RO PL SL HR
HU CS RU RO PL SL HR
ET LT LV SK BG
ET LT LV SK BG
ET LT LV SK BG
ET LT LV SK BG
ET LT LV SK BG
ET LT LV SK BG
ET LT LV SK BG
ET LT LV SK BG
ET LT LV SK BG
ET LT LV SK BG
FR EN DE ES IT PT NL SV DA NO FI
FR EN DE ES IT PT NL SV DA NO FI
FR EN DE ES IT PT NL SV DA NO FI
FR EN DE ES IT PT NL SV DA NO FI
FR EN DE ES IT PT NL SV DA NO FI
FR EN DE ES IT PT NL SV DA NO FI
FR EN DE ES IT PT NL SV DA NO FI
HU
CS RU RO PL SL HR ET LT LV SK BG
CS
HU RU RO PL SL HR
RU
HU CS RO PL SL HR
RO
HU CS RU PL SL HR
PL
HU CS RU RO SL HR
SL
HU CS RU RO PL HR
HR
HU CS RU RO PL SL
ET LT LV SK BG
ET LT LV SK BG
ET LT LV SK BG
ET LT LV SK BG
ET LT LV SK BG
ET LT LV SK BG
FR EN DE ES IT PT NL SV DA NO FI
FR EN DE ES IT PT NL SV DA NO FI
FR EN DE ES IT PT NL SV DA NO FI
FR EN DE ES IT PT NL SV DA NO FI
FR EN DE ES IT PT NL SV DA NO FI
HU CS RU RO PL SL HR
HU CS RU RO PL SL HR
HU CS RU RO PL SL HR
HU CS RU RO PL SL HR
HU CS RU RO PL SL HR
ET
LT LV SK BG
LT
ET LV SK BG
LV
ET LT SK BG
SK
ET LT LV BG
BG
ET LT LV SK
Springpoles are dangerous and could strike the
operator, causing the operator to lose control of
the chainsaw. This could result in severe or fatal
injury to the operator.
MAINTENANCE
When servicing, use only identical Ryobi
replacement parts. Use of any other parts may
create a hazard or cause product damage.
Always wear safety goggles or safety glasses
with side shields during power tool operation or
when blowing dust. If operation is dusty, also
wear a dust mask.
GENERAL MAINTENANCE
Avoid using solvents when cleaning plastic parts. Most
plastics are susceptible to damage from various types of
commercial solvents and may be damaged by their use.
Use clean cloths to remove dirt, dust, lubricant, grease,
etc.
Do not at any time let brake fluids, petrol,
petroleum-based products, penetrating
lubricants, etc., come in contact with plastic
parts. Chemicals can damage, weaken or
destroy plastic which may result in serious
personal injury.
LUBRICATION
All of the bearings in this product are lubricated with a
sufficient amount of high grade lubricant for the life of
the unit under normal operating conditions. Therefore, no
further lubrication is required.
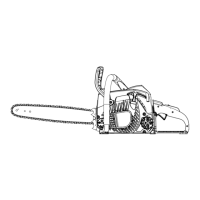
See Figures 36 - 45.
Never start the engine before installing the
guide bar, chain, clutch cover, and clutch drum.
Without all these parts in place, the clutch can
fly off or explode, exposing the user to possible
serious injury.
To avoid serious personal injury, read and
understand all the safety instructions in this
section.
■ Always place the switch in the stop “0” position
before you work on the saw.
■ Make sure the chain brake is not set by pulling the
chain brake lever/hand guard towards the front
handle to the run position.
When replacing the guide bar and chain,
always use the specified bar and chain listed in the
section later in this
manual.
■ Wear gloves when handling the chain and bar. These
components are sharp and may contain burrs.
■ Press in on the clutch cover lock knob and rotate
counter clockwise until the clutch cover can be
removed.
■ Remove the bar and chain from the mounting
surface.
■ Remove the old chain from the bar.
■ Lay out the new saw chain in a loop and straighten
any kinks. The cutters should face in the direction of
chain rotation. If they face backwards, turn the loop
over.
■ Place the chain drive links into the bar groove as
shown.
■ Position the chain so there is a loop at the back of the
bar.
■ Hold the chain in position on the bar and place the
loop around the sprocket.
■ Fit the bar flush against the mounting surface so that
the bar studs are in the long slot of the bar.
■ Replace the clutch cover ensuring that the adjusting
pin in the clutch cover is in the bar chain tensioning
pin hole.
■ Replace the clutch cover and rotate clutch cover lock
knob just enough to hold the cover in position.
The bar must be free to move for tension
adjustment.
■ Remove all slack from the chain by rotating the chain
tensioning dial clockwise until the chain seats snugly
against the bar with the drive links in the bar groove.
■ Lift the tip of the guide bar up to check for sag.
■ Release the tip of the guide bar and turn the chain
tensioning dial clockwise. Repeat this process until
sag does not exist.
■ Hold the tip of the guide bar up and tighten the
clutch cover lock knob securely. The chain is correctly
tensioned when there is no sag on the underside of
the guide bar, the chain is snug, but it can be turned
by hand without binding. Ensure that the chain brake
is not set.
If chain is too tight, it will not rotate. Loosen
the clutch cover lock knob by pressing in and slightly
rotating counter clockwise, then rotate the chain
tensioning dial counter clockwise. Lift the tip of the
guide bar up and retighten the clutch cover lock knob
securely. Ensure that the chain will rotate without
binding.
CHAIN MAINTENANCE
See Figures 45 - 47.