11
3. Ensure the choke lever is set to the Run position
(Choke Open).
4. Hold down the throttle lock-off button (item 32) and
squeeze the throttle trigger (item 11).
5. Pull the starter grip with a quick rm and consistent
upward motion until the engine starts (No more than
6 pulls).
NOTE: If engine does not start, return to step 4 on the "To
start a cold engine" and repeat the steps.
Stopping the product
■ Release the throttle trigger.
■ Push the On/Off switch to the ‘O’ (off) position.
BASIC CUTTING PROCEDURE
See gures 5 - 6.
Follow the steps below to prevent damage to tree or shrub
bark. Do not use a back-and-forth sawing motion.
■ Accelerate the engine to full throttle just before
entering the cut by squeezing the throttle trigger. Keep
the engine at full throttle the entire time you are cutting.
■ Make a shallow first cut (item 28, 1/4 of limb diameter)
on the underside of the limb close to the main limb
or trunk.
■ Make a second cut from the top side of the limb
outboard from the first cut (item 29).
■ Make a final cut close to trunk (item 30).
NOTE: For second and nal cuts (from top of limb or
branch), hold front cutting guide against the limb being
cut. This will help steady the limb and make it easier to
cut. Allow chain to cut for you; exert only light downward
pressure. If you force the cut, damage to the bar, chain, or
engine can result.
■ Release the trigger as soon as the cut is completed,
allowing the engine to idle. If you run the pruner at
full throttle without a cutting load, unnecessary wear
or damage can occur to the chain, bar, and engine.
Failure to follow proper cutting procedures will result in the
bar and chain binding and becoming pinched or trapped in
the limb. If this should happen:
■ Stop the engine.
■ Loosen the knob on the coupler.
■ Depress the button on the shaft; twist and pull the
shafts to separate the pruner from the power head.
■ If the limb can be reached from the ground, lift the limb
while holding the attachment. This should release the
"pinch" and free the pruner.
■ If the pruner is still trapped, call a professional for
assistance.
LIMBING AND PRUNING
See gures 7 - 8.
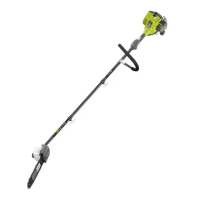
This unit is designed for trimming small branches and
limbs up to 150 mm in diameter. For best results, observe
the following precautions.
■ Plan the cut carefully. Be aware of the direction in
which the branch will fall.
■ Branches may fall in unexpected directions. Do not
stand directly under the branch being cut.
■ The most typical cutting application is to position
the unit at an angle of 60° or less, depending on the
specific situation, as shown. As the angle of the pruner
shaft to ground increases, the difficulty of making the
first cut (from the underside of limb) increases.
■ Remove long branches in several stages.
■ Cut lower branches first to allow the top branches
more room to fall.
■ Work slowly, keeping both hands on the saw with a
firm grip. Maintain secure footing and balance.
■ Keep the tree between you and the chain while
limbing. Cut from side of tree opposite to the branch
you are cutting.
■ Do not cut from a ladder; this is extremely dangerous.
Leave this operation for professionals.
■ Do not make the flush cut next to the main limb or trunk
until you have cut off the limb further out to reduce
the weight. Following proper cutting procedures will
prevent stripping the bark from the main member.
■ Do not use the pruner for felling or bucking.
■ To prevent electrocution, do not operate within 15 m of
overhead electrical lines.
■ Keep bystanders at least 15 m away.
MAINTENANCE
WARNING
When servicing, use only identical replacement parts.
Use of any other parts may create a hazard or cause
product damage.
WARNING
Always wear safety goggles or safety glasses with side
shields during power tool operation or when blowing
dust. If operation is dusty, also wear a dust mask.


 To Next Page