EasyManua.ls Logo

Ryobi TSS103 User Manual

Ryobi TSS103
104 pages
To Next Page IconTo Next Page
Page #1 background imageLoading...
Page #1 background image
OPERATOR’S MANUAL
MANUEL D’UTILISATION
MANUAL DEL OPERADOR
10 in. SLIDING COMPOUND MITER
SAW WITH LED
SCIE À ONGLETS COMBINÉS
COULISSANTE DE 254 mm (10 po)
AVEC DEL
SIERRA INGLETEADORA COMPUESTA
DESLIZANTE DE 254 mm (10 pulg.)
CON LED
TSS103
WARNING: To reduce the
risk of injury, the user must read and
understand the operator’s manual
before using this product.
SAVE THIS MANUAL FOR
FUTURE REFERENCE
ADVERTENCIA: Para reducir
el riesgo de lesiones, el usuario debe leer
y comprender el manual del operador
antes de usar este producto.
AVERTISSEMENT :
Pour
réduire les risques de blessures,
l’utilisateur doit lire et veiller à bien
comprendre le manuel d’utilisation avant
d’employer ce produit.
GUARDE ESTE MANUAL
PARA FUTURAS CONSULTAS
CONSERVER CE MANUEL
POUR FUTURE RÉFÉRENCE
TABLE OF CONTENTS
****************
General Safety Rules .......................2-3
Miter Saw Specific Safety Rules .....3-4
Additional Safety Rules ...................4-5
Symbols ..............................................6
Electrical ............................................. 7
Glossary of Terms ..............................8
Features .........................................9-11
Tools Needed ...................................12
Loose Parts List ................................12
Assembly .....................................13-21
Operation .....................................22-31
Adjustments .....................................32
Maintenance ................................33-34
Parts Ordering / Service ..... Back Page
TABLE DES MATIÈRES
****************
Règles de sécurité générales ..........2-3
Règles de sécurité scie à onglets ....3-4
Règles de sécurité supplémentaires ... 4-5
Symboles ............................................6
Caractéristiques électriques ...............7
Glossaire ............................................8
Caractéristiques ............................9-11
Outils nécessaires ............................12
Liste des pièces détachées ..............12
Assemblage .................................13-21
Utilisation .....................................22-31
Réglages ...........................................32
Entretien ......................................33-34
Commande de pièces /
réparation
......................... Page arrière
ÍNDICE DE CONTENIDO
****************
Reglas de seguridad generales .......2-3
Reglas de seguridad sierra
ingleteadora ....................................3-4
Advertencias de seguridad
adicionales
......................................4-5
Símbolos ............................................6
Aspectos eléctricos ............................ 7
Glosario de términos ..........................8
Características ..............................9-11
Herramientas necesarias ..................12
Lista de piezas sueltas .....................12
Armado ........................................13-21
Funcionamiento ...........................22-32
Ajustes ..............................................33
Mantenimiento .............................34-35
Pedidos de piezas /
servicio
.......................... Pág. posterior
Question and Answer IconNeed help?

Do you have a question about the Ryobi TSS103 and is the answer not in the manual?

Ryobi TSS103 Specifications

General IconGeneral
TypeSliding Compound Miter Saw
Blade Diameter10 inches
Motor Power15 Amp
Arbor Size5/8 inches
Voltage120V
No Load Speed5000 RPM
Bevel Capacity0-45 degrees
Max Cut Depth at 90 Degrees3-1/2 inches
Power SourceCorded Electric

Summary

General Safety Rules

Work Area Safety

Guidelines for maintaining a safe and clear workspace to prevent accidents during operation.

Electrical Safety

Precautions regarding safe use of electricity and power tool connections to prevent shock.

Personal Safety

Essential safety measures for the operator, including alertness, PPE, and proper attire.

Power Tool Use and Care

Instructions on the correct and safe usage of power tools, including maintenance and handling.

Miter Saw Specific Safety Rules

Service

Information on obtaining professional repair and maintenance services for the power tool.

Additional Safety Rules

Symbols

Electrical

Double Insulation

Explanation of the double insulation safety feature and its implications for grounding.

Electrical Connection

Details on connecting the tool to a power supply, including voltage and frequency requirements.

Extension Cords

Guidance on selecting and using appropriate extension cords for safe and effective operation.

Glossary of Terms

Features

Product Specifications

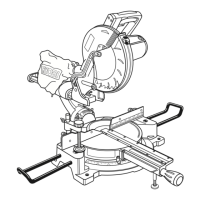
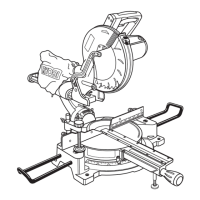
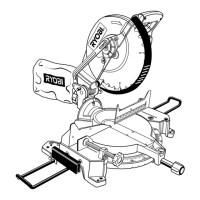
Technical details and specifications of the miter saw, including dimensions and capacity.

Operating Features and Mechanisms

Details on the saw's operating features, adjustment mechanisms, and locking systems for comprehensive understanding.

Tools Needed

Loose Parts List

Assembly

Unpacking

Instructions for safely removing the saw from its packaging and initial inspection.

Mounting Holes

Information on the base mounting holes and how to securely attach the saw to a workbench.

Using the Depth Stop

Guidance on utilizing the depth stop for making non-through cuts like dadoes.

Locking/Unlocking the Saw Arm

Procedure for safely locking and unlocking the saw arm for transport or operation.

Accessory Installation

Steps for installing included accessories like the dust bag, blade wrench, and work clamp.

Table Extensions

Instructions for attaching the table extensions to the left and right sides of the saw base.

To Install/Replace the Blade

Detailed steps for safely removing and installing or replacing the saw blade.

Removing/Replacing the Throat Plate

Procedure for removing and reinstalling the throat plate to ensure proper cutting.

Adjusting Support Foot

How to adjust the support foot for stability during sliding cuts.

Squaring the Blade to the Fence

Procedure for aligning the saw blade perpendicular to the miter fence for accurate cuts.

Adjusting Scale Indicators

Steps to adjust scale indicators to ensure accurate angle readings after squaring.

Operation

Applications

Lists the intended uses and limitations of the miter saw, including material types.

Cutting with Your Compound Miter Saw

General guidelines and safety precautions for performing cuts with the compound miter saw.

LED Lighting System

Information on how to use the LED system for improved cut visibility and accuracy.

To Make Non-Sliding Cuts

Instructions for performing standard cuts without using the sliding feature.

To Miter Cut/Cross Cut

Steps for making miter and cross cuts, including setting angles on the miter table.

To Bevel Cut

Procedure for making bevel cuts by adjusting the saw arm angle.

To Compound Miter Cut

Detailed instructions for making cuts that involve both miter and bevel angles simultaneously.

To Support Long Workpieces

Guidance on providing adequate support for long workpieces to prevent sagging or tipping.

To Slide Cut

Instructions for performing cuts using the saw's sliding feature for wider workpieces.

Making an Auxiliary Fence

How to attach and use an auxiliary fence for added support and accuracy in specific cuts.

Cutting Compound Miters

Chart and guidance for setting precise compound miter angles for various applications.

Cutting Crown Molding

Specific techniques for accurately cutting crown molding using the compound miter saw.

Laying Molding Flat on the Miter Table

Method for positioning crown molding flat on the table for accurate corner cuts.

Nesting Crown Molding Against the Miter Fence

Technique for cutting specific sizes of crown molding by nesting it against the miter fence.

Cutting Warped Material

Instructions on how to safely cut warped or bowed materials to prevent pinching the blade.

Clamping Wide Workpieces

Guidance on how to securely clamp wide workpieces for stable cutting operations.

Adjustments

Pivot Adjustments

Information on checking and adjusting the saw arm pivot points for smooth movement.

Positive Stop Adjustments

Procedure for adjusting the positive stop mechanisms for accurate angle settings.

Maintenance

Lubrication

Information regarding the lubrication of the tool's bearings, noting no further lubrication is required.

Brush Replacement

Steps for checking and replacing worn carbon brushes in the motor assembly.

Cleaning the LED Lens

Instructions for cleaning the LED lens to maintain optimal visibility and light output.

Related product manuals