INSTALLATION MANUAL T7 DIVING SYSTEM™
7
srsmith.com
• T7 Installation limited to Residential Inground Swimming Pools conforming to a Type I or greater dimension in accordance with
the ANSI/APSP/ICC-5 2011 Standard and S.R.Smith’s Residential Inground Swimming Pool Minimum Specifications.
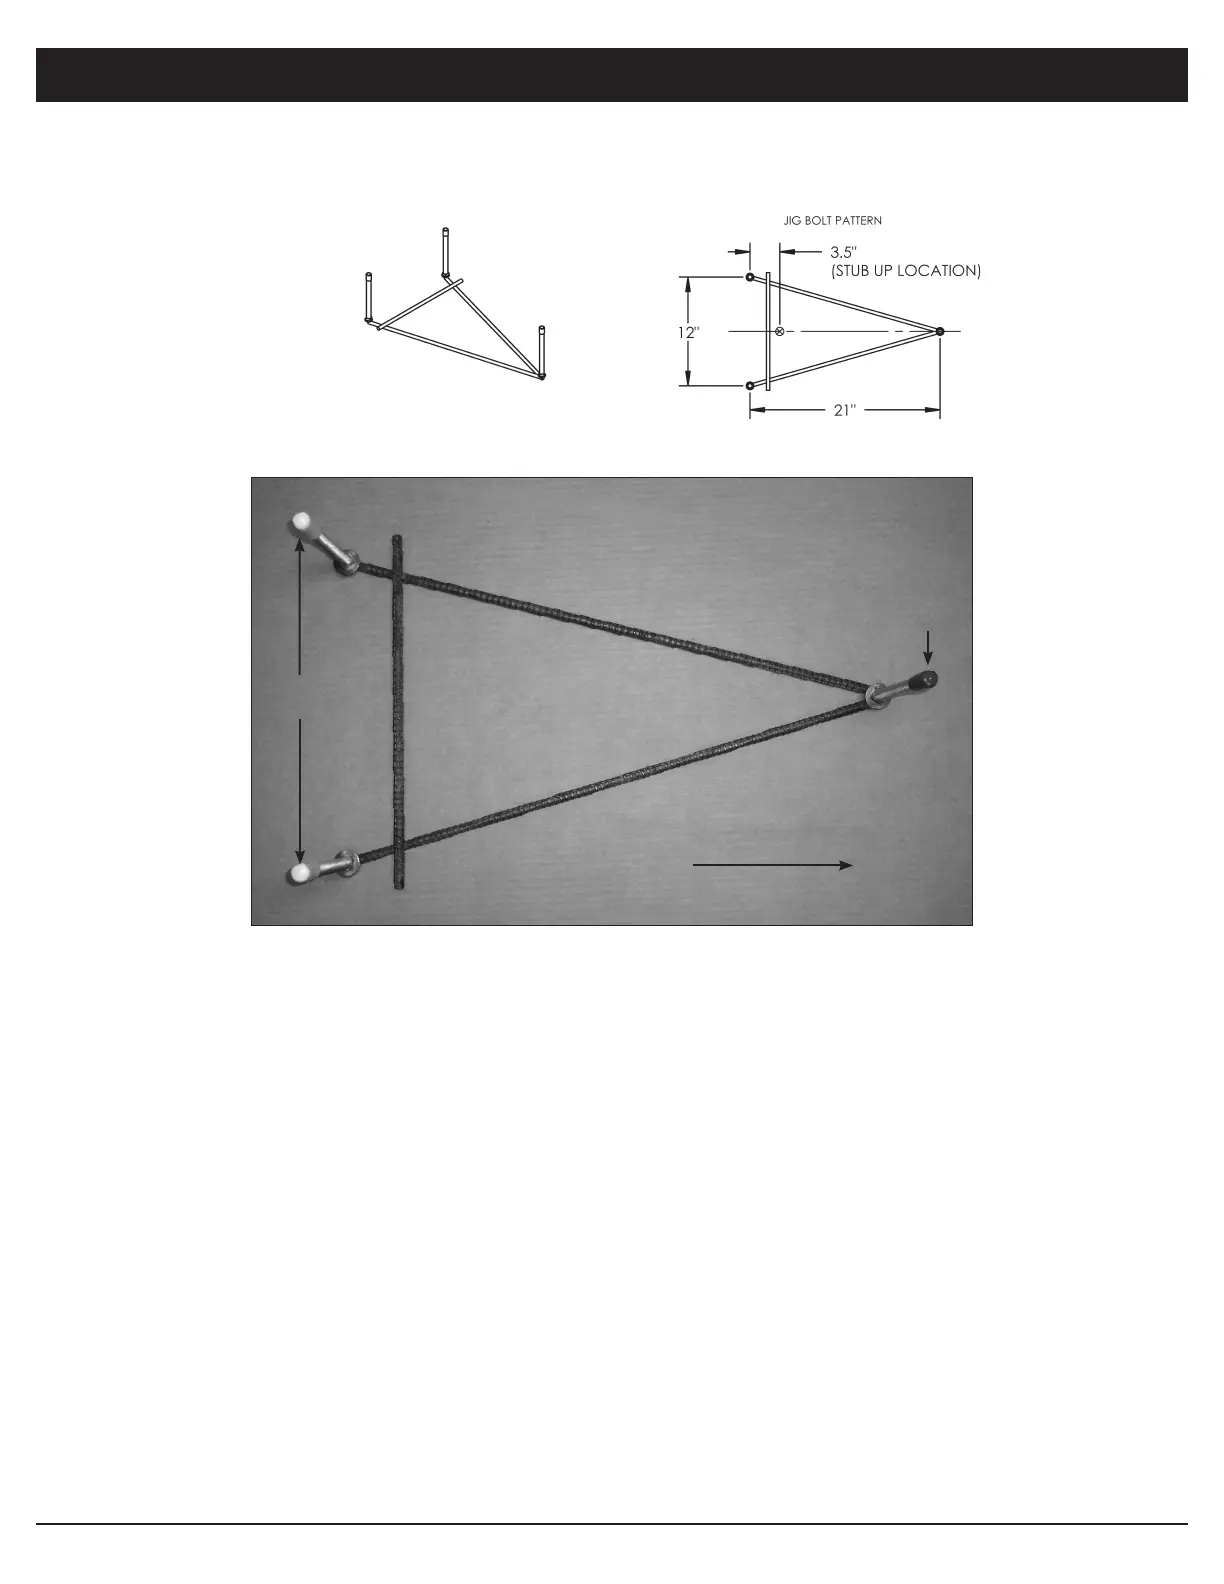
• Install jig on the deep end of the pool on centerline.
• Before installing the T7 jig ensure the concrete deck surrounding the jig meets the minimum 8’ long x 4’ wide x 6” deep minimum.
• Comply with all local and national electrical codes when bonding jig.
• Be careful to ensure that the red capped bolt is toward the pool and set back from the water’s edge at the correct distance based
on the table on page 6.
• The 3 jig bolts must extend 2” above the final deck surface.
• Ensure the deck surrounding the jig and base is flat and level so the base makes uniform contact with the deck surface.
• Leave the protective caps on the bolts until the concrete has cured and base/stand is ready to be installed.
• If installing a Board Fall with the T7 ensure that a 1/2” water stub-up is located per the diagram on page 6 and as shown in the above
illustration. Provide a minimum of 10 gallons per minute to the end of the T7 diving board.
JIG PLACEMENT TIPS:
MOUNTING JIG:
SIDE VIEW TOP VIEW
T7™ JIG INFO:
TOWARD POOL
RED
CAP
YELLOW
CAPS