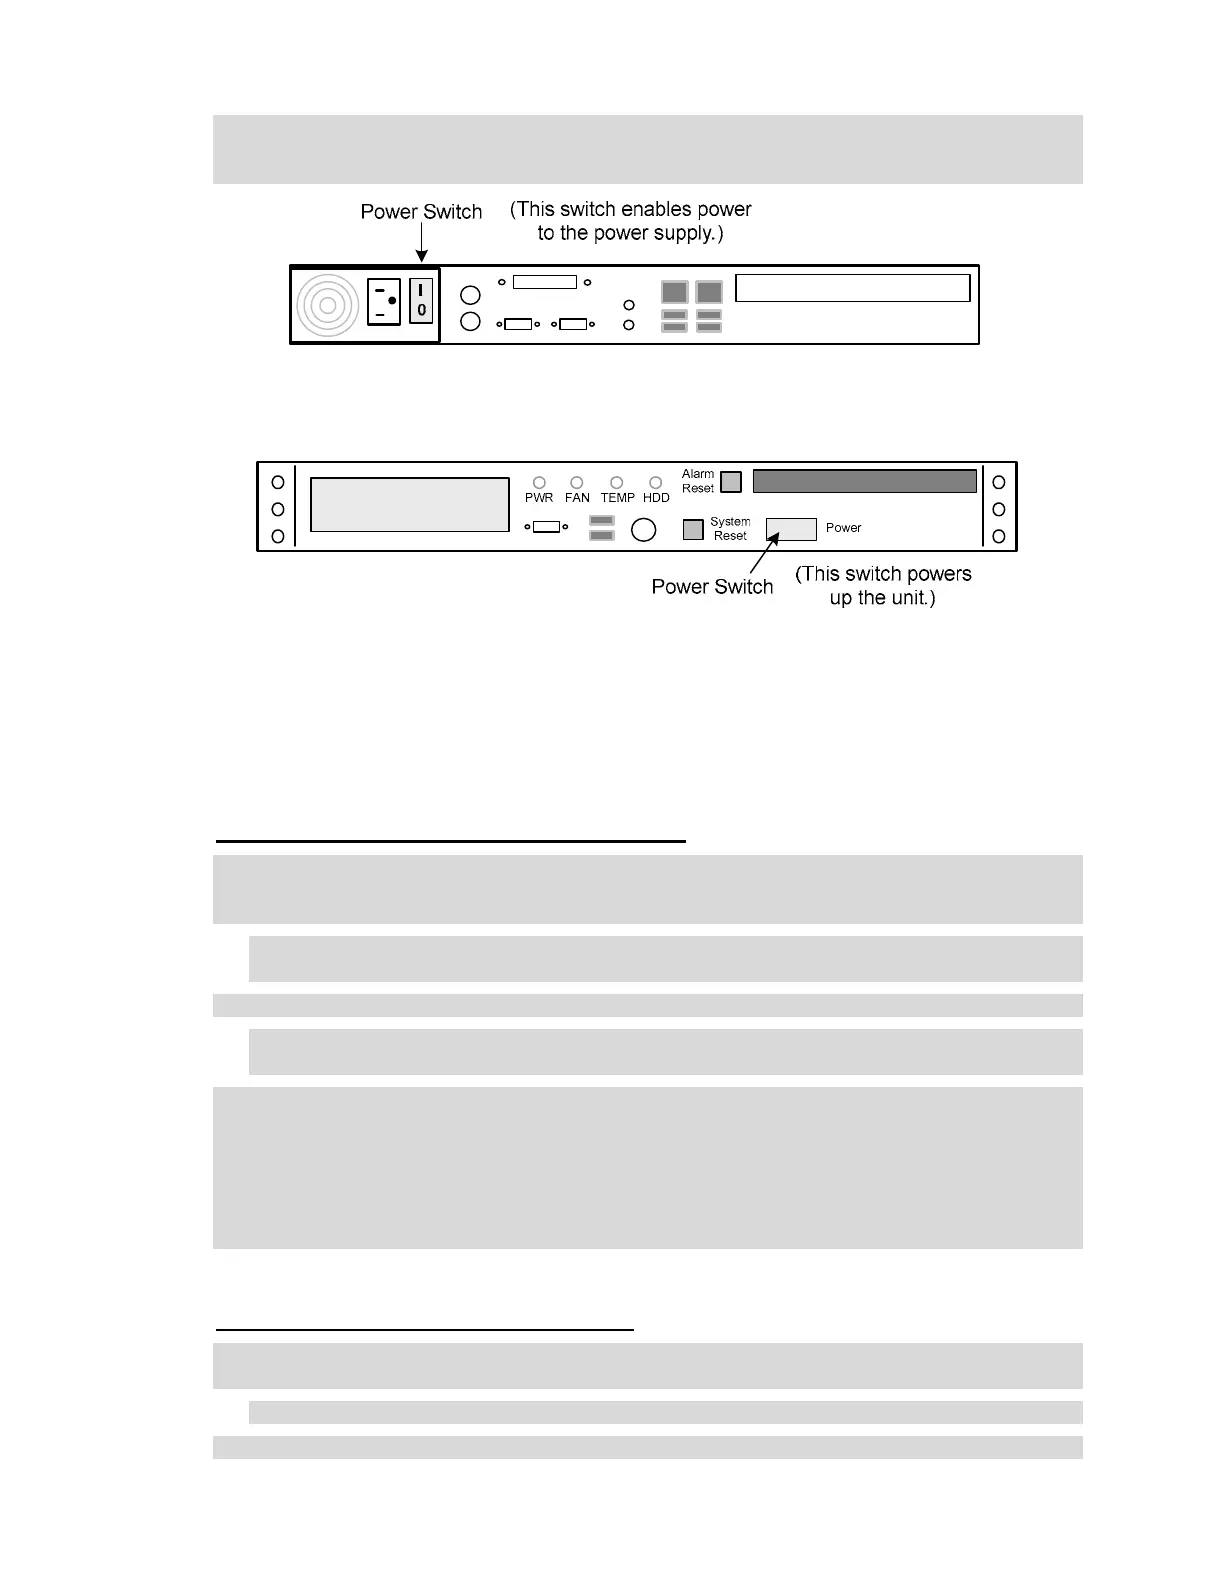
4. For the NetBox Enterprise (1U), press the power switch on the back panel to enable power to
the power supply. Then press the power switch on the front panel to power on the NetBox
Enterprise. See the diagrams below.
The back panel of the NetBox Enterprise, 1U rack mount.
The front panel of the NetBox Enterprise, 1U rack mount.
Configuring IP Settings
Configuring IP settings through the web interface
1. Open your browser and in the address field enter 192.168.0.250. This is the Network
Controller default IP address. Press the Enter key. The Init Mode page should now display
allowing you to set network IP settings.
NOTE: If the Init Mode page does not display select Setup : Site Settings : Network
Controller and click the link in the Initmode Settings section.
2. You can edit any of the settings on this page.
NOTE: If you change the IP address of the NetBox Enterprise be sure to take note of the new
address as you will need it to log in later.
3. In the Initmode Settings section select No from the drop-down. This ensures that Init mode
will not redisplay when you reboot. You can redisplay the Init mode page at any time from the
security application by selecting Setup : Site Settings : Network Controller and click the
link in the Initmode Settings section.
4. Click Save.
5. Click Reboot. The application may take several minutes to launch. Listen for the single beep.
Configuring IP settings through the console
1. Connect a monitor and a keyboard to the NetBox Enterprise Ultra back panel connectors, or
the NetBox Enterprise front panel connectors. See the image above on page 2.
NOTE: The USB ports on the front panel may also be used.
2. Enter the user name admin.
3