13
English
Part 3
End
fig. 17
3
A
B
C
D
TIME MANAGEMENT
EXIT
PROGRAM Y/N
FREE VEND FREE VEND
ALWAYS
TIME ON1
mtwtfss 00:00
FREE VEND
TIME RANGE
FREE VEND
NEVER
FREE VEND ON1
mtwtfss 00:00
FREE VEND OFF2
mtwtfss 00:00
FREE VEND OFF1
mtwtfss 00:00
ON/OFF TIME
NO
ON/OFF TIME
Y ->N<-
DISCOUNT
0000
DISCOUNT ON1
mtwtfss 00:00
INCREASE
0000
INCREASE ON1
mtwtfss 00:00
RINSING TIME
RINSING TIME
Y ->N<-
RINSING TIME
->Y<- N
RINSING ON1
mtwtfss 00:00
ON/OFF TIME
->Y<- N
FREE VEND ON2
mtwtfss 00:00
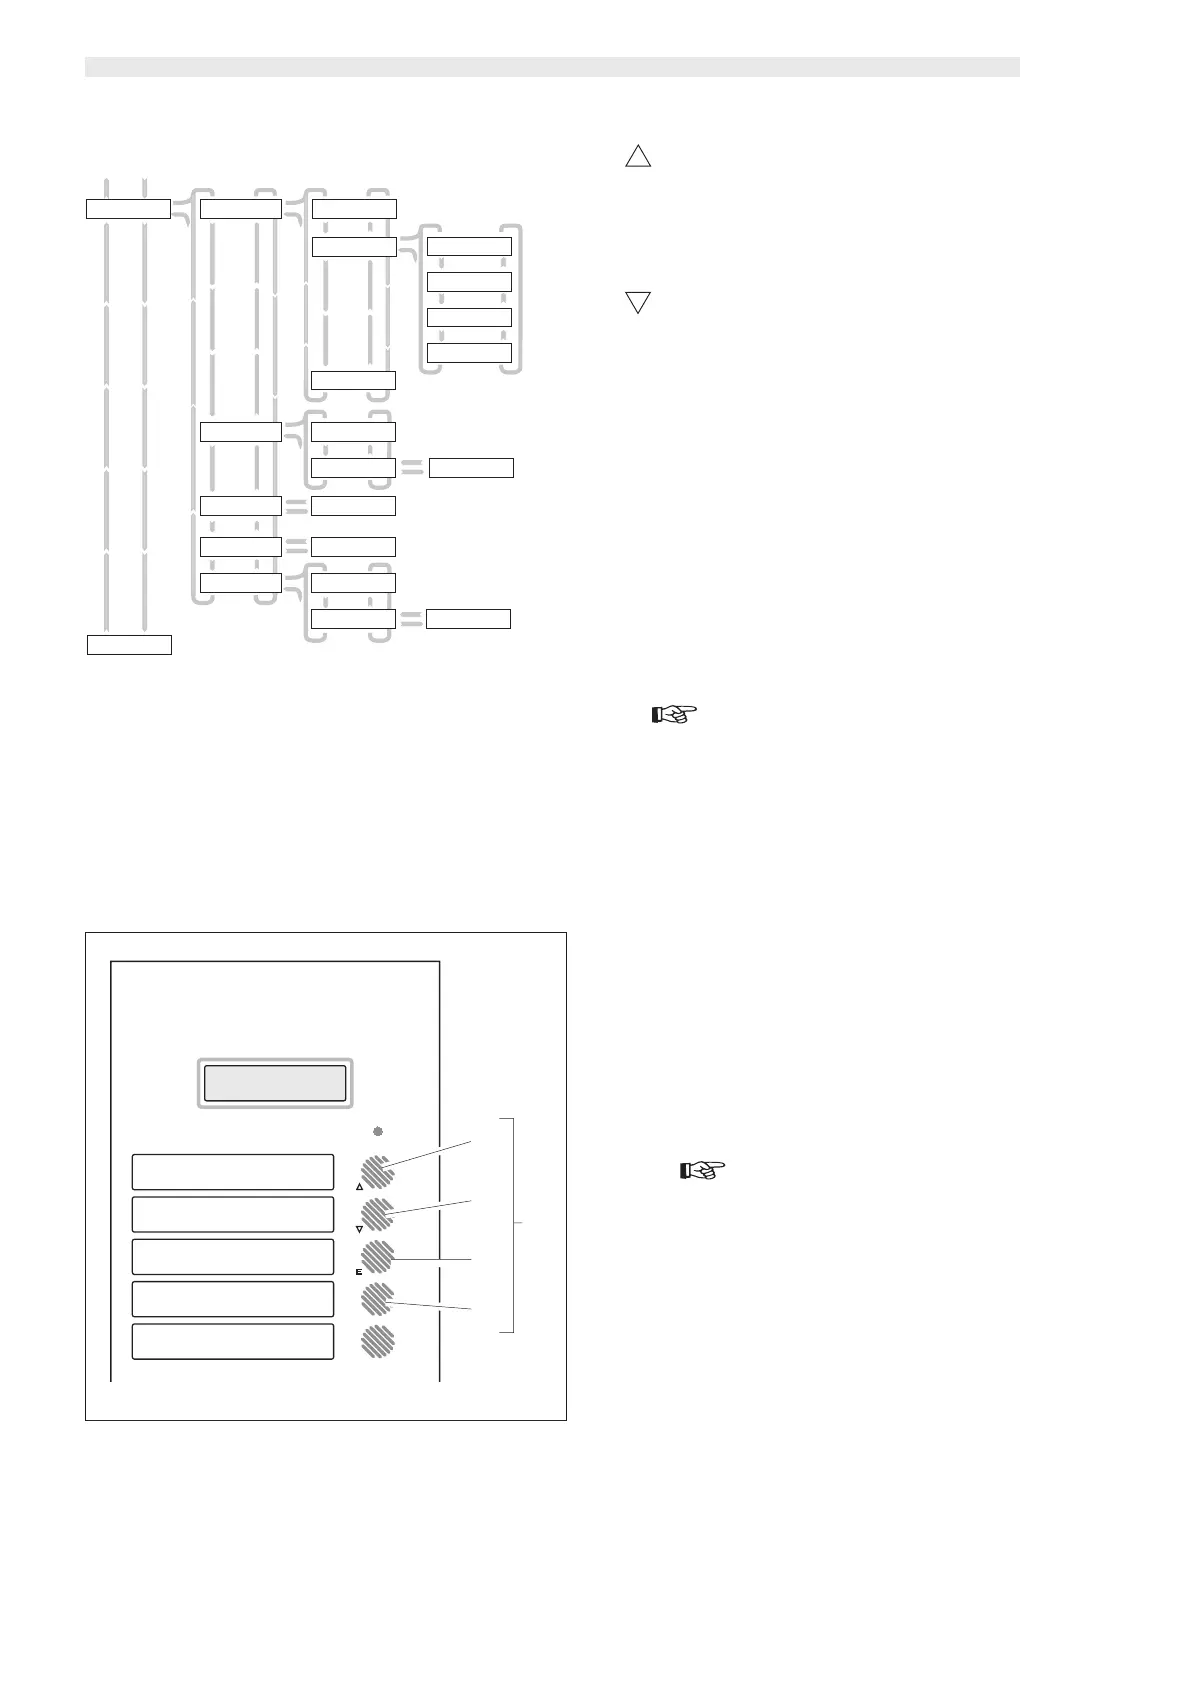
7.2 Key functions
The operating parameters of the vending machine may be pro-
grammed directly from the product selection keypad.
In the model D.A. 5P the programming keys are A - B - C - D (ref.
3, fig. 17).
In model D.A. 3P the programming keys are A - B - C (ref. 3, fig.
17).
There are small symbols beside the keys recalling the functions
performed by the keys during the programming phase.
A - “UP” key
Allows upwards scrolling of the various menus, and rises
the displayed values during the programming phase.
In the model D.A. 3P, it allows the passage between levels
after parameter memory-storage.
B - “DOWN” key
Allows downwards scrolling of the various menus, and re-
duces the displayed values during the programming phase.
In the model D.A. 3P, it allows the passage between levels
after parameter memory-storage.
E
C - “ENTER” key
It changes or memory-stores the displayed parameter.
D - “CANCEL” key
It allows returning to the upper programming level after
parameter confirmation (only D.A. 5P).
7.3 Programming mode access
Important
The inserted digits and the modified parameters should be
always confirmed with the “ENTER” key.
The vending machine is equipped with a programming menu struc-
tured on four levels.
Accessing programming requires:
- Starting the vending machine by means of the main switch
(ref. 25, fig. 1) while pressing the “UP” and “ENTER” keys at
the same time (ref. A and C, fig. 17).
“SYSTEM MANAGEMENT” (system management) appears on
the display.
If a programming password has been created for the vending
machine, the display will visualize “PASSWORD 0000” , with
the cursor flashing on the first digit . You must then:
- Enter the access password using the “UP” and “DOWN”
keys.
Important
Each entered digit should be confirmed with the “ENTER”
key.
- After each confirmation the flashing cursor passes to the
following digit.
Proceed similarly up to the fourth one.
- After having confirmed the fourth digit the display will visu-
alize “SYSTEM MANAGEMENT”.
- Scroll the various menu items with the “UP” and “DOWN”
keys.
If no password was assigned, programming is accessed directly.
 Loading...