21
All equipment which must be disposed of in accordance with the WEEE Directive 2002/96/EC is marked with
a special symbol (12).
The improper disposal of Waste Electrical and Electronic Equipment is liable to punishment under
the relevant laws in the countries where the offence is committed.
Waste electrical and Electronic Equipment may contain hazardous substances with potential harmful
effects on the environment and human health. You are urged to dispose of them properly.
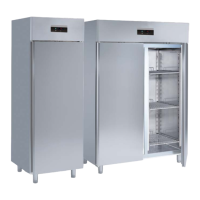
INVERTING THE DOOR (82)
Refrigerator cabinets are normally supplied with opening to the right.
To invert the door (hinge on the left side) follow this procedure:
• Rotate the instrument panel on the side heads by removing the “F” screw.
• Remove the two fixing screws of the bracket “A” and the holding screw of the hinge “B”.
• Extract the door, remove the hinge “B” and the component “e” and invert their position.
• Remove the lower bracket “d” and install it in its housing on the opposite side.
• Place the door by introducing the hole of the lower component “E” into the pin of the bracket “D”.
• Fix the bracket “A” to the structure on the opposite side by tightening the fixing screws.
• Before tightening the bracket screws, check the hinge height (12 mm approx.) and the door
perpendicular position with respect to the structure.
• Replace the instrument panel.
NOTE
: Keep the door closed when removing and installing the brackets.
INVERTING THE 1/2 DOOR (82a)
Cold stores are equipped with door opening to the right.
When inverting door opening, proceed as follows:
• Rotate the instrument panel on the side heads by removing the “F“ screw.
• Remove the two fixing screws of the bracket “A” and the holding screw of the hinge “B”.
• Remove the upper door ; disassemble the hinge “B” and the component “E”, then reverse their
assembly.
• Remove the component “C” and install it on the opposite side of the door.
• Remove the middle bracket “G” and re-install it in its specific seat on the opposite side.
• Remove the lower door ; disassemble the hinge “B” and the component “E”, then reverse their assembly.
• Move the lower door micro to the opposite side using the specific hole.
• Remove the lower bracket “D” and re-install it onto the component “B” located on the lower door.
• Set the lower door introducing the component “E” in the pin of the bracket “G”.
• Fix the bracket “D” tightening the fixing screws thoroughly.
• Place the bracket “A” on the component “B” located on the upper door.
• Set the upper door introducing the component “E” in the pin of the bracket “G”.
• Fix the bracket “A” tightening the fixing screws thoroughly.
• Before tightening the bracket screws, check the hinge height (12 mm approx.) and the door
perpendicular position with respect to the structure.
• Replace the instrument panel.
NOTE
: Keep the door closed when removing and installing the brackets.