SALCOR INC
Page 9 of 14
It is recommended that the disinfection sub-assembly be removed and
serviced (cleaned) a minimum of once per year to insure proper effluent
disinfection.
The Salcor Model 3G UV disinfection Unit is designed to provide a long service life;
It is recommended that the UV lamp be replaced every 2 years to insure proper
disinfection.
UV LAMP REPLACEMENT PROCEDURE
1. Turn off the dedicated circuit breaker located on the main electrical control panel
that supplies power to the UV Unit.
2. Remove the electrical junction box from the 4-inch riser pipe by loosening the
junction box to riser pipe setscrew. Then carefully set the junction box aside.
3. Using the white PVC handle connected to the disinfection sub-assembly, lift the sub-
assembly out of the disinfection chamber/riser pipe and set it aside.
4. After pulling out the sub-assembly, check the disinfection chamber to make sure
there is no mud, debris, or other flow-impeding non-liquid material present at the
bottom of the disinfection chamber.
5. If there is non-liquid material present in the bottom of the disinfection chamber, use
a shop vacuum cleaner to vacuum out the excess material. Do not let the material
flow downstream.
6. Loosen the lamp cable cord grip at the top of the white PVC handle so that the lamp
cable can move through the cable grip and thus allow the handle to move away from
the top of the aluminum frame assembly.
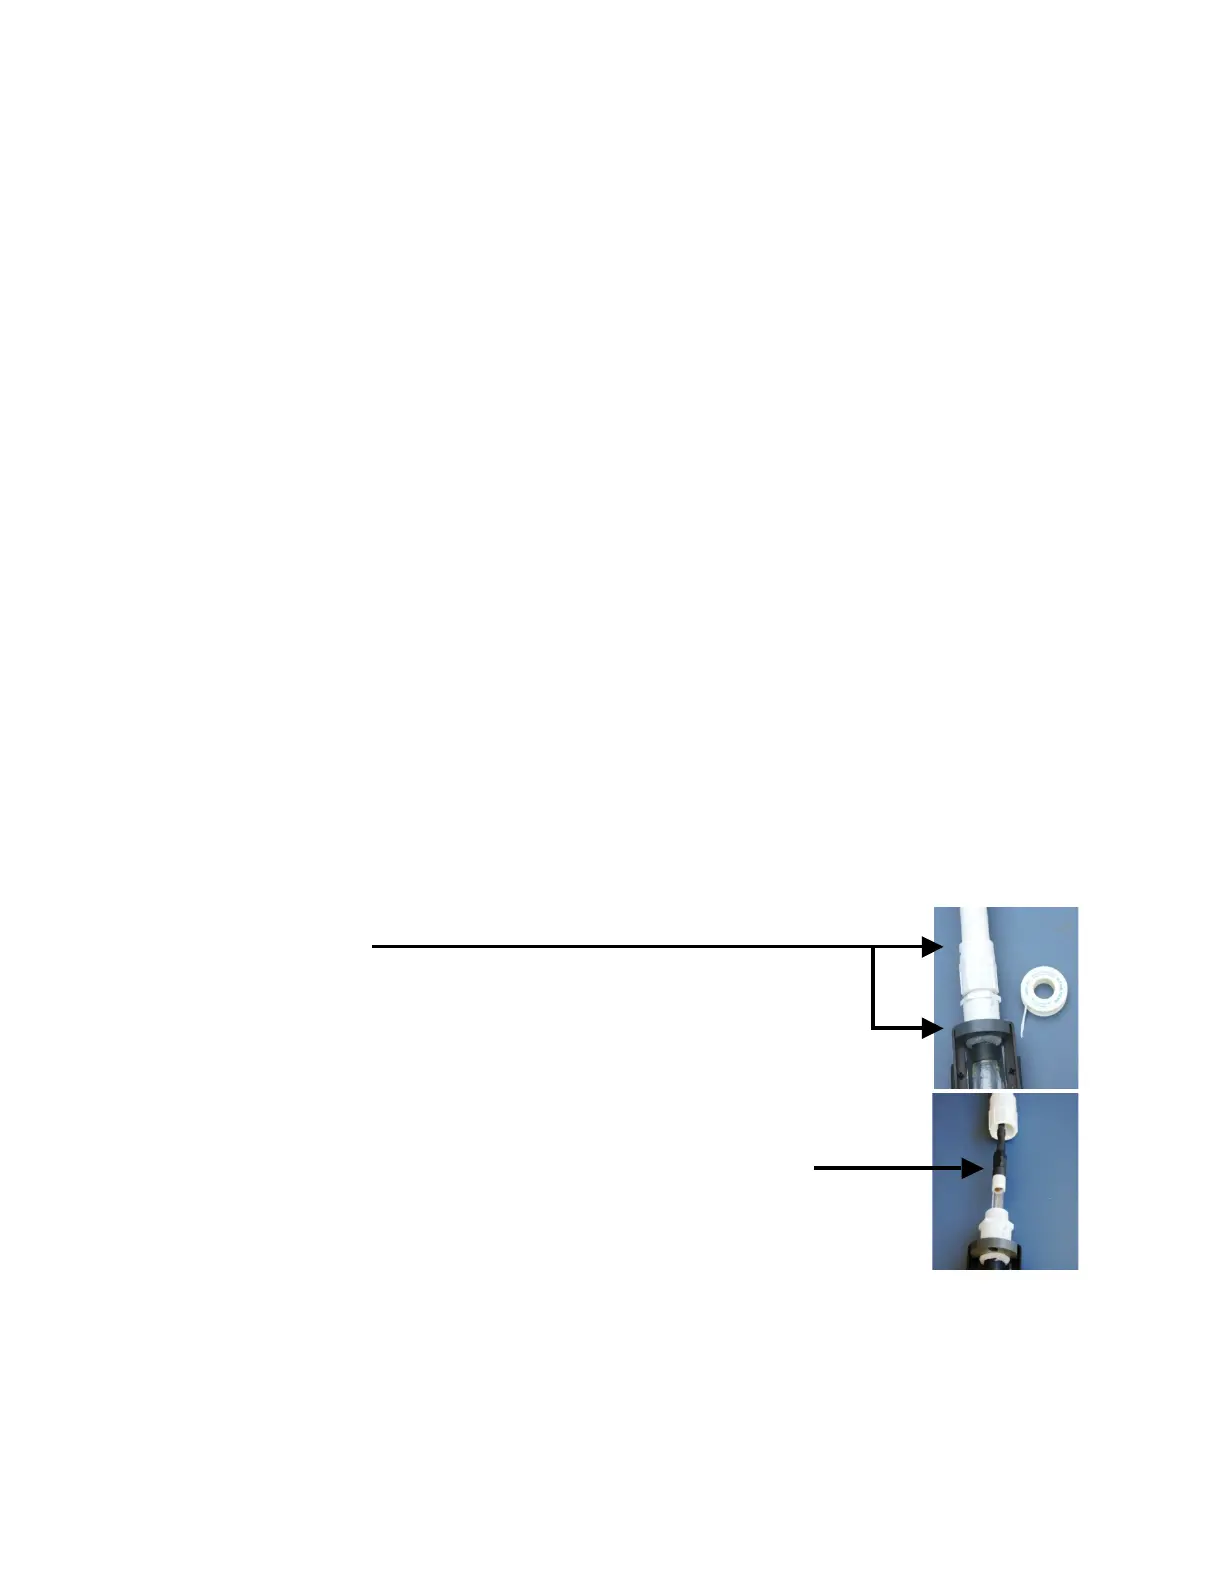
7. Unscrew the bottom threaded end of the 1-inch white PVC handle from the upper
end of the aluminum frame assembly. Separate the handle from
the assembly.
8. Disconnect the four pin socket connector attaching the
lamp cable to the UV lamp. Remove the old UV lamp.
9. Use dielectric grease on the boot of the connector. Connect the 4-
pin socket connector to the new lamp.
Apply Dielectric Grease to the inside of the boot.
Lamp Cord Connected
Lamp Inserted into the Aluminum Frame
Make sure that the connector mates COMPLETELY onto the UV lamp pins.
10. Lower the new UV lamp into the quartz tube of the UV sub-assembly, making sure it
bottoms out in the quartz tube. Do not use force that would break the quartz tube.
11. Screw the bottom threaded end of the 1-inch lamp handle onto the upper end of the
aluminum frame assembly. Use Teflon® tape to ensure a waterproof connection.
 Loading...